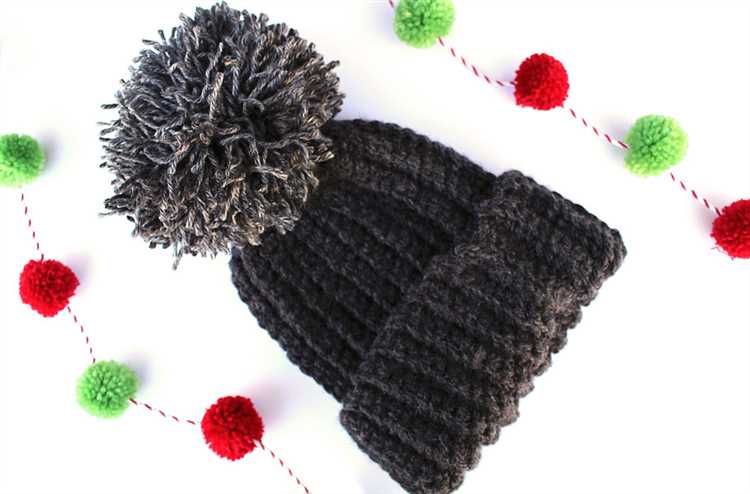
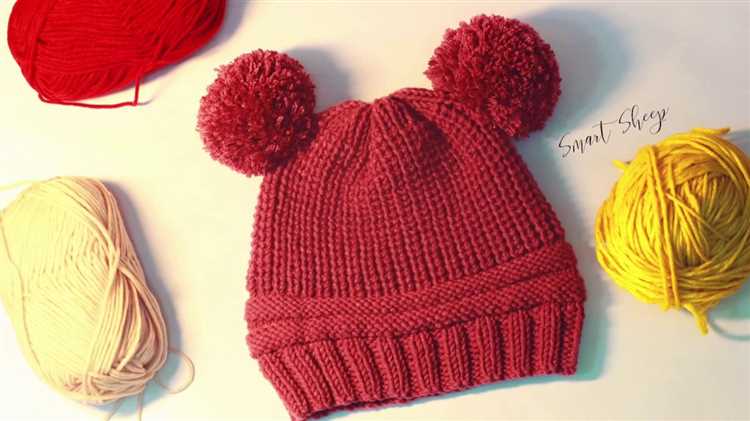
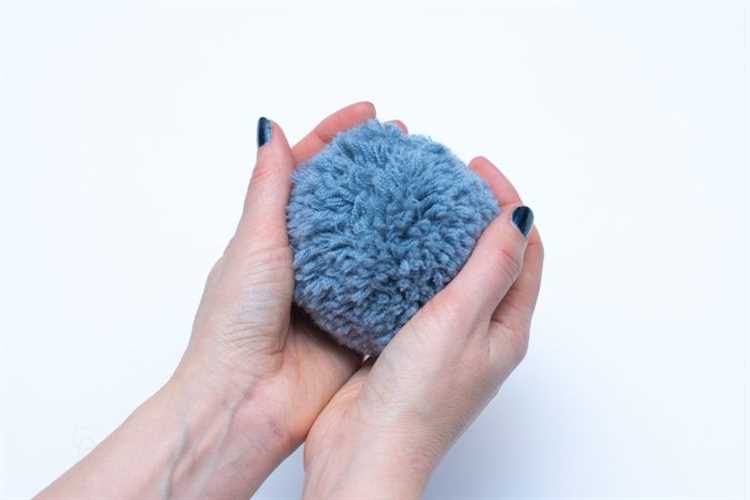
If you’ve ever knit your own hat, you know that the perfect finishing touch is a fluffy pom pom on top. A pom pom adds a playful and stylish element to any hat. Plus, it’s a fun and easy way to customize your knitwear. In this step-by-step guide, we’ll show you how to make a perfect pom pom for your knit hat.
First, you’ll need a few supplies. Gather some yarn in a color that matches or complements your hat. You’ll also need a pair of sharp scissors and a pom pom maker. A pom pom maker is a handy tool that makes the process much easier, but if you don’t have one, don’t worry – we’ll show you how to make a pom pom without it.
Next, choose the size of pom pom you want to make. This will depend on your personal preference and the size of your hat. For a small pom pom, use two fingers or a fork. For a larger pom pom, use your hand or a cardboard cutout. The larger the template, the bigger the pom pom. Keep in mind that the pom pom will appear larger and fluffier once it’s trimmed, so don’t make it too big at first.
Now it’s time to start making the pom pom. If you’re using a pom pom maker, follow the instructions that came with it. If you’re making a pom pom without a pom pom maker, start by wrapping the yarn around the template. The more yarn you wrap, the fuller your pom pom will be. Once you’ve wrapped the yarn to your desired thickness, carefully slide it off the template.
Choosing the Right Yarn for Your Pom Pom
When it comes to choosing the right yarn for your pom pom, there are a few factors to consider. The type of yarn you use can affect the overall appearance and durability of your pom pom.
Fiber Content:
Consider the fiber content of the yarn you choose. Wool yarns, such as merino or alpaca, are popular choices for pom poms because they are soft, fluffy, and provide excellent texture. Acrylic yarns are also a good option as they are easy to find, affordable, and come in a wide range of colors. Additionally, blends of different fibers can offer unique textures and effects.
Weight and Thickness:
The weight and thickness of the yarn will determine the size and density of your pom pom. Thicker yarns will result in a larger, more voluminous pom pom, while thinner yarns will create a smaller, more compact pom pom. Consider the type of hat you are making and the desired size of the pom pom to choose the appropriate yarn weight.
Color:
The color of your yarn can make a big impact on the final look of your pom pom. You can opt for a yarn that matches your hat for a more subtle look, or choose a contrasting color to make your pom pom stand out. Experiment with different color combinations to find the perfect match for your project.
Texture:
Texture can add visual interest to your pom pom. Look for yarns with unique textures, such as boucle or eyelash yarn, to create a more textured and fluffy pom pom. You can also experiment with different techniques, such as blending multiple yarns or adding decorative elements like sequins or beads, to create a one-of-a-kind pom pom.
Durability:
Consider the durability of the yarn you choose, especially if your pom pom will be subjected to frequent washing or rough handling. Some fibers, like acrylic or nylon, are more resistant to wear and tear and can better withstand the test of time. However, keep in mind that natural fibers like wool may be more prone to felting or shedding over time.
Ultimately, the choice of yarn for your pom pom depends on your personal preference and the style you want to achieve. Have fun experimenting with different yarns to create the perfect pom pom for your knit hat!
Preparing the Yarn for Your Pom Pom
Before you can start making your pom pom, you need to gather and prepare the yarn. Here are the steps to prepare the yarn for your pom pom:
- Select your yarn: Choose a yarn that you like and that complements the color of your knit hat. It’s important to use a yarn that is suitable for pom poms, such as acrylic or wool.
- Measure the yarn: Depending on the size of pom pom you want, measure and cut a length of yarn. The longer the yarn, the larger the pom pom will be.
- Prepare multiple strands: To make a fuller pom pom, you can use multiple strands of yarn. Cut several lengths of yarn and gather them together.
- Tie the yarn: Take the cut yarn or multiple strands and fold them in half. Hold the folded end and tie a knot in the middle of the yarn. This will create the center of your pom pom.
- Trim the ends: After tying the knot, use scissors to trim the ends of the yarn. This will help create a more even and uniform pom pom.
Once you have prepared the yarn, you are ready to start making your pom pom. The next steps will guide you through the process of wrapping the yarn and shaping the pom pom.
Creating the Pom Pom Template
Before you start making your pom pom, you’ll need to create a template to wrap the yarn around. This template will determine the size of your pom pom. You can use any round object as a template, such as a cardboard circle or a cup.
To create the template, follow these steps:
- Take a piece of cardboard and draw a circle with the desired diameter of your pom pom. You can use a compass or trace around a round object to make the circle.
- Cut out the circle using scissors or a craft knife. This will be your template for wrapping the yarn.
- If you want a fuller pom pom, you can also create an inner circle by tracing a smaller object inside the original circle. This will create a donut shape to wrap the yarn around.
Once you have your template ready, you’re all set to start making your pom pom!
Wrapping the Yarn around the Template
To create a pom pom for your knit hat, you will first need a template. This can be as simple as a piece of cardboard, a book, or even your hand. The size and shape of the template will determine the final size and shape of your pom pom.
Start by wrapping the yarn around the template. Leave a long tail at the beginning to be able to tie the yarn together later. Hold the end of the yarn against the template with your finger and start wrapping the yarn around. Make sure to wrap the yarn tightly and evenly around the template.
Continue wrapping the yarn around the template until you achieve your desired thickness for the pom pom. The more times you wrap the yarn, the fuller and thicker your pom pom will be. Make sure to leave a gap between the wraps to easily cut the yarn later.
If you want a multi-colored pom pom, you can use different colors of yarn and alternate between them while wrapping. This will create a striped effect once the pom pom is finished.
Once you have finished wrapping the yarn, cut the yarn, leaving another long tail. This will be used to tie the pom pom together later. Make sure to leave enough space to easily slide the yarn off the template without it unraveling.
Tying and Securing the Yarn
Once you have cut your yarn to the desired length for your pom pom, it’s time to tie and secure it to keep the pom pom intact. There are a few different methods you can use to tie and secure the yarn, depending on your personal preference.
Method 1: Double Knot
- Hold the cut yarn together to create a loop.
- Take the loop and slide it through the center of your pom pom maker or your fingers.
- Pull the ends of the yarn through the loop, creating a loose knot.
- Tighten the knot by pulling the ends of the yarn tightly.
- Make a second knot by looping the ends of the yarn together and pulling them tightly.
Method 2: Single Knot with Tassel
- Hold the cut yarn together to create a loop.
- Take the loop and slide it through the center of your pom pom maker or your fingers.
- Leave a long tail of yarn (around 6-8 inches) and cut the rest of the yarn.
- Take the long tail of yarn and loop it through the looped yarn, creating a loose knot.
- Tighten the knot by pulling the long tail of yarn tightly.
- Leave the long tail of yarn free to create a tassel effect.
Method 3: Tying with a Separate Strand of Yarn
- Create a separate strand of yarn, approximately 12 inches long.
- Hold the separate strand of yarn together with the cut yarn to create a loop.
- Take the loop and slide it through the center of your pom pom maker or your fingers.
- Make a knot by pulling the ends of the separate strand of yarn through the loop tightly.
- Tie a double knot to secure the yarn, making sure it is tight.
- Trim the excess ends of the separate strand of yarn, if desired.
Whichever tying and securing method you choose, make sure the knot is tight enough to keep your pom pom intact. You can also add a drop of fabric glue or clear nail polish to the knot for extra security. Once the yarn is tied and secured, you can remove the pom pom maker or release the yarn from your fingers.
Trimming and Shaping the Pom Pom
Once you have made your pom pom, it’s time to trim and shape it to give it a neat and uniform look. Follow these steps to trim and shape your pom pom:
- Start by fluffing up the pom pom with your hands to separate the strands and make it easier to trim. This will also help you to see any uneven parts that need to be trimmed.
- Using sharp scissors, carefully trim any long or stray strands that are sticking out. Be careful not to cut too close to the base of the pom pom, as this may cause it to fall apart.
- Continue trimming the pom pom, making sure to maintain a round shape. Take your time and trim small amounts at a time to achieve the desired look.
- To create a more fluffy pom pom, gently shake it to loosen up the strands and create a fuller appearance.
- If your pom pom looks a bit uneven, you can also trim it from the sides to make it more symmetrical. Pay attention to the overall shape and make any necessary adjustments.
Remember that practice makes perfect, so don’t worry if your first few attempts at trimming and shaping the pom pom don’t come out exactly as you want. With some practice, you’ll soon be able to create a perfect pom pom for your knit hat!
Attaching the Pom Pom to Your Knit Hat
Once you have completed making your perfect pom pom, it’s time to attach it to your knit hat. Follow these simple steps to ensure a secure and professional-looking attachment:
- Thread a tapestry needle with a piece of yarn that matches the color of your hat. Make sure the yarn is long enough to go through the center of the pom pom and securely attach it to the hat.
- Decide where you want your pom pom to be placed on the hat. This is usually at the top of the hat, centered between the ribbing and the crown.
- Insert the needle into the center of the pom pom, making sure to go through several layers of yarn to ensure a strong attachment.
- Bring the needle and yarn through to the inside of the hat, near the placement point you chose in step 2.
- Insert the needle back through the hat, just a short distance away from where it came out.
- Bring the needle and yarn back through to the inside of the hat, creating a loop around the hat.
- Repeat steps 4-6 several times, creating multiple loops around the hat to securely attach the pom pom.
- Once you are satisfied with the attachment, tie a secure knot on the inside of the hat. Trim any excess yarn.
Now that you have successfully attached the pom pom to your knit hat, you can proudly wear your stylish creation! Take care to avoid pulling on the pom pom too hard, as this may loosen the attachment over time. Enjoy the added warmth and flair that the pom pom brings to your hat!
Adding Personalized Touches to Your Pom Pom
Once you have made your perfect pom pom, it’s time to add some personalized touches to make it even more special. Here are a few ideas to get you started:
- Embroidery: Use a needle and embroidery floss to add initials, a name, or a small design to the surface of your pom pom. This can be a great way to personalize it for yourself or as a gift.
- Buttons: Sew on small buttons to create eyes or a mouth for your pom pom. This can give it a fun and whimsical look.
- Ribbon: Tie a small ribbon around the base of your pom pom to add a touch of elegance. You can choose a ribbon in a color that complements your hat or go for a contrasting color for a pop of visual interest.
- Charms: Attach small charms, such as a tiny key or a small pendant, to the yarn strands of your pom pom. This can give it a unique and personalized flair.
- Glitter: If you want to add some sparkle to your pom pom, you can sprinkle glitter on the surface while the glue is still wet. Just be careful not to overdo it, as too much glitter can make it look messy.
Remember, the possibilities are endless when it comes to personalizing your pom pom. Get creative and have fun experimenting with different ideas to make it truly unique.
FAQ:
What materials do I need to make a pom pom for my knit hat?
To make a pom pom for your knit hat, you will need yarn in your desired color, a pom pom maker or cardboard, scissors, and a needle and thread.
Can I use a different material instead of yarn to make the pom pom?
Yes, you can use different materials to make a pom pom, such as faux fur, ribbon, or even tulle. However, yarn is the most common and easiest material to work with.
How do I make a pom pom using a pom pom maker?
To make a pom pom using a pom pom maker, you simply wrap yarn around the arms of the pom pom maker until it is full. Then, cut the yarn along the groove of the pom pom maker and tie it together tightly. Finally, remove the pom pom maker and trim the pom pom to your desired shape and size.
What if I don’t have a pom pom maker?
If you don’t have a pom pom maker, you can easily make one using cardboard. Simply cut out two circles of equal size and cut a smaller circle in the center of each. Then, place the cardboard circles together and wrap yarn around them until they are full. Cut the yarn along the outer edge of the circles and tie it together tightly. Remove the cardboard circles and trim the pom pom to your desired shape and size.
How can I attach the pom pom to my knit hat?
To attach the pom pom to your knit hat, you can use a needle and thread. Thread the needle with a double strand of thread and insert it through the center of the pom pom. Then, sew the pom pom securely onto the top of your hat, making sure to stitch through several layers of the hat for added stability.


