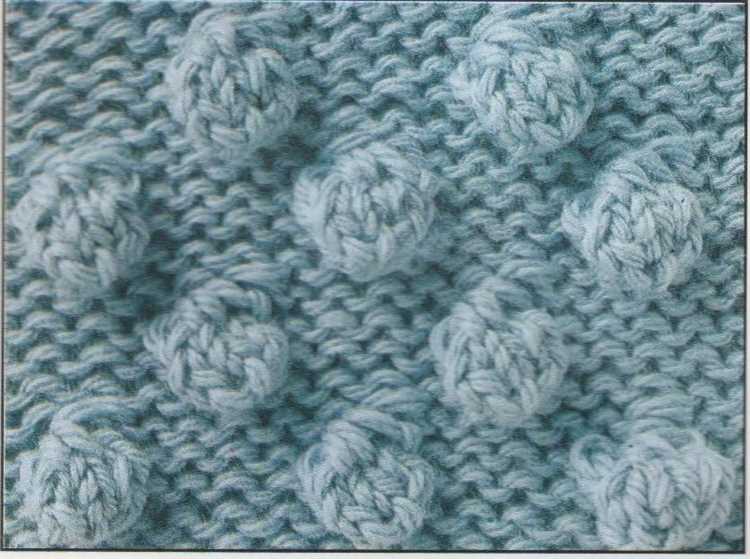
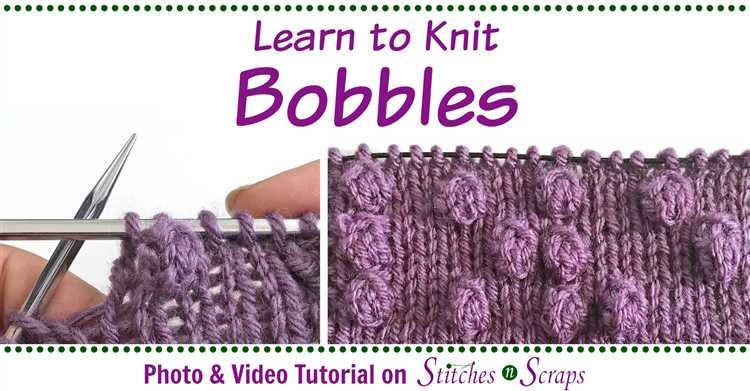
Knitted bobbles are a fun and adorable way to add some extra flair to your knitting projects. Whether you want to create a playful pom-pom-like accent or add texture to a hat or scarf, learning how to make a knitted bobble is a valuable skill for any knitter.
In this step-by-step guide, we will walk you through the process of creating a knitted bobble from start to finish. We will cover everything from choosing the right yarn and needles to adding the finishing touches to your bobble.
Before we begin, it’s important to note that making a knitted bobble requires basic knitting skills, such as casting on, knitting, purling, and binding off. If you are new to knitting, we recommend practicing these techniques before attempting to make a bobble.
So, grab your yarn, needles, and enthusiasm, and let’s get started on making a knitted bobble that will add a touch of whimsy and charm to your knitting projects.
Choosing the Right Yarn and Needles
When it comes to making a knitted bobble, choosing the right yarn and needles is essential for achieving the desired result. Here are some tips to help you select the perfect materials:
- Yarn Weight: Consider the weight of the yarn you want to use. A thicker yarn will create a larger and fuller bobble, while a thinner yarn will result in a smaller and more delicate bobble.
- Fiber Content: Pay attention to the fiber content of the yarn. Natural fibers like wool and alpaca will provide warmth and structure to the bobble, while synthetic fibers may give a softer and less defined look.
- Needle Size: Choose needles that correspond to the recommended gauge of the yarn. If the yarn label suggests using a certain needle size, follow that recommendation to ensure the stitch work turns out as intended.
- Circular or Straight Needles: Decide whether you want to use circular needles or straight needles. Circular needles can be more comfortable to work with and may be necessary if you plan to knit the bobble as part of a larger project, such as a hat or scarf.
Remember to take your personal preferences and the final look you want to achieve into account when choosing the yarn and needles. Experimentation with different materials can also be a fun way to add your own unique touch to the finished bobble!
Casting On
Before you can start knitting your bobble, you’ll need to cast on. Casting on is the process of creating the first row of stitches on your knitting needle.
There are various methods for casting on, but for this project, we will use the long tail cast on method. Here’s how to do it:
- Hold the knitting needle in your right hand and leave a long tail of yarn hanging down.
- Take the tail of yarn and loop it around your thumb and index finger, creating a slipknot.
- Insert the knitting needle into the slipknot and tighten it by pulling on the tail of yarn.
Your first stitch is now on the needle. Repeat the following steps to cast on more stitches:
- Hold the needle with the slipknot in your right hand.
- With your left hand, grab the working yarn (the yarn attached to the ball) and wrap it around your thumb and index finger.
- Insert the needle into the loop created by the yarn on your thumb and index finger.
- Slip the loop off your fingers and onto the knitting needle.
- Tighten the stitch by pulling on the working yarn.
Continue casting on until you have the desired number of stitches for your bobble. Once you have completed casting on, you are ready to start knitting!
Knitting the Body of the Bobble
Once you have cast on the required number of stitches for your bobble, it is time to start knitting the body. Follow these steps to create the body of the bobble:
- Hold your knitting needles with the cast-on stitches in your left hand.
- Insert the right-hand needle into the first stitch on the left-hand needle, from left to right.
- Bring the yarn over the right-hand needle, creating a loop.
- Pull the loop through the stitch, removing it from the left-hand needle and transferring it to the right-hand needle.
- Repeat steps 2-4 for each stitch until you have completed one row.
- Turn your work so that the opposite side is facing you.
- Repeat steps 2-5 for each stitch on this side, until you have completed another row.
- Continue repeating steps 6-7 until you have reached the desired length for your bobble. This will depend on your pattern or personal preference.
Remember to regularly check your knitting to ensure you are maintaining the correct tension and stitch count. This will help ensure your bobble turns out as planned.
Once you have completed the body of your bobble, you can move on to the next step, which is usually shaping or finishing the bobble. Refer to your pattern for specific instructions on what comes next.
Creating the Bobble
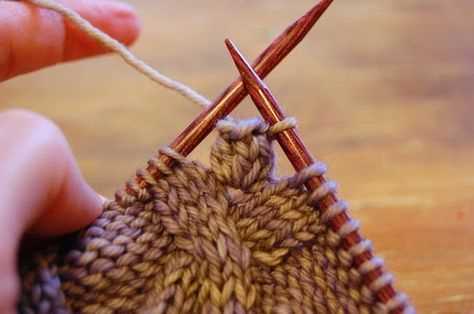
To create the bobble, you will need a small amount of yarn in the color of your choice and a pair of knitting needles in the appropriate size for your yarn.
1. Start by casting on the desired number of stitches onto one needle. The number of stitches will depend on the size of the bobble you want to create.
2. Next, knit all of the stitches on the first row.
3. On the second row, purl all of the stitches.
4. Repeat steps 2 and 3 for a total of 3-5 rows, or until your bobble is the desired size.
5. On the next row, knit 2 stitches together across the entire row. This will decrease the number of stitches and create a rounded edge for the bobble.
6. Cut the yarn, leaving a long tail. Thread the tail through the remaining stitches and pull tight to close the top of the bobble.
7. Secure the tail of the yarn by weaving it into the back of the bobble using a tapestry needle.
Congratulations, you have created a knitted bobble! Now you can attach it to your project or use it as a decorative element in your knitting.
Securing the Bobble
Once you have finished knitting your bobble, it’s important to secure it properly to ensure it stays in place and doesn’t unravel.
Follow these steps to secure your bobble:
- Thread a darning needle: Thread a darning needle with a length of yarn that matches the color of your bobble.
- Weave through the bobble stitches: Starting from the bottom of the bobble, weave the needle through the stitches, going in and out every few stitches. Make sure to catch all the stitches to secure them in place.
- Secure the ends: Once you have woven through all the bobble stitches, bring the needle to the back of the work and tie a secure knot with the loose yarn ends.
- Trim the excess yarn: Use scissors to carefully trim any excess yarn ends close to the knot, being careful not to cut the bobble itself.
By following these steps, you can ensure that your knitted bobble is securely attached and will not come undone easily. Now you can proudly show off your knitted project with a beautiful bobble!
Finishing the Bobble
Once you have completed all of the necessary rows for the bobble, it’s time to finish it off. Follow these steps to complete the bobble:
- Bind off: Start by binding off the stitches in the bobble. Using your knitting needle, knit the first two stitches together, then lift the resulting stitch over the stitch just knit. Repeat this process until only one stitch remains. Cut the yarn, leaving a tail around 6 inches long, and pull it through the final stitch to secure it.
- Sew the top seam: Thread your yarn tail onto a yarn needle. Fold the bobble in half, aligning the cast-on edge with the bind-off edge. Use the yarn needle to sew a seam along the top edge of the bobble, connecting the two edges together. Make sure to sew through both layers of the bobble to create a secure seam.
- Secure the yarn tail: After sewing the top seam, weave the yarn tail into the bobble to secure it. Thread the yarn tail onto the yarn needle and insert the needle into the body of the bobble. Weave the yarn tail in and out of the stitches, going in different directions to ensure it remains in place.
- Trim any excess yarn: Once the yarn tail is secured, use scissors to trim any excess yarn, leaving a small tail that blends into the bobble.
After completing these steps, your knitted bobble should be finished and ready to use! Repeat the process for any additional bobbles you want to make. Enjoy adding bobbles to your knitting projects!
Attaching the Bobble to a Hat or Scarf
Once you have finished knitting your bobble, you will need to attach it to your hat or scarf. Follow these steps to ensure a secure attachment:
- Prepare the bobble: Make sure the threads from the bobble are trimmed neatly, leaving enough length to sew it onto your project.
- Position the bobble: Decide where you want the bobble to go on your hat or scarf. Use a tape measure or ruler to ensure the placement is symmetrical and centered.
- Thread the needle: Take a needle with a thread that matches your project. Double the thread over and tie a knot at the end.
- Start sewing: Begin sewing the bobble onto your project by inserting the needle from the inside to the outside. Make sure the knot stays on the inside.
- Secure the bobble: Sew the bobble to your project by alternating stitches between the base of the bobble and the fabric, taking care to keep the tension even to prevent puckering.
- Continue sewing: Continue sewing in a circular pattern around the base of the bobble, making sure to catch the fabric securely with each stitch.
- End the sewing: Once you have sewn all the way around the base of the bobble, make a few extra stitches to secure the thread. Then, trim the excess thread.
After completing these steps, your bobble should be securely attached to your hat or scarf. Give it a gentle tug to ensure it is securely fastened. Now you can enjoy your finished project with its adorable knitted bobble!
Final Thoughts and Variations
Congratulations! You have successfully learned how to make a knitted bobble. This fun and stylish technique can be used to add texture and visual interest to any knitting projects. Here are some final thoughts and variations to consider:
- Experiment with different yarn weights and colors to create different effects. Thicker yarns will result in larger bobbles, while thinner yarns will create smaller, more delicate bobbles.
- Try using multiple colors in your bobbles to create a striped or gradient effect. Simply change colors when you start a new bobble round.
- If you’d like, you can add more rounds of plain knitting between the bobble rounds to create a more subtle effect. Just remember to adjust your stitch count accordingly.
- Consider incorporating bobbles into other knitting patterns. For example, you could add bobbles as a border to a scarf or hat, or use them to create a textured pattern on a sweater or blanket.
- Experiment with different bobble sizes by increasing or decreasing the number of stitches you gather in step 8. This will allow you to create bobbles of varying sizes within the same project.
Remember, practice makes perfect! Don’t be discouraged if your first few bobbles don’t turn out exactly as you’d hoped. Keep practicing and soon you’ll be able to create beautiful, professional-looking bobbles in no time.
Happy knitting!
FAQ:
What materials do I need to make a knitted bobble?
To make a knitted bobble, you will need yarn in the color of your choice, knitting needles, a tapestry needle, and a pair of scissors.
Can I use any type of yarn for a knitted bobble?
Yes, you can use any type of yarn for a knitted bobble. However, it is recommended to use a thicker yarn as it will create a fuller and more defined bobble.
How long does it take to make a knitted bobble?
The time it takes to make a knitted bobble depends on your knitting speed and experience. On average, it can take anywhere from 30 minutes to an hour to complete.
Can I make a knitted bobble without knitting needles?
No, knitting needles are necessary to create the stitches required for a knitted bobble. If you do not have knitting needles, you can purchase them at your local craft store or online.


