Are you interested in knitting and looking to learn a new stitch? The ribbed stitch is a popular pattern that is often used for creating cuffs, collars, and borders on various knitting projects. It not only adds a beautiful texture to your work but also provides elasticity, making it perfect for creating snug-fitting garments.
In this step-by-step guide, we will walk you through the process of knitting the ribbed stitch. Whether you are a beginner or an experienced knitter, this tutorial will help you master this versatile stitch.
To begin, you will need a pair of knitting needles and your chosen yarn. The ribbed stitch is typically worked with a combination of knit and purl stitches, creating alternating raised and recessed rows. The pattern is often written as a multiple of 2 stitches, so be sure to cast on an appropriate number to achieve the desired width.
Once you have your materials ready, we will guide you through each step of the ribbed stitch. From casting on to binding off, we will explain each stitch in detail and offer tips and tricks to help you achieve a professional finish. So grab your needles and yarn, and let’s get started on mastering the ribbed stitch.
Overview of Ribbed Stitch
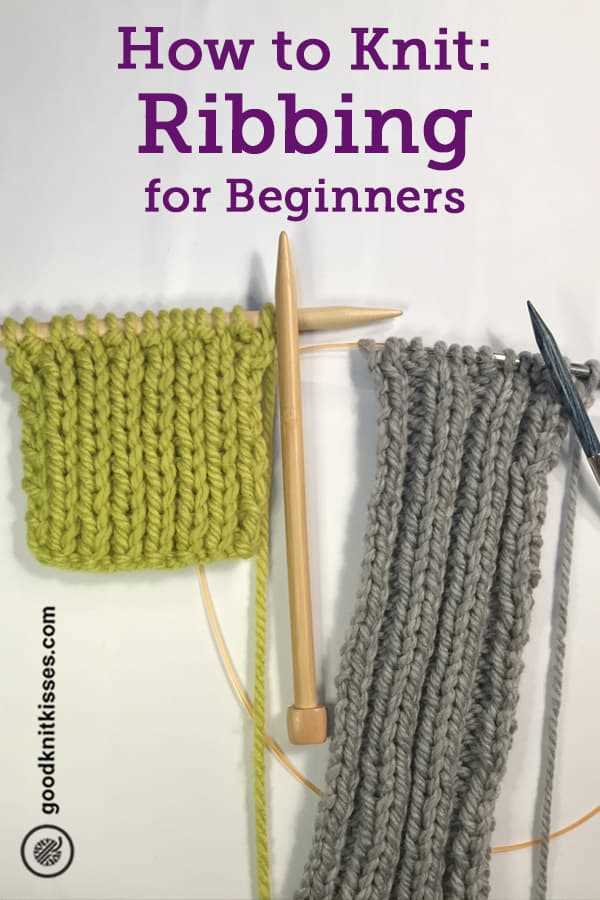
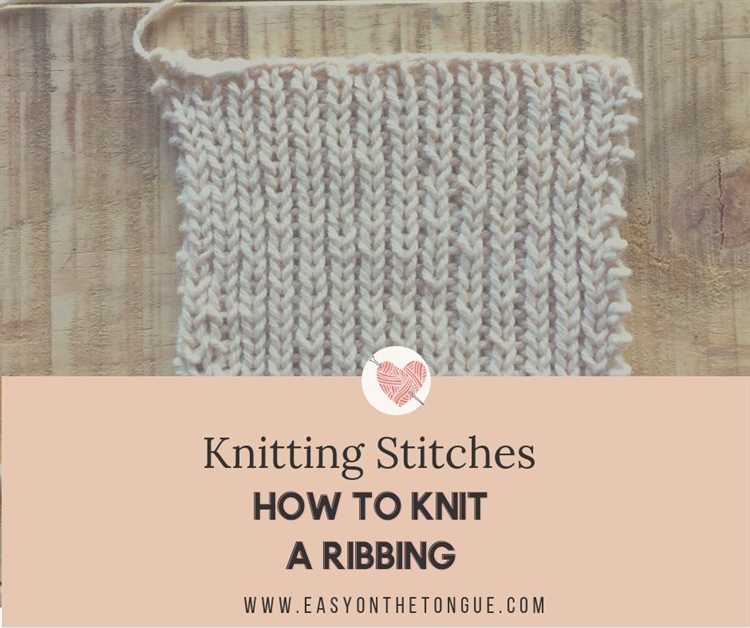
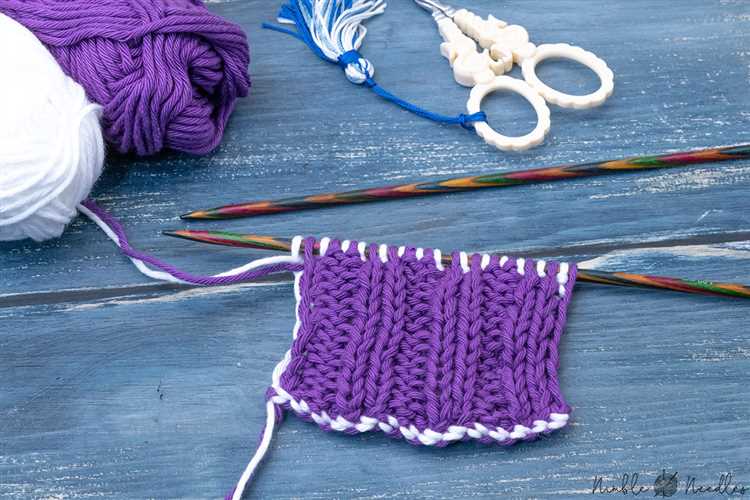
The ribbed stitch is a popular knitting technique that creates a stretchy and textured fabric. It is commonly used in knitted items such as cuffs, collars, and borders to add elasticity and a visually interesting pattern.
Ribbing is created by alternating knit and purl stitches in a specific pattern. The most common ribbing patterns include 1×1 ribbing, 2×2 ribbing, and 3×1 ribbing. The first number represents the number of knit stitches, and the second number represents the number of purl stitches in each repeat of the pattern.
The ribbed stitch is perfect for projects that require a bit of stretch, such as hats, scarves, and sweaters. It gives the fabric a snug fit and helps to prevent it from losing its shape over time.
To get started with ribbing, you’ll need to know the basic knit and purl stitches. Knit stitches are made by inserting the right needle into the loop of the left needle from left to right, wrapping the yarn around the right needle, and pulling the new loop through. Purl stitches are made by inserting the right needle into the loop from right to left, wrapping the yarn around the right needle in the opposite direction, and pulling the new loop through.
To create a ribbed stitch, simply alternate between knitting and purling according to the desired pattern. The tension of your stitches and the size of your needles will determine the overall appearance and stretchiness of the ribbed fabric. Experiment with different combinations to achieve the desired effect.
Benefits of Knitting Ribbed Stitch
Knitting is a versatile craft that offers a wide range of stitch patterns and techniques to explore. One popular stitch pattern that every knitter should learn is the ribbed stitch. The ribbed stitch creates a stretchy and textural fabric that has many benefits.
- Elasticity: One of the main advantages of knitting ribbed stitch is its elasticity. The alternating knit and purl stitches create multiple columns of raised and recessed stitches, allowing the fabric to stretch and contract easily. This makes ribbed stitch ideal for knitting garments that need to fit snugly, such as hats, socks, and cuffs.
- Warmth: The ribbed stitch pattern creates a thick and dense fabric that provides excellent insulation and warmth. The raised knit stitches trap air between them, creating a layer of insulation that helps to retain body heat. This makes ribbed stitch perfect for knitting cozy sweaters, scarves, and blankets.
- Texture: Ribbed stitch creates a beautiful textured fabric that adds visual interest to your knitting projects. The alternating columns of knit and purl stitches create a ribbed or ridged effect that can be used to enhance the design of your knitted items.
- Versatility: Ribbed stitch is a versatile stitch pattern that can be used in a variety of knitting projects. It can be easily adjusted to create different widths and depths, allowing you to customize the look and feel of your fabric. Additionally, ribbed stitch can be combined with other stitch patterns and techniques to create unique and intricate designs.
- Easy to Learn: While knitting may seem complicated, the ribbed stitch is relatively easy to learn. It only requires basic knitting techniques, such as knitting and purling, and can be mastered with a bit of practice. Once you’ve learned the ribbed stitch, you’ll have a versatile stitch pattern in your knitting repertoire.
Whether you’re a beginner or an experienced knitter, learning how to knit the ribbed stitch is a valuable skill. Its elasticity, warmth, texture, versatility, and ease of learning make it a go-to stitch pattern for a variety of knitting projects. So grab your knitting needles and start exploring the world of ribbed stitch!
Materials Needed for Ribbed Stitch
- Yarn
- Knitting Needles
- Tape Measure or Ruler
- Tapestry Needle
When learning how to knit the ribbed stitch, you will need a few materials to get started. Here’s a list of what you’ll need:
- Yarn: Choose a yarn that is suitable for the project you have in mind. Ribbed stitch works well with various types of yarn, so you can choose anything from a soft acrylic to a cozy wool.
- Knitting Needles: Select knitting needles that are appropriate for the yarn you’ve chosen. The needle size will depend on the gauge you want to achieve and the thickness of your yarn.
- Tape Measure or Ruler: Having a tape measure or ruler handy will allow you to measure your gauge and keep track of your progress as you knit.
- Tapestry Needle: A tapestry needle, also known as a yarn needle or a darning needle, is essential for finishing your knitting project. You’ll use it to weave in loose ends of yarn and sew up any seams if necessary.
Make sure you have all of these materials ready before you begin learning how to knit the ribbed stitch. Having everything within reach will help you stay organized and make your knitting experience more enjoyable.
Step 1: Casting On
Before you can start knitting the ribbed stitch pattern, you need to cast on your stitches.
Here’s how to cast on:
- Start by making a slipknot with your yarn. To do this, create a loop near the end of your yarn.
- Insert your knitting needle into the loop from the back to the front, and then bring the loop over the needle.
- Gently pull the loose end of the yarn to tighten the loop around the needle.
- Hold the needle with the slipknot in your dominant hand and the loose end of the yarn in your other hand.
- Insert the needle into the slipknot from left to right, creating a new loop around the needle.
- Once again, gently pull the loose end of the yarn to tighten the loop around the needle.
- Repeat steps 5 and 6 until you have cast on the desired number of stitches.
Remember to keep your tension even as you cast on to ensure that your stitches are not too tight or too loose.
Once you have cast on your stitches, you are ready to move on to the next step in the ribbed stitch pattern.
Step 2: Knitting the First Row
Once you have cast on the desired number of stitches, you are ready to start knitting the first row of the ribbed stitch pattern. Follow these steps to create your first row:
- Hold the knitting needles with the cast on stitches in your right hand.
- With your left hand, hold the working yarn and make sure it is coming from behind the first stitch on your right-hand needle.
- Insert the right-hand needle into the first stitch on the left-hand needle from left to right, as if you were going to knit that stitch.
- Using your right hand, wrap the yarn around the right-hand needle counterclockwise, bringing the yarn between the needles.
- With the right-hand needle, pull the wrapped yarn through the stitch, transferring the stitch from the left-hand needle to the right-hand needle.
- Continue steps 3-5 for each stitch on the left-hand needle until all stitches have been transferred to the right-hand needle. This completes one row of knitting.
As you work through the first row, pay attention to the tension of your stitches. Make sure not to pull too tightly or leave them too loose. Consistent tension will result in an even and professional-looking ribbed stitch.
Remember to refer to your pattern for any specific instructions or variations on knitting the first row of ribbing. Once you have completed the first row, you can continue knitting subsequent rows to create your ribbed stitch pattern.
Step 3: Repeating the Ribbed Stitch Pattern
Now that you have learned how to create the ribbed stitch pattern, it’s time to repeat the pattern to create the desired length of your knitted piece.
Here are the steps to follow:
- Continue alternating between knit and purl stitches for each row, following the ribbed stitch pattern.
- If you want to maintain the ribbed pattern, knit the knit stitches and purl the purl stitches. This will create the classic ribbed texture.
- Repeat the ribbed stitch pattern for as many rows as you need to achieve your desired length. Remember to count your stitches periodically to ensure that you haven’t accidentally added or dropped any stitches.
- Once you have reached the desired length, you can finish off your work by binding off the stitches. This will secure the ends of your knitting and create a clean edge.
By repeating the ribbed stitch pattern, you can create a variety of different knitted items, such as scarves, hats, sweaters, and more. Experiment with different yarns and needle sizes to customize the look and feel of your projects.
Continue practicing the ribbed stitch pattern and exploring different knitting techniques to expand your skills and create beautiful hand-knit items.
Step 4: Binding Off
Once you have completed the desired number of ribbed stitch rows, it’s time to bind off your knitting. Binding off, also known as casting off, is the process of ending your knitting project and securing the stitches so they don’t unravel.
To bind off in ribbed stitch, you’ll continue to work the knit and purl stitches in the established ribbing pattern:
- Start by knitting the first two stitches in ribbing pattern.
- Insert the left needle into the first stitch on the right needle.
- Pass the first stitch over the second stitch, as if you were binding off in a regular knit stitch.
- Purl the next stitch.
- Continue to alternate between binding off knitwise and purling the stitches until you reach the end of the row.
When you have only one stitch left on your right needle, cut the yarn, leaving a tail of about 6 inches. Pull the tail through the last stitch to secure it.
Once you have bound off all the stitches, you can remove the knitting from the needles. Gently tug on the tail of yarn to tighten the bind-off edge.
Voila! You have successfully bound off your knitting in ribbed stitch. You can now use your ribbed fabric for various knitting projects, such as scarves, hats, or even sweaters.
FAQ:
What materials do I need to knit the ribbed stitch?
To knit the ribbed stitch, you will need knitting needles, yarn, and a yarn needle.
Can I use any type of yarn for the ribbed stitch?
Yes, you can use any type of yarn for the ribbed stitch. However, it is recommended to use a yarn that has some stretch to it, as it will give the ribbing a better shape and fit.
How do I start knitting the ribbed stitch?
To begin knitting the ribbed stitch, cast on an even number of stitches. Then, knit one stitch and purl one stitch alternately across the row.
What is the purpose of the ribbed stitch?
The ribbed stitch is commonly used in knitting to create stretchy and flexible fabric, making it ideal for garments such as cuffs, collars, and waistbands. It also adds texture to the knitted piece.
What is the difference between knit stitches and purl stitches in the ribbed stitch?
In the ribbed stitch, knit stitches create a raised V-shaped pattern on the front side of the fabric, while purl stitches create a raised horizontal line on the front side. When these stitches are alternated, they create the ribbing effect.
Can I knit the ribbed stitch in the round?
Yes, you can knit the ribbed stitch in the round. Instead of knitting and purling alternate rows, you will knit all stitches in the round to create the ribbing effect.
How do I finish the ribbed stitch?
To finish the ribbed stitch, continue knitting and purling in the ribbing pattern until you have reached the desired length. Then, bind off the stitches and weave in any loose ends with a yarn needle.


