If you’re new to knitting or looking to expand your skills, joining knitting in the round on circular needles is a great technique to learn. Knitting in the round allows you to create seamless projects, such as hats, cowls, and sleeves, without the need for seams or sewing. Circular needles are a versatile tool, and once you master this technique, you’ll be able to tackle a wide range of projects.
The first step in joining knitting in the round is selecting the right circular needles for your project. Circular needles come in various lengths, so choose a length that matches the circumference of your project. If your project is small, like a hat or a sleeve, you can use shorter circular needles. For larger projects, like a sweater or a blanket, longer circular needles are necessary.
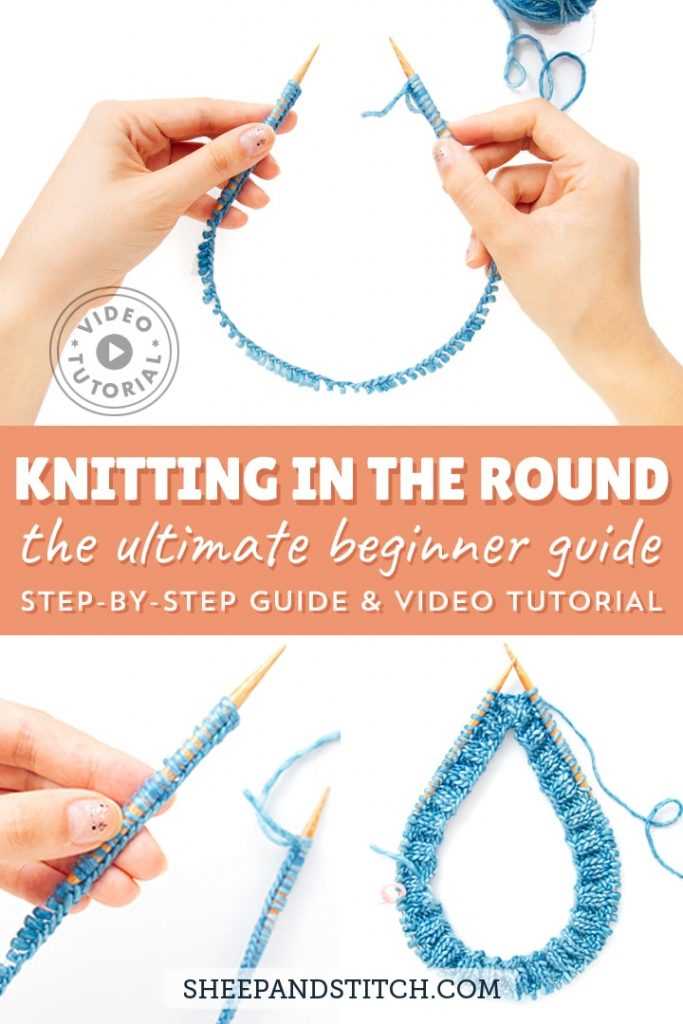
Once you have your circular needles, cast on the required number of stitches for your project. To join the knitting in the round, make sure that all the stitches are oriented in the same direction on the needle. Then, bring the first stitch from the right needle to the left needle, being careful not to twist the stitches. This will create a continuous loop of stitches, forming the start of your project.
As you begin knitting in the round, use markers to indicate the beginning and end of each round. These markers will help you keep track of your progress and ensure that your stitches are aligned correctly. With each round, continue to knit or purl the stitches as instructed in your pattern, working in a clockwise direction around the circular needles. With practice, joining knitting in the round will become second nature, and you’ll be able to create beautiful seamless projects with ease.
Materials Needed for Knitting in the Round
Before you begin knitting in the round on circular needles, make sure you have the following materials:
- Circular Needles: You will need a pair of circular needles that are the appropriate size for your yarn. The length of the needles will depend on the circumference of the project you are working on. Typically, a 16-inch or 24-inch circular needle is suitable for most projects.
- Yarn: Choose a yarn that is appropriate for your project. Make sure to check the yarn label for the recommended needle size.
- Stitch Markers: Stitch markers are used to mark the beginning of each round. You can use specialized stitch markers or simply loop a small piece of contrasting yarn through your stitches.
- Tapestry Needle: A tapestry needle is used for weaving in ends and finishing your project.
- Scissors: You will need a pair of scissors to cut your yarn.
- Measuring Tape: A measuring tape is handy for checking your gauge and measuring your project as you go.
Once you have gathered all of your materials, you will be ready to start knitting in the round on circular needles.
Step 1: Casting On Stitches
Before you can start knitting in the round on circular needles, you first need to cast on the desired number of stitches onto your needles. Here is a step-by-step guide on how to cast on stitches:
- Hold your circular needles: Hold the circular needles in your dominant hand, with the needle tips pointing to the right. Use your non-dominant hand to hold the yarn.
- Make a slipknot: Create a slipknot by making a loop with the yarn. Insert the working end of the yarn through the loop from the bottom and pull it tight. Place the slipknot onto the right needle.
- Insert the needle: Insert the right needle into the slipknot on the left needle, going from front to back.
- Create a new stitch: With your non-dominant hand, take the working yarn and wrap it around the right needle, going counterclockwise.
- Pull through the loop: Use the right needle to pull the loop of yarn through the slipknot, creating a new stitch on the right needle.
- Repeat the process: Continue steps 3-5 until you have cast on the desired number of stitches. Keep the stitches snug on the needles, but not too tight.
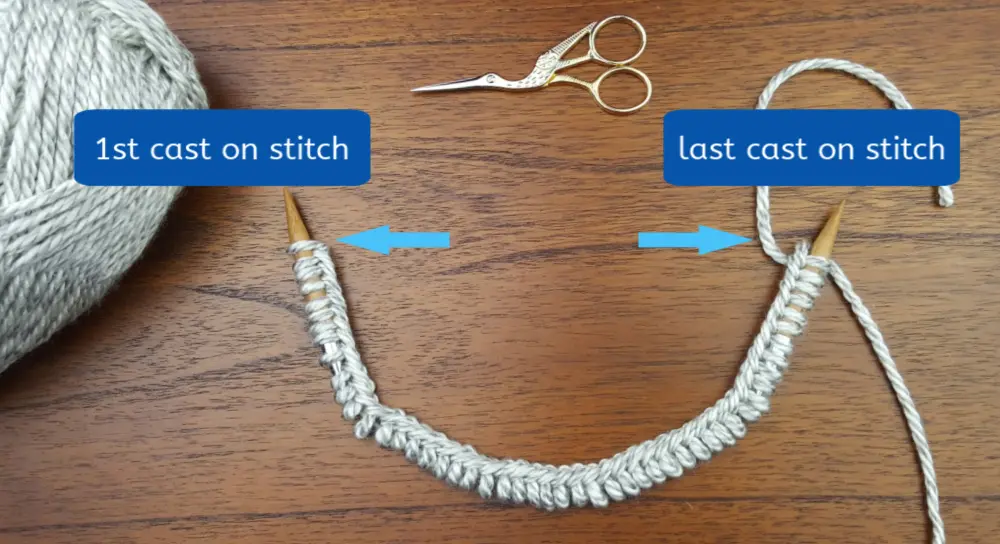
- Join the round: Once you have cast on all the stitches, you can join the round by holding the knitting so that the first stitch you cast on is now at the tip of the right needle. Make sure the cast-on stitches are not twisted around the needles before joining.
Now that you have successfully cast on stitches onto your circular needles, you are ready to begin knitting in the round. Remember to consult your specific project’s knitting pattern for any additional instructions or stitch counts.
Step 2: Joining the Cast On Stitches
Once you have cast on the required number of stitches onto your circular needles, it’s time to join them together to form a circle. This step is crucial to knitting in the round, as it creates a continuous loop of stitches.
Here are the steps to join the cast on stitches:
- Make sure all the cast on stitches are facing the same direction, with the working yarn at the back of the needle.
- Hold the needle with the cast on stitches in your right hand and the empty needle in your left hand.
- Insert the tip of the empty needle into the first stitch on the right-hand needle, from front to back.
- Slide the first stitch from the right-hand needle onto the left-hand needle.
- Repeat steps 3 and 4 for the remaining stitches, sliding each stitch from the right-hand needle onto the left-hand needle.
- Once all the stitches are on the left-hand needle, ensure that they are not twisted. They should be sitting flat and evenly on the needle.
At this point, you have successfully joined the cast on stitches and are ready to begin knitting in the round. Check that the working yarn is positioned behind the left-hand needle, and you’re all set to start your first round!
Note: It’s important to be careful not to twist the stitches when joining them, as twisted stitches can lead to a distorted or misshapen finished project. Take your time to ensure that the stitches lay flat and in the correct orientation before proceeding.
Step 3: Knitting the First Round
Once you have joined your knitting in the round and have all the stitches on your circular needles, you are ready to start knitting the first round.
To knit the first round, follow these steps:
- Hold your circular needles with the needle tips pointing to the right, and the working yarn attached to the right needle.
- With your right hand needle, insert it into the first stitch on the left hand needle, from front to back.
- Wrap the yarn around the right hand needle, counterclockwise, so that the yarn is positioned behind the needles.
- Using the right hand needle, pull the wrapped yarn through the stitch, towards you, and slip the stitch off the left hand needle.
- Repeat steps 2 to 4 for each stitch on the left hand needle, until you have worked all the stitches.
- At the end of the round, the working yarn will be in position to start the next round.
Remember to maintain a consistent tension as you knit, and try to avoid knitting too tightly, as this can make it difficult to work the stitches.
Continue knitting rounds in the established pattern according to your project instructions.
Step 4: Ensuring the Stitches are Joined
After casting on and joining the stitches onto your circular needles, it’s important to make sure that the stitches are properly joined, so that you can continue knitting in the round without any gaps or twisting.
Here are the steps to ensure that your stitches are joined correctly:
- Hold the circular needles in your hands with the needle tips pointing to the right.
- Look at the first stitch on the left needle. If the working yarn is coming from the back of the needle, it means that the stitches are properly joined. If the working yarn is coming from the front of the needle, you will need to flip the work inside out to correct it.
- If the stitches are correctly joined, take the working yarn and the right needle and start knitting the first stitch. Make sure to knit the stitch as you normally would, pulling the working yarn through the stitch and sliding the old stitch off the left needle.
- The second stitch on the left needle will now become the first stitch on the right needle.
- Continue knitting the next stitches, always making sure to knit them from the left needle onto the right needle.
- As you continue knitting, it’s important to keep an eye on the joins between the stitches. Make sure that there are no gaps or twists in the stitches, as this can affect the overall appearance and fit of your project.
Once the stitches are properly joined and you have completed a few rounds of knitting, you can continue working on your project in the round, following the pattern instructions or your own design.
Step 5: Continuing to Knit in the Round
Once you have joined your knitting in the round and completed the first round, you can continue knitting your project in the round. This will create a continuous tube of knitting, without any seams.
To continue knitting in the round:
- Hold your circular needles with the right side of the work facing you.
- Insert the right needle into the first stitch on the left needle, just as you would if you were knitting flat.
- Wrap the yarn around the right needle, from back to front.
- Use the right needle to pull the yarn through the stitch, just as you would if you were knitting flat.
- Slide the stitch off the left needle and onto the right needle. You have completed one stitch.
- Continue knitting each stitch in the round in the same manner, inserting the right needle into the next stitch on the left needle, wrapping the yarn around the right needle, and pulling the yarn through the stitch.
- As you knit, the fabric will grow and wrap around the circular needles. Be careful not to let your work twist as you continue knitting.
It may take a few rows before you get comfortable knitting in the round, but with practice, it will become second nature. Remember to keep your tension consistent and to take breaks when needed to prevent hand strain.
You can also use stitch markers to mark the beginning of each round, especially if you are working on a larger project with many rounds. This will help you keep track of where each round begins and ends.
Continue knitting in the round until you reach the desired length or complete the pattern as specified.
And that’s it! You are now on your way to successfully knitting in the round on circular needles. Enjoy your seamless knitting experience!
Step 6: Marking the Beginning of the Round
Once you have joined your knitting in the round on circular needles, it’s important to mark the beginning of the round. This will help you keep track of your progress and ensure that your stitches are properly aligned.
To mark the beginning of the round, you can use a variety of tools such as stitch markers, contrasting yarn, or a safety pin. Here are a few methods you can choose from:
- Stitch markers: Place a stitch marker onto one of the needles to mark the beginning of the round. Simply slide the marker onto the needle between the last stitch of the previous round and the first stitch of the new round.
- Contrasting yarn: If you don’t have stitch markers, you can use a small piece of contrasting yarn. Tie the yarn around the working yarn in a loose knot to mark the beginning of the round. Make sure the knot is loose enough to easily slip over the needle as you work.
- Safety pin: Another option is to use a small safety pin to mark the beginning of the round. Simply attach the safety pin to the working yarn or the fabric at the beginning of the round.
Whichever method you choose, make sure the marker is secure but not too tight that it distorts your stitches. You can move the marker up as you progress in your knitting to keep it in the correct position.
By marking the beginning of the round, you can easily keep track of your progress and avoid confusion when working in the round on circular needles.
Step 7: Finishing the Knitting in the Round
Once you have completed all the rounds of your project, it’s time to finish the knitting in the round. Follow these steps to complete your project:
- Remove the stitch marker from the beginning of your round, if you used one.
- Place the work on a flat surface, with the right side facing up.
- Thread a tapestry needle with a length of yarn, leaving a tail.
- Starting at the last stitch of your round, insert the tapestry needle through the center of the stitch.
- Continue to pull the yarn through the stitch, removing it from the knitting needle.
- Insert the tapestry needle through the next stitch in the same direction, working your way around the project.
- Repeat this process until all the stitches have been removed from the knitting needle and secured with the yarn.
- Once all the stitches have been secured, pull the yarn tight to close up the hole and form a neat finish.
- Use the tapestry needle to weave in the loose ends of yarn on the wrong side of the work, making sure to secure them tightly.
- Cut off any excess yarn.
Now that you have finished knitting in the round, you can admire your project and enjoy the seamless finish that circular knitting provides. Whether you made a hat, a sweater, or any other project, you can be proud of your accomplishment!
FAQ:
What are circular needles and how are they different from straight needles?
Circular needles are knitting needles that are connected by a flexible cable. They are different from straight needles because they allow you to work in a round rather than back and forth.
How do I know what size of circular needles to use?
The size of the circular needles you use depends on the project you are working on and the gauge you want to achieve. You can refer to your pattern or use a gauge swatch to determine the appropriate needle size.
Can I use circular needles for knitting flat projects?
Yes, you can use circular needles for knitting flat projects. Simply work back and forth as you would with straight needles, ignoring the cable.
What is the magic loop method?
The magic loop method is a technique used to knit small circumferences, such as sleeves or socks, using a long circular needle. It involves pulling out a loop of cable from the middle of the work to create two separate loops, which allows you to easily work in a round.
Do I need any special skills to join knitting in the round on circular needles?
No, you don’t need any special skills to join knitting in the round on circular needles. It’s a simple technique that can be easily mastered with a little practice.


