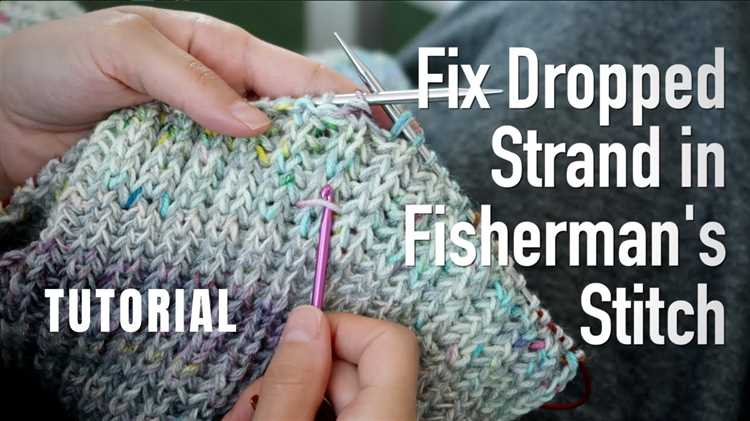
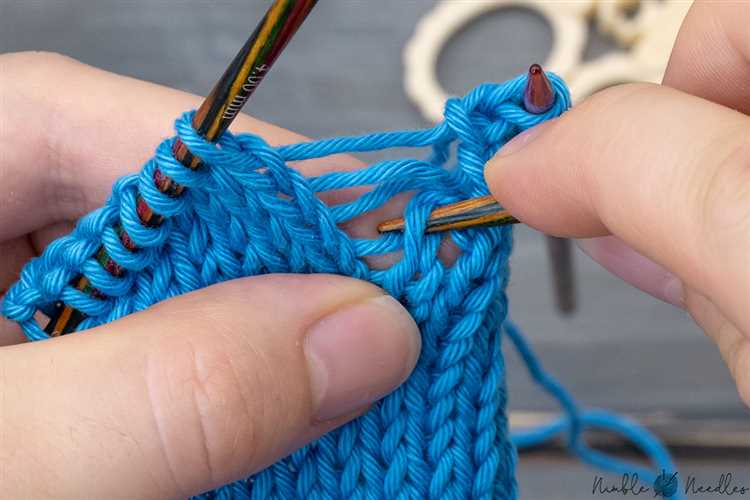
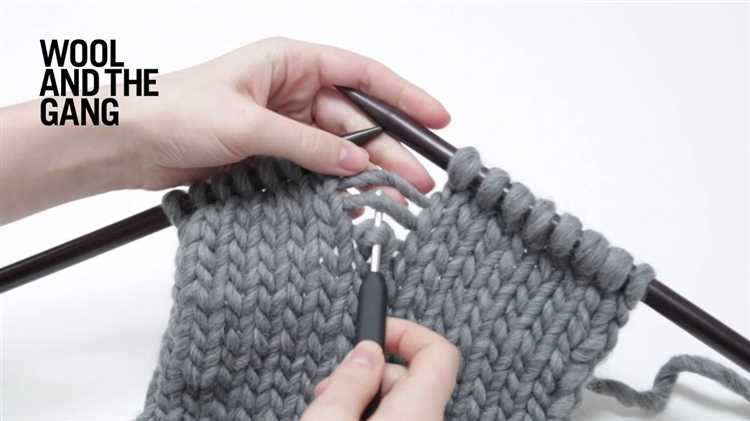
Knitting is a beloved hobby for many, but we’ve all been there – you’re knitting away, and suddenly you notice a dropped stitch. It can be frustrating and intimidating, but fear not! Fixing a dropped stitch is easier than you might think. In this step-by-step guide, we’ll walk you through the process of rescuing that dropped stitch and getting your knitting project back on track.
Step 1: Assess the Situation
When you first notice a dropped stitch, take a deep breath and don’t panic. Examine the stitch carefully to see how far down it has slipped. If it’s only a few rows down, it’s a relatively simple fix. If it has gone several rows down, you may need to tink (unravel) some stitches to get to the dropped stitch.
Step 2: Secure the Stitch
Once you’ve located the dropped stitch, you need to secure it to prevent it from unraveling any further. Take a spare double-pointed needle, a crochet hook, or a knitting needle, and slide it through the dropped stitch from front to back, making sure the stitch is properly oriented on the needle.
Step 3: Work the Stitch Up
Now that you have secured the dropped stitch, it’s time to work it back up. Carefully unravel the stitches above the dropped stitch, one by one, until you reach the secured stitch. Use the spare needle, hook, or knitting needle to guide the stitches back onto the working needle, making sure to catch the dropped stitch and place it back in the correct orientation.
Step 4: Fix Any Loose Stitches
After you’ve successfully worked the dropped stitch back up, you may notice some loose or uneven stitches around it. To fix these, use a crochet hook or the tip of your knitting needle to gently adjust the tension and even out the stitches. Take your time and make any necessary adjustments until your knitting looks neat and uniform once again.
Remember, fixing a dropped stitch is a normal part of the knitting process, and even experienced knitters make mistakes. Don’t be discouraged – you have the skills to fix it! With a little practice and patience, you’ll be able to quickly rescue dropped stitches and continue creating beautiful knitted projects.
What is a Dropped Stitch in Knitting and Why is it a Problem?
A dropped stitch in knitting occurs when a stitch falls off the knitting needles, creating a noticeable gap in the fabric. This can happen due to various reasons such as accidental slips, incorrect stitches, or even weak yarn. When a stitch drops, it unravels the rows below it, causing a cascade effect and potentially ruining hours of work.
Not only does a dropped stitch create a visual flaw in the knitting project, but it can also affect the structural integrity of the fabric. The dropped stitch can lead to the yarn tension becoming uneven, causing the surrounding stitches to become loose or even unravel themselves. If left unaddressed, a dropped stitch can result in a small hole or ladder-like gaps in the knitted fabric.
Fixing a dropped stitch promptly is essential to maintaining the overall structure and appearance of the knitting project. By catching and fixing the dropped stitch before it creates a larger problem, you can prevent further unraveling and ensure the stitch is back in its correct position.
Fortunately, fixing a dropped stitch is a relatively simple process once you understand the basics. With a few essential tools and step-by-step instructions, you can rescue your knitting project and continue enjoying the process without any major hiccups.
Step 1: Identify the Dropped Stitch
Before you can fix a dropped stitch in your knitting, you first need to identify which stitch has been dropped. Look for a vertical column of loose yarn that runs down from the row above the dropped stitch. This column will typically be slightly longer than the surrounding stitches. You may also notice a small loop of yarn at the bottom of the column.
It’s important to note that the dropped stitch may have unravelled several rows below where it was originally dropped. Take the time to examine your work carefully and determine how many rows the stitch needs to be worked back up.
If you’re having trouble identifying the dropped stitch, you can use a stitch marker to mark the location of the nearby stitches. This will help you keep track of the surrounding stitches as you work to fix the dropped stitch.
Step 2: Pick Up the Dropped Stitch from Below
Once you have identified the dropped stitch, you will need to pick it up and secure it back onto the knitting needle. Here is how you can do it:
- Insert the knitting needle into the stitch below the dropped stitch, from front to back.
- Slide the dropped stitch onto the knitting needle.
- Remove the knitting needle from the stitch below, allowing the dropped stitch to move up onto the needle.
Here is a step-by-step breakdown of how to pick up the dropped stitch:
- Locate the stitch immediately below the dropped stitch, which will be the stitch that the dropped stitch should have been worked into.
- Insert the right needle or crochet hook from front to back into the stitch below the dropped stitch.
- Gently slide the dropped stitch over the right needle or crochet hook.
- Remove the right needle or crochet hook from the stitch below, letting the dropped stitch rest on the needle.
At this point, you will have successfully picked up the dropped stitch and secured it back onto the knitting needle. It is important to be careful and patient during this process to avoid any further mistakes or dropped stitches.
Step 3: Bring the Dropped Stitch Back to the Needle
Once you have identified the dropped stitch and secured it with a stitch marker or safety pin, it’s time to bring it back onto the knitting needle. This step is crucial to fixing the dropped stitch and preventing further unraveling.
Follow the steps below to bring the dropped stitch back to the needle:
- Insert the knitting needle into the stitch below the dropped stitch, from front to back.
- Use the knitting needle to pick up the dropped stitch by inserting it from back to front through the horizontal loop of the dropped stitch.
- Slide the loop onto the knitting needle, making sure it sits correctly and is not twisted.
Repeat these steps for each dropped stitch until they are all back on the knitting needle.
Note: If you are working on a complex stitch pattern, such as cables or lace, you may need to refer to your knitting pattern or chart to ensure that you bring the dropped stitch back correctly.
Tip: If you are struggling to pick up the dropped stitch, you can use a crochet hook or a tapestry needle with a blunt tip to help guide the stitch onto the knitting needle.
Once all the dropped stitches are back on the needle, you can continue knitting as normal, making sure to snug up the stitches to prevent any gaps or holes.
Step 4: Fix the Loose Stitch Above the Dropped Stitch
After picking up the dropped stitch, you may notice that the stitch directly above it is loose. Don’t worry, it’s easy to fix!
To fix the loose stitch, insert the left-hand needle into the stitch from the front to the back, just as you would to knit. Then slide the dropped stitch onto the left-hand needle.
Hold the working yarn in your right hand and use it to wrap the loose stitch, just like you would knit a regular stitch. Make sure to wrap it in the same direction as the surrounding stitches.
Insert the right-hand needle into the wrapped loose stitch and pull it through, similar to a regular knit stitch. Slip the stitch off the left-hand needle and continue knitting across the row normally.
By wrapping and knitting the loose stitch, you’ll secure it in place and ensure that it matches the tension of the surrounding stitches.
Repeat this process for any other loose stitches you encounter above the dropped stitch.
Step 5: Check the Surrounding Stitches for Tightness
After fixing the dropped stitch, it’s essential to check the surrounding stitches for tightness. When a stitch is dropped, the tension in the surrounding stitches may become uneven or loose.
Here’s how to check the tension:
- Starting from the row below the dropped stitch, examine the stitches on both sides.
- Look for any loose stitches or areas where the tension seems uneven.
- If you find loose stitches, tighten them carefully by pulling the yarn gently.
- Ensure that the tension is consistent across the row.
By checking and adjusting the tension of the surrounding stitches, you’ll ensure that your knitted piece maintains a uniform appearance.
Step 6: Continue Knitting
Once you have fixed the dropped stitch, you can continue knitting as usual. Pick up the working yarn with your right hand and insert the right needle into the next stitch. Wrap the yarn around the right needle counterclockwise and pull it through the stitch, transferring the stitch from the left needle to the right needle.
Continue knitting each stitch in the row, being careful to maintain an even tension. Remember to count your stitches periodically to ensure you haven’t dropped any additional stitches.
If you are working on a pattern, follow the instructions provided to complete the desired design. Pay attention to any stitch pattern changes or shaping instructions as you continue knitting.
Continue knitting until you have completed the desired number of rows or until you have finished the project. At the end of your knitting, you can bind off your stitches to secure them and create a finished edge.
Remember to take breaks and stretch your hands and fingers if you start to feel any discomfort. Knitting should be an enjoyable and relaxing activity, so take your time and enjoy the process!
Tips for Preventing Dropped Stitches in the Future
1. Use stitch markers: Using stitch markers can help you keep track of your stitches and prevent them from slipping off your needles. Place a stitch marker after every few stitches or at the beginning of a pattern repeat.
2. Check your work regularly: Take a moment to check your work every few rows or after completing a pattern repeat. Look for any dropped stitches or areas where the tension may be uneven. Fix any issues immediately to prevent them from worsening.
3. Avoid distractions: Knitting requires concentration, so try to create an environment that minimizes distractions. Find a quiet space and eliminate any potential interruptions that may cause you to drop stitches.
4. Use lifelines: Lifelines are pieces of contrasting yarn or thread that are threaded through a row of stitches. They act as a safety net, allowing you to easily pick up stitches if you make a mistake. Insert a lifeline every few rows or after completing a pattern repeat.
5. Practice good tension: Maintaining consistent tension while knitting can help prevent dropped stitches. Avoid pulling your yarn too tight or leaving it too loose. Practice knitting at a moderate tension that feels comfortable for you.
6. Learn how to read your knitting: Understanding how your stitches should look as you work can help you catch any mistakes early on. Take the time to learn how to read your knitting and recognize when a stitch has been dropped.
7. Use circular needles: Circular needles can help distribute the weight of your knitting, reducing the likelihood of dropped stitches. The flexible cable allows for more maneuverability and prevents stitches from slipping off the ends of straight needles.
8. Take breaks: Knitting for long periods without taking breaks can lead to fatigue and decreased concentration, increasing the chances of making mistakes. Take regular breaks to rest your hands and eyes, helping you maintain focus on your work.
9. Practice fixing mistakes: The more comfortable you are with fixing dropped stitches, the less daunting they will be. Take the time to practice fixing mistakes on scrap yarn to build your confidence and improve your knitting skills.
10. Be patient: Making mistakes and dropping stitches is a normal part of knitting. Remember to be patient with yourself and embrace the learning process. With time and practice, you will become more skilled at preventing and fixing dropped stitches.
FAQ:
What should I do if I notice a dropped stitch while I’m knitting?
If you notice a dropped stitch while you’re knitting, you should stop and fix it immediately. You can’t just leave it or your project will unravel.
What is the best way to fix a dropped stitch in knitting?
The best way to fix a dropped stitch in knitting is to use a crochet hook or a knitting needle to pick up the stitch from the row below. Then, simply knit it back up to the row you’re working on.
How do I prevent dropping stitches while I’m knitting?
To prevent dropping stitches while you’re knitting, make sure to count your stitches regularly to catch any mistakes early on. You can also use markers to keep track of where your stitches should be, and double-check your work before moving on to the next row.
Can I fix a dropped stitch in knitting after I’ve finished the project?
Yes, you can still fix a dropped stitch in knitting after you’ve finished the project, but it will be more difficult. You’ll need to carefully unravel your work to the dropped stitch, then use a crochet hook or knitting needle to pick it up and knit it back up to the row you’re working on. It may take some time and patience, but it is possible to fix a dropped stitch even after finishing the project.


