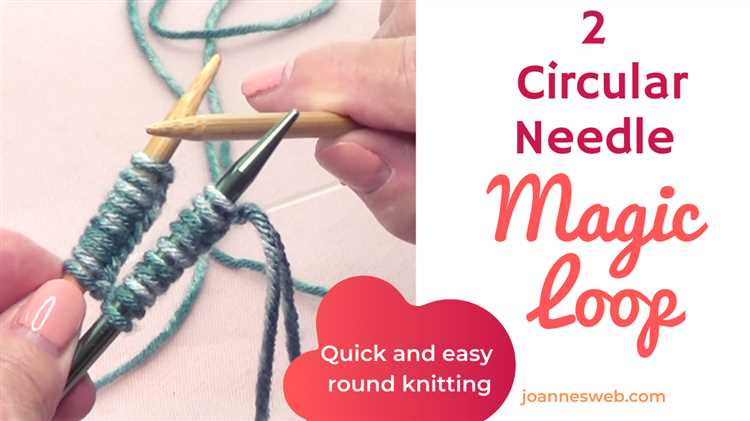
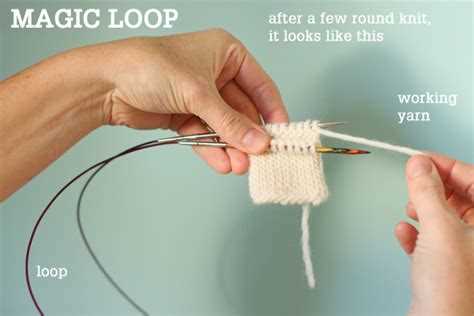
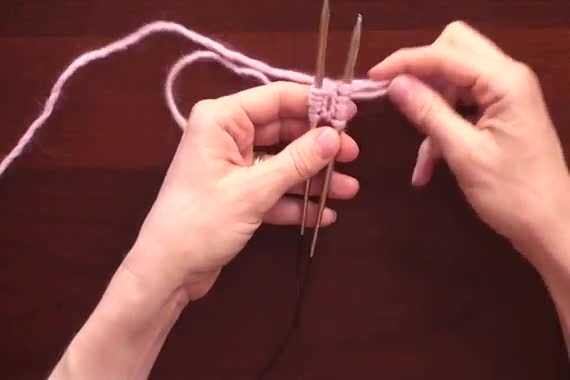
Knitting is a popular pastime and hobby that allows for creativity and relaxation. One technique that every knitter should learn is the magic loop method. This technique is perfect for knitting in the round, especially when working with a small number of stitches.
The magic loop method involves using a long circular needle, typically around 40 inches or longer, to create a loop that allows you to knit in the round. This eliminates the need for double-pointed needles, making it more versatile and easier to manage.
To begin, you will cast on your desired number of stitches onto the circular needle. Then, instead of joining the round and knitting in the traditional way, you will divide your stitches in half, with one half on each side of the loop. This creates a continuous loop of stitches.
As you work your way around the loop, you will slide the stitches from one side of the loop to the other, always keeping the working yarn towards the back. This allows you to knit the stitches without any interruptions or gaps.
Mastering the magic loop knitting technique takes practice, but once you get the hang of it, you’ll wonder how you ever knitted in the round without it. So grab your circular needles and give it a try!
The History of Magic Loop Knitting
Magic loop knitting is a technique that was developed in the early 2000s by Sarah Hauschka, a knitter and designer from Minnesota, USA. While the exact origin of the technique is unclear, it has quickly gained popularity among knitters for its versatility and efficiency.
The magic loop method allows knitters to work on small diameter projects, such as socks or sleeves, using a long circular needle instead of double-pointed needles or multiple circular needles. This eliminates the need for constantly switching between needles and keeps the stitches securely on the cable.
The technique itself involves sliding the stitches to the middle of a circular needle, creating a loop of cable on either side. By pulling the cable through the stitches, the knitter can easily work on one half of the stitches at a time, while the rest remain safely on the cable.
The magic loop technique revolutionized small diameter knitting, making it more accessible and less fiddly for knitters of all skill levels. It became particularly popular in the knitting community due to its efficiency and the ability to easily adapt the method to different patterns and stitch counts.
Since its introduction, the magic loop technique has been widely adopted by knitters around the world. It has even inspired variations and adaptations, such as using two circular needles instead of one long circular needle. Many knitting patterns now include instructions for magic loop knitting, recognizing its popularity and usefulness.
Overall, the history of magic loop knitting is relatively recent, but its impact on the knitting world has been significant. By offering a versatile and efficient alternative to traditional methods, it has become a go-to technique for many knitters, allowing them to tackle small diameter projects with ease.
Benefits of the Magic Loop Technique
The Magic Loop knitting technique is a versatile method that offers several benefits to knitters. Here are some of the advantages of using the Magic Loop technique:
- Versatility: The Magic Loop technique allows you to knit a variety of projects, from small circular items like socks and mittens to larger items such as sweaters and blankets. This technique eliminates the need to invest in multiple sets of double-pointed needles for different project sizes.
- Flexibility: With the Magic Loop technique, you can easily adjust the size of your loop to accommodate different stitch counts without the need for additional needles. This flexibility makes it easier to adapt patterns to fit your desired size or gauge.
- Easy to learn: Although the Magic Loop technique may seem intimidating at first, it is relatively easy to learn with a bit of practice. Once you understand the basic steps, you can quickly master this technique and apply it to your knitting projects.
- Seamless knitting: One of the main advantages of the Magic Loop technique is the ability to knit in the round without any seams. This creates a smooth and seamless finish, which is particularly beneficial for garments and accessories that require a neat and professional look.
- Reduced risk of laddering: Laddering, which is the uneven tension between stitches, can be a common issue when knitting with double-pointed needles. However, the Magic Loop technique helps to reduce the risk of laddering by distributing the stitches evenly across the loop.
- Portable and compact: The Magic Loop technique allows you to knit small circumference projects using a single long circular needle. This makes it a great option for knitters who prefer to have a compact and portable knitting project that can be easily carried around.
In conclusion, the Magic Loop knitting technique offers a range of benefits, including versatility, flexibility, seamless knitting, and portability. If you’re looking to expand your knitting skills and experiment with new techniques, the Magic Loop technique is definitely worth exploring.
Essential Tools for Magic Loop Knitting
To successfully practice the magic loop knitting technique, you will need a few essential tools. These tools will help you achieve the desired results and make your knitting experience more enjoyable.
- Circular needles: The most important tool for magic loop knitting is a pair of circular needles with a long and flexible cable. The length of the cable will depend on the size of the project you are working on, but a cable length of at least 32 inches is recommended for most projects.
- Yarn: Choose yarn that is suitable for the project you have in mind. The weight and fiber content of the yarn will determine the finished look and feel of your project. Make sure to choose a yarn that is compatible with the needle size you will be using.
- Stitch markers: Stitch markers are used to mark the beginning of a round or any other important points in your pattern. They help you keep track of your progress and prevent mistakes. You can use simple plastic rings or decorative stitch markers, depending on your preference.
- Tapestry needle: A tapestry needle is used for weaving in loose ends and finishing your knitting project. It is helpful to have a tapestry needle with a large eye that can accommodate the thickness of your yarn.
In addition to these tools, it is also recommended to have a pair of scissors or yarn snips to cut your yarn, a row counter to keep track of your progress, and a crochet hook for any necessary adjustments or corrections.
By gathering these essential tools, you will be well-equipped to practice the magic loop knitting technique and create beautiful and seamless items.
Step 1: Creating the Magic Loop
The magic loop knitting technique is a great way to knit in the round using a long circular needle, especially when working on small circumference projects such as socks, sleeves, or hats. Here’s how you can create the magic loop:
- Start by casting on the required number of stitches onto the circular needle.
- Hold the needle with the cast-on stitches in your right hand, while the free end of the circular needle is in your left hand.
- Slide the stitches towards the center of the circular needle until they are evenly distributed.
- Find the midpoint of the stitches and fold the circular needle in half at that point.
- Hold the midpoint of the circular needle with your left thumb and middle finger.
- With your right hand, pull the free end of the circular needle through the stitches, creating a loop.
At this point, you should have a loop of stitches with half of the stitches on one side and the other half on the other side. This loop is known as the magic loop.
It’s important to ensure that the tension is even and not too tight or too loose on either side of the magic loop. This will help in creating an even fabric while knitting in the round.
Once you have created the magic loop, you can continue knitting in the round by working on one half of the stitches at a time, pulling the needles through as needed.
Step 2: Casting On Stitches
Once you have your magic loop set up, you’re ready to start casting on stitches. The casting on process creates the first row of stitches on your needle and is the foundation of your knitting project.
- Hold the needle with the magic loop in your dominant hand. Make sure the loop is at the back of your hand and the working yarn is coming from the back of the loop.
- With your non-dominant hand, make a slipknot by creating a loop with the working yarn. Insert the needle through the loop from back to front, and pull the yarn to tighten the loop around the needle. This slipknot will serve as your first cast-on stitch.
- With your dominant hand, hold the needle with the slipknot in a comfortable grip.
- Insert the needle into the loop of the slipknot, from front to back, creating a new stitch. This stitch is formed by the working yarn behind the loop and the slipknot loop on the needle.
- Pull the yarn through the slipknot loop, creating a new loop on the needle. This new loop is your second cast-on stitch.
- Repeat steps 4 and 5 until you have cast on the desired number of stitches for your project. Each time you create a new loop on the needle, that loop counts as one stitch.
- Continue casting on stitches until you are ready to start knitting your first row.
Remember to keep the tension of your stitches even and not too tight. This will make it easier to knit your first row and achieve a uniform appearance in your finished project.
Step 3: Knitting the First Round
Now that you have prepared your magic loop and casted on your stitches, it’s time to start knitting the first round.
- Make sure the working yarn is in the back of your work and the tail is on the left side.
- Insert your right-hand needle into the first stitch on the left-hand needle, from front to back, as if to knit.
- Wrap the working yarn around the right-hand needle from back to front.
- Pull the right-hand needle and the wrapped yarn through the stitch on the left-hand needle.
- Slip the stitch off the left-hand needle, and the knitted stitch will now be on the right-hand needle.
- Repeat steps 2-5 until you have knitted all the stitches on the left-hand needle.
- Rotate your work and repeat steps 2-6 for the remaining stitches on the left-hand needle.
Remember to keep the tension consistent as you knit each stitch. This will ensure an even and professional-looking fabric. Take your time and practice the motions until you feel comfortable with the magic loop knitting technique.
Step 4: Continuing the Magic Loop Technique
Once you have successfully completed the initial setup of the magic loop technique, you can continue working on your project using this method.
To continue knitting in the round using the magic loop technique, follow these steps:
- Slide the stitches from the left needle onto the cable so that the first half of the stitches are on one side and the second half are on the other side.
- Hold the cable with the stitches in your right hand and bring the working yarn to the back of the work.
- Take the right needle (formerly the left needle) with your left hand and insert it through the first stitch on the cable from front to back.
- With the working yarn in your right hand, knit the stitch as you would normally by wrapping the yarn around the right needle and pulling it through.
- Continue knitting all the stitches on the cable in the same way, working your way around the loop.
- Once you have finished knitting all the stitches, slide the stitches from the left needle onto the cable and repeat the process from step 1.
It is important to keep the tension even and avoid pulling the yarn too tight when knitting with the magic loop technique. This will ensure that your stitches are uniform and the fabric is not distorted.
By using the magic loop technique, you can knit smaller circumference projects such as socks, sleeves, or hats without the need for double-pointed needles. It offers a more seamless and efficient way of knitting in the round.
FAQ:
What is the magic loop knitting technique?
The magic loop knitting technique is a method used to knit small-circumference projects, such as socks, hats, and sleeves, using a long circular needle.
Why should I learn the magic loop knitting technique?
Learning the magic loop knitting technique allows you to knit small-circumference projects without the need for double-pointed needles. It is a versatile and handy method to have in your skill set.
How does the magic loop knitting technique work?
The magic loop knitting technique works by using a long circular needle and dividing your stitches into two halves. You then pull the cable of the needle to create a loop, which acts as a dividing line between the two halves of stitches. You then knit or purl each half separately, moving the loop along as you progress.
What materials do I need to use the magic loop knitting technique?
You will need a long circular needle with a flexible cable and a length suitable for your project, as well as yarn and any necessary notions such as stitch markers.
Is the magic loop knitting technique difficult to learn?
While the magic loop knitting technique may seem intimidating at first, with practice and patience, it can become a valuable skill in your knitting repertoire. Following a step-by-step guide and watching video tutorials can help you master the technique.
Can I use the magic loop knitting technique for any project?
The magic loop knitting technique can be used for most small-circumference projects, but it may not be suitable for very tiny items or projects with a large number of stitches.


