Knitting is a popular craft that allows you to create beautiful and unique garments and accessories. One of the key aspects of knitting is connecting yarn seamlessly, ensuring that there are no noticeable breaks in the finished product. Whether you are a beginner or an experienced knitter, knowing how to properly join yarn is essential for achieving professional-looking results.
To connect yarn in knitting, there are several methods you can use, depending on the project and your personal preference. One common method is the “weaving in” technique, where you thread the new yarn through the stitches of the old yarn to create a seamless transition. Another method is the “spit splicing” technique, which involves moistening the ends of the old and new yarn and rubbing them together to create a strong bond.
Before joining yarn, it is important to ensure that both ends are securely attached to your work. You can achieve this by leaving a long enough tail when casting on or by using a knot or other secure method to anchor the yarn. Once both ends are secure, you can begin the process of connecting the yarn and continue knitting seamlessly.
Pro Tip: When adding a new ball of yarn, it is best to join it at the beginning or end of a row, as this will make it less noticeable in the finished piece.
By following these step-by-step instructions and experimenting with different joining techniques, you can connect yarn in knitting with ease and achieve seamless results in your projects. With practice, you will become more comfortable with joining yarn and will be able to create beautiful knitted items that showcase your skills and creativity.
Choose the Right Yarn
Choosing the right yarn is essential to create a seamless and beautiful knitting project. Here are some factors to consider when selecting your yarn:
- Fiber content: Different fibers have different properties, so think about how you want your finished project to feel. Common fiber choices include wool, cotton, acrylic, silk, and blends.
- Weight: Yarn comes in various weights, ranging from laceweight to super bulky. The weight of the yarn will determine the thickness and drape of your finished project.
- Color: Consider the color palette you want to work with and how it will enhance your knitting project. Keep in mind that variegated or multi-colored yarns may hide stitch details.
- Texture: Some yarns have a smooth texture, while others have a fuzzy, bouclé, or tweed texture. Think about the desired effect for your project and choose a yarn that matches.
- Price: Yarn prices can vary greatly. Determine your budget and find a yarn that fits your financial constraints.
By taking these factors into consideration, you can choose the perfect yarn for your knitting project and ensure seamless and stunning results.
Prepare the Yarn
Before you connect the yarn in knitting, it’s important to prepare it properly. This will ensure that your knitting project comes out seamless and without any knots or tangles. Here are some steps to follow when preparing your yarn:
- Check the yarn label: Start by checking the label on your yarn. This will provide important information about the yarn weight, fiber content, and washing instructions. Make sure you have the right yarn for your project.
- Check for knots or tangles: Carefully examine the yarn for any knots or tangles. If you find any, gently untangle them before you start working with the yarn. This will help prevent any interruptions or frustrations while knitting.
- Wind the yarn into a ball: If your yarn comes in a hank or skein form, you’ll need to wind it into a ball before you can start knitting. Find a yarn winder or use a chair or your hand to wind the yarn into a neat ball. This will make it easier to work with and prevent tangling.
- Consider using a yarn bowl or bag: To keep your yarn clean and free from dust or pet hair, consider using a yarn bowl or bag. These tools can help hold the yarn while you knit and prevent it from rolling away or getting dirty.
By taking the time to prepare your yarn properly, you’ll set yourself up for success in your knitting project. You’ll have a smooth and seamless knitting experience, resulting in beautiful and professional-looking finished garments or accessories. So, don’t skip this important step and enjoy your knitting journey!
Make a Slip Knot
A slip knot is the first step in starting a knitting project. It’s a simple loop that can be easily adjusted and serves as the anchor for the yarn.
To make a slip knot, follow these steps:
- Hold the end of the yarn in your hand, leaving a tail of about 6 inches.
- With your other hand, create a loop with the yarn by crossing the working yarn over the tail.
- Pass the end of the yarn through the loop, creating a second loop.
- Hold the second loop with your fingers and gently pull the tail to tighten the knot.
Make sure the slip knot is snug but not too tight. You should be able to slide it along the needle easily.
A slip knot is used to attach the yarn to the knitting needle before you start casting on stitches. It’s important to have a secure and adjustable knot that won’t come undone while you’re working on your knitting project.
Join a New Yarn
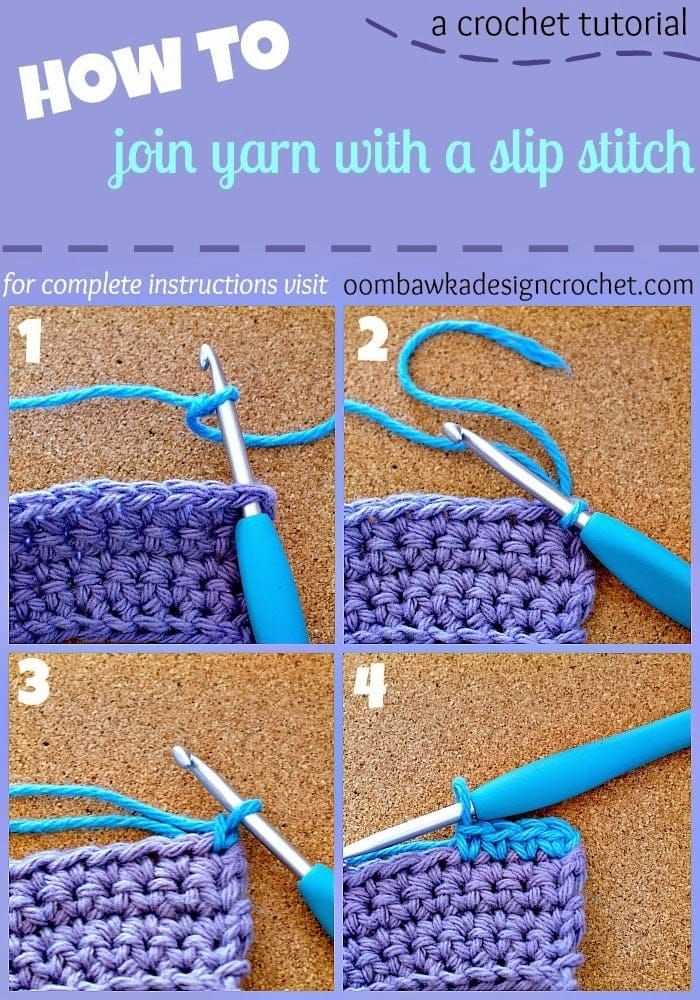
There are times in your knitting project when you will need to join a new yarn. This can happen when you run out of yarn, want to change colors, or if you need to switch to a different type of yarn. Here’s a step-by-step guide on how to join a new yarn seamlessly.
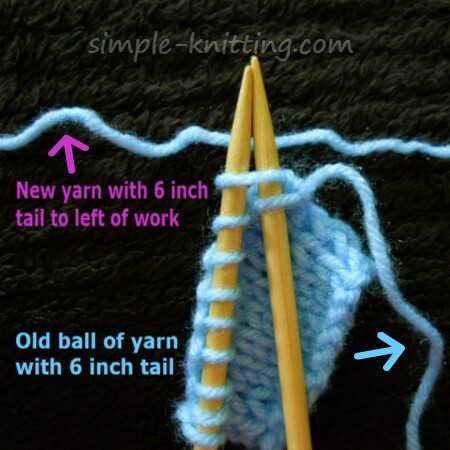
- Start by knitting with your current yarn until you have a few inches of yarn left. It’s important to leave a tail that is long enough to weave in later.
- Take your new yarn and make a slip knot. Leave a tail that is also long enough to weave in later.
- Insert the right-hand needle into the next stitch and knit as you normally would. However, instead of wrapping the yarn with the old yarn, wrap the needle with the new yarn.
- Continue knitting with the new yarn until the old yarn tail is completely gone. Be careful not to pull too tightly, as this can create tension issues.
- To secure the yarn, gently tug on the tail of the new yarn to tighten the stitch. This will anchor the new yarn and prevent it from unraveling.
- Continue knitting with the new yarn, following the pattern instructions or your design.
Once you have finished the project, you can weave in the ends of the old and new yarn to ensure everything is secure. Use a tapestry needle to thread the tails through the stitches on the wrong side of the fabric, being careful not to create any visible knots on the right side.
Now you know how to join a new yarn seamlessly in your knitting project. With this technique, you can easily change colors or switch yarns without any noticeable gaps or loose ends.
Weave in the Yarn Ends
Once you have finished knitting your project, you will need to weave in the yarn ends to secure them and give your project a clean, seamless finish. Here is a step-by-step guide on how to weave in the yarn ends:
- Thread the yarn end onto a tapestry needle: Cut the yarn, leaving a tail that is long enough to work with. Thread the yarn end onto a tapestry needle with a large eye that is suitable for the weight of the yarn.
- Weave the yarn end through the stitches: Start by inserting the tapestry needle under a few nearby stitches, going in the same direction as the knitting. Weave the yarn end through the stitches, following the path of the yarn already in the project. Avoid pulling the yarn too tightly, as this may cause puckering. Continue weaving for a few inches.
- Change direction: After weaving for a few inches, change direction and weave the yarn end back through the stitches in the opposite direction. This helps to secure the yarn end more effectively.
- Cut off the excess yarn: Once you have woven the yarn end back and forth through the stitches, trim off any excess yarn, leaving a small tail. Make sure not to cut the yarn too close to the project, as this may cause the yarn end to come loose over time.
Weaving in the yarn ends can be a time-consuming process, but it is an important step to ensure that your knitting project looks professional and stays together over time. Take the time to weave in all the yarn ends before finishing your project, and you will be left with a beautiful, seamless result.
Avoid Knots and Bulkiness
When connecting yarn in knitting, it is important to avoid knots and bulkiness to ensure seamless and professional-looking results. Follow these tips to achieve a smooth transition between yarns:
- 1. Choose a smooth yarn: Opt for a yarn with a smooth texture to minimize the chances of knots and bulkiness. Yarns with a high-quality ply will also ensure a seamless transition.
- 2. Leave a long tail: When starting a new yarn, leave a long tail of at least 6 inches. This will give you enough yarn to weave in the ends later, preventing any bulkiness at the join.
- 3. Look for the right moment: When changing yarns, wait until you reach the end of a row or a natural transition point in your pattern. This will make it easier to hide the join and avoid noticeable changes in the stitch pattern.
- 4. Avoid knots: Instead of tying a knot to secure the new yarn, use the method of weaving in the ends. Thread the new yarn through a yarn needle and weave it through the stitches of the old yarn for a few inches. This will create a secure join without any knots.
- 5. Alternate strands: If you need to change yarns in the middle of a row, you can alternate strands for a few stitches before completely switching to the new yarn. This will create a more gradual transition and minimize bulkiness.
- 6. Trim excess yarn: Once you have woven in the ends and secured the join, trim any excess yarn to further reduce bulkiness. Be careful not to cut the working yarn or any vital stitches.
By following these tips, you can avoid knots and bulkiness when connecting yarn in your knitting projects, resulting in seamless and professional-looking results.
Test for a Secure Connection
After you have connected your yarn, it is important to test the security of the connection to ensure that it will not come undone while you are knitting. Follow these steps to test the connection:
- Pull gently: Give a light tug on both ends of the yarn to test whether the connection holds. If it comes apart easily, you may need to rejoin the yarn with a stronger method or a tighter knot.
- Check for any loose strands: Examine the area where the yarn was connected for any loose strands or frayed edges. This can be an indication that the connection is not secure. Trim any loose strands and reinforce the connection if necessary.
- Test the connection with some tension: Gently pull on the connected yarn with more force to mimic the tension it will experience during knitting. This will help you determine if the connection is firm enough to withstand the pressure without coming undone.
- Knit a few test stitches: After testing the connection, it is a good idea to knit a few stitches to see if the yarn moves smoothly without any slipping or unraveling. If you notice any issues, rejoin the yarn or reinforce the connection before continuing with your project.
It is important to perform these tests to ensure a secure connection before you start working on your knitting project. This will help prevent any unexpected unraveling or loose yarn while you are knitting.
Enjoy Seamless Knitting
Knitting can be a therapeutic and fulfilling hobby, and achieving seamless results can enhance the satisfaction of your knitting projects. Follow these steps to enjoy seamless knitting:
- Choose the right yarn: Select a high-quality yarn that is suitable for your project. The texture, weight, and fiber content of the yarn can all affect the final outcome of your knitting.
- Prepare your needles: Make sure your knitting needles are in good condition. Smooth and well-maintained needles can help prevent snags and ensure an even stitch.
- Practice proper tension: Maintaining consistent tension throughout your knitting is crucial for achieving seamless results. Practice holding the yarn and adjusting the tension until you find a comfortable and consistent grip.
- Start with a slipknot: Begin your knitting with a slipknot, which will create a secure foundation for your stitches and prevent them from unraveling.
- Join in the round: If you are knitting in the round, such as for a hat or a seamless garment, make sure to join your stitches in a continuous loop. This will eliminate the seam and create a seamless appearance.
- Read your pattern carefully: Follow the instructions of your pattern closely to ensure you are creating the correct stitches and achieving the desired shape and size.
- Use stitch markers: Place stitch markers at key points in your knitting to help you keep track of increases, decreases, or any other specific instructions. This will help you maintain a uniform and seamless look.
- Block your finished piece: After completing your project, block your knitting to give it a professional finish. Blocking can help even out any irregularities and enhance the overall appearance of your work.
By following these steps and practicing patience and attention to detail, you can enjoy the process of seamless knitting and create beautiful, seamless garments and accessories.
FAQ:
What is the best way to connect yarn in knitting?
The best way to connect yarn in knitting is to use a method called “joining” or “splicing.” This involves weaving the new yarn into the existing stitches of your work, creating a seamless connection.
Is it possible to connect yarn without creating a visible seam?
Yes, it is possible to connect yarn in knitting without creating a visible seam. By using techniques such as joining or splicing, you can seamlessly connect the new yarn to your existing work, eliminating any visible seams or joins.
Are there any alternative methods to connect yarn in knitting?
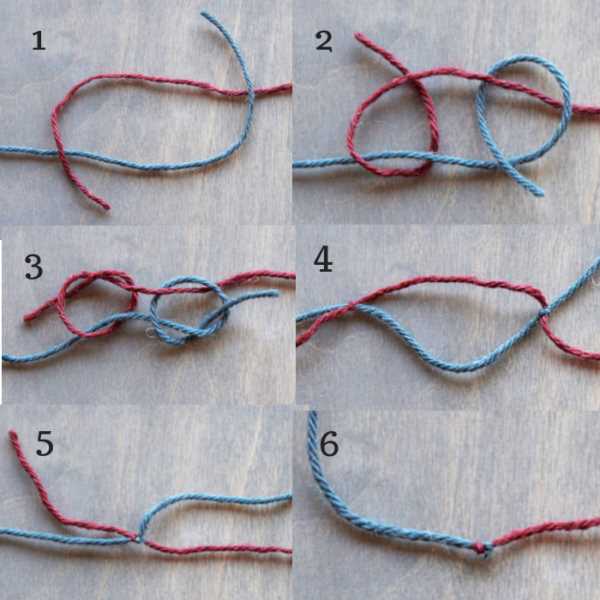
Yes, there are alternative methods to connect yarn in knitting. Some knitters prefer to tie a knot between the old and new yarn, while others choose to overlap the yarns and knit a few stitches with both held together. These methods can create a visible join, but they are quick and easy alternatives to more intricate techniques like joining or splicing.


