Knitting is a versatile craft that allows you to create beautiful garments and accessories. One of the first steps in knitting is casting on, which is the process of creating the foundation row of stitches on your needles. In this step-by-step guide, we will focus on casting on in knitting with two needles.
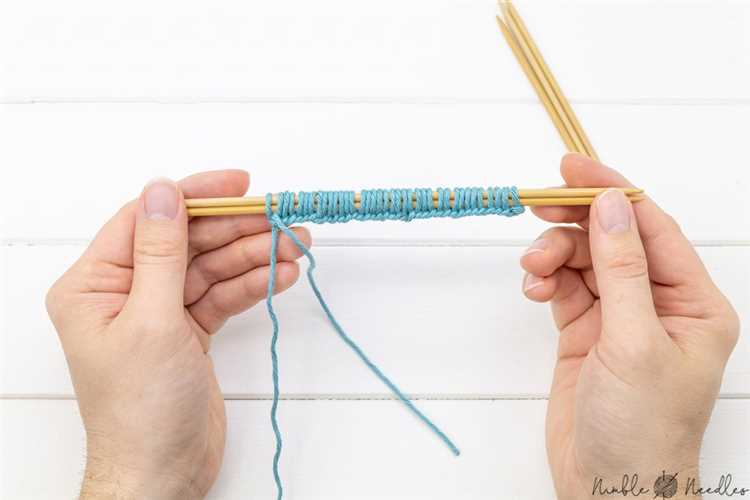
To begin, gather your materials: two knitting needles and a ball of yarn. Start by making a slipknot, which is a loop that will be used to secure the yarn to your first needle. Place the slipknot on your first needle, leaving a long tail of yarn.
Next, hold the needle with the slipknot in your right hand and the empty needle in your left hand. Insert the empty needle into the slipknot from left to right, going under the first needle. Position the empty needle so that it is parallel to the first needle.
Now, wrap the yarn around your left thumb and hold it taut with your other fingers. Bring the yarn over the top of the first needle and down in between both needles. Use your left thumb to push the yarn through the loop on the first needle, creating a new loop on the second needle.
Repeat this process until you have cast on the desired number of stitches. Remember to keep your tension even and avoid pulling the yarn too tightly or too loosely. Once you have finished casting on, you can begin knitting your first row.
Casting on in knitting with two needles is a fundamental skill that will set the foundation for your knitting projects. With practice and patience, you will master this technique and be on your way to creating beautiful knitted items.
Step 1: Prepare Your Materials
Before you can start casting on in knitting with two needles, you will need to gather the necessary materials:
- Two knitting needles of the appropriate size for your project
- Yarn in the color and weight specified in your pattern
- A pair of scissors to cut the yarn
- A tapestry needle for weaving in any loose ends
Make sure you have enough yarn for your project by checking the yarn requirements in your pattern or consulting a yarn calculator.
Choose knitting needles that are appropriate for your yarn weight. The needle size should match or be slightly larger than the recommended size on the yarn label or in your pattern.
It’s important to have a pair of sharp scissors to easily cut the yarn when needed during the casting on process.
A tapestry needle is useful for weaving in any loose ends after you finish your knitting project. This will ensure a neat and finished appearance.
Once you have gathered all your materials, you are ready to move on to the next step: learning how to hold the knitting needles and yarn.
Step 2: Make a slip knot
Now that you have your yarn and knitting needles ready, it’s time to make a slip knot. This is the first step in casting on and will create the first stitch on your needle.
To make a slip knot, follow these steps:
- Hold the end of the yarn in your hand, leaving a tail of at least 6 inches.
- Take the end of the yarn and cross it over the top of the tail, creating a loop.
- Bring the end of the yarn through the loop, creating a second loop.
- Place your knitting needle through the second loop.
- Pull on the tail of the yarn to tighten the slip knot around the knitting needle.
Now you have successfully made a slip knot! This knot will be used as the first stitch on your needle. Be sure to tighten the knot securely, but not too tightly as it needs to be able to slide along the needle as you cast on more stitches.
It is important to master the slip knot, as it is the foundation for most knitting projects. Practice making slip knots until you are comfortable with the process. Once you have mastered this step, you are ready to move on to the next step: casting on stitches onto your needle.
Step 3: Hold the needle
Once you have your yarn and needles ready, it’s time to hold the needle. Follow these steps:
- Take the needle in your dominant hand.
- Grasp the needle about 1/3 of the way down from the tip.
- Make sure the tip of the needle is pointing away from you.
- Hold the needle firmly but not too tightly.
By holding the needle correctly, you’ll have better control and be able to cast on the stitches more easily.
Step 4: Insert the needle
Now that you have your slip knot and the first stitch on your left-hand needle, it’s time to insert the right-hand needle into the stitch.
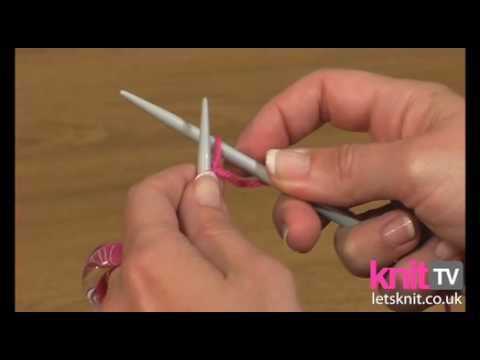
With your right hand, hold the needle with the slip knot and slide the tip of the right-hand needle into the front of the first stitch on the left-hand needle.
Make sure the right-hand needle goes through the center of the stitch, so it doesn’t split the yarn.
Once the right-hand needle is inserted, hold it parallel to the left-hand needle, with the tips pointing in the same direction.
Your knitting needles should now be crossed, with the left-hand needle in front of the right-hand needle.
This is the correct position to continue with the knitting process.
Step 5: Wrap the yarn
Once you have your first stitch on the needle, it’s time to wrap the yarn around your fingers to create the new stitches.
Hold the working yarn, which is attached to the ball of yarn, in your right hand and the needle with the first stitch in your left hand.
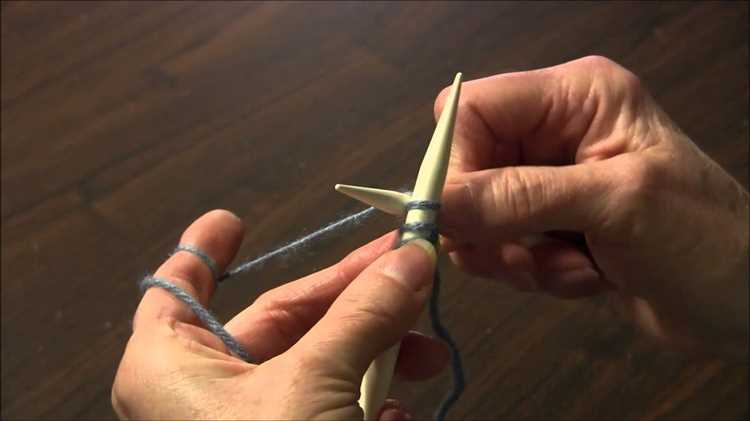
Take the working yarn and wrap it around your left thumb, from the back to the front.
Extend your thumb slightly to create a loop with the working yarn.
Now, take the needle with the first stitch and insert it into the loop from left to right, going over the top of the loop.
Hold the needle with the first stitch and use your right hand to pull the working yarn tight, securing the loop around the needle.
Repeat these steps for each stitch you want to cast on, wrapping the yarn around your thumb, inserting the needle into the loop, and pulling the yarn tight.
Continue casting on stitches until you have the desired number for your project.
Make sure to keep the tension of your yarn consistent as you wrap and secure each stitch.
Once you have finished casting on, you are ready to start knitting your first row!
Step 6: Pull the loop through
Now that you have made a loop with the working yarn, it’s time to pull it through the loop on your needle. Take the right needle and insert it through the loop on the left needle from front to back.
Hold onto the loop with your thumb and index finger to steady it, then use the right needle to catch the working yarn and pull it through the loop.
This creates a new loop on the right needle, while the previous loop remains on the left needle.
Repeat this process for the desired number of stitches, pulling the loop through each time until you have cast on all the stitches you need.
You have now successfully completed the cast on process using the two-needle method!
Step 7: Repeat the process
Once you have cast on the desired number of stitches, you can repeat the process to cast on more stitches if needed. Simply follow steps 1 to 6 again.
Continue repeating the process until you have cast on all the stitches required for your knitting project.
Remember to keep your tension consistent and to keep the stitches loose enough to easily slide the needle through.
If you make a mistake during the casting on process, you can undo the stitches and start again from step 1.
Practice casting on with two needles regularly to improve your skills and become more comfortable with the technique.
With practice, you will be able to cast on quickly and efficiently, setting yourself up for a successful knitting project.
FAQ:
What is casting on in knitting?
Casting on, also known as the foundation row, is the process of creating the very first stitches on the knitting needle before you start knitting.
Why is casting on in knitting important?
Casting on is important because it establishes the number of stitches and the width of your knitting project.
What are the different methods of casting on in knitting?
There are many different methods of casting on in knitting, such as the long-tail cast-on, the knitted cast-on, the cable cast-on, the backward loop cast-on, and more.
Can you explain the long-tail cast-on method?
The long-tail cast-on method is a versatile and commonly used method. It involves using a long tail of yarn and two knitting needles to create the first row of stitches.
How do you do the knitted cast-on method?
The knitted cast-on method is a simple and easy method. You start by making a slip knot, then insert the right needle into the loop, and knit one stitch. Repeat this process until you have the desired number of stitches.
What is the easiest method of casting on in knitting for beginners?
The knitted cast-on method is often considered the easiest method for beginners because it only requires basic knitting skills and is quick to learn.
Are there any tips for casting on in knitting?
Yes, here are a few tips for casting on in knitting: make sure to leave a long enough tail of yarn, practice maintaining an even tension, and try different methods to find the one that works best for you.


