Knitting is a relaxing and creative hobby that allows you to create beautiful and cozy items. If you’ve always wanted to learn how to knit, one of the first things you’ll need to master is the cast on technique. The cast on is the foundation of your knitting project, and it determines the number of stitches you’ll have on your needle.
In this step-by-step guide, we’ll walk you through the process of casting on in knitting. Whether you’re a complete beginner or a seasoned knitter looking for a refresher, this guide will help you start your knitting journey.
To begin, you’ll need a pair of knitting needles and a ball of yarn. It’s best to start with medium-weight yarn and a pair of size 8 or 9 knitting needles, as they are easier to handle for beginners.
There are several different cast on methods to choose from, but we’ll focus on the long tail cast on, which is widely used and suitable for most knitting projects. So, grab your needles and yarn, and let’s get started!
Choosing the Right Yarn and Needles
Choosing the right yarn and needles is an essential step in starting your knitting project. The type of yarn and size of needles you choose will determine the look and feel of your finished piece. Here are some tips to help you make the best choices:
- Consider the project: Think about the type of project you want to knit. Is it a cozy sweater, a delicate lace shawl, or a sturdy blanket? Different projects require different types of yarn and needles. For example, a sweater may require a worsted-weight yarn and medium-sized needles, while a lace shawl may need a finer yarn and smaller needles.
- Think about the fiber: Yarn comes in a variety of fibers, such as wool, cotton, acrylic, and blends. Each fiber has its own characteristics and properties. For example, wool is warm and elastic, while cotton is cool and breathable. Consider the qualities you want in your finished piece and choose a fiber that best suits your needs.
- Check the yarn label: The yarn label provides valuable information about the yarn, such as its weight, gauge, and recommended needle size. Pay attention to these details to ensure that you select the right yarn for your project. If you’re unsure, ask for help at your local yarn store or check online resources.
- Consider your knitting style: Your knitting style may also influence your yarn and needle choice. If you’re a tight knitter, you may need to use larger needles to achieve the recommended gauge. Conversely, if you’re a loose knitter, you may need smaller needles. Experimentation and practice will help you find the right combination for your knitting style.
- Experiment and have fun: Knitting is a creative and personal craft, so don’t be afraid to experiment and have fun with different yarns and needle sizes. Try different fibers, textures, and colors to create unique and beautiful pieces. Enjoy the process and embrace the learning experience.
In summary, choosing the right yarn and needles is crucial for a successful knitting project. Consider the type of project, fiber content, yarn label information, knitting style, and personal preferences. With these tips in mind, you’ll be able to select the perfect yarn and needles for your next knitting adventure.
Understanding the Basic Cast On Techniques
When beginning a knitting project, the first step is to cast on, which is the process of creating the loops on your knitting needle. There are several different cast on techniques that you can use, each with its own advantages and uses.
1. Long-Tail Cast On
The long-tail cast on is one of the most commonly used cast on techniques. It creates a neat and stretchy edge, making it suitable for a wide range of projects. To perform this cast on, you will need to estimate the length of yarn needed for the cast on and leave a long tail. It can be a bit tricky to get the tension right, but with practice, it becomes easier.
2. Knitted Cast On
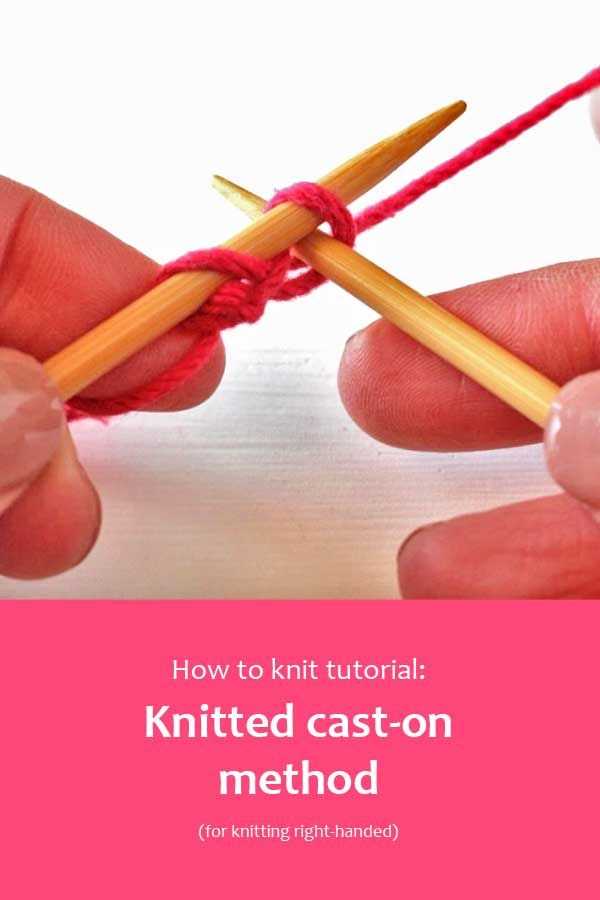
The knitted cast on is another popular technique that is easy to learn and provides a firm edge. It is similar to the knit stitch, making it a good choice for beginners. This cast on is worked by alternating between knitting and casting on stitches, creating a row of stitches as you go.
3. Cable Cast On
The cable cast on is often used for projects that require a tighter and more structured edge. It is ideal for ribbing or projects that need a defined edge. This cast on method creates a row of stitches that resemble a cable and provides a sturdy foundation.
4. Provisional Cast On
The provisional cast on is used when you need to cast on stitches that will later be joined to another piece of knitting. It creates a temporary cast on that can be easily unravelled when needed. This technique is commonly used for projects that require a seamless finish or for creating temporary stitches that will be picked up later.
5. Tubular Cast On
The tubular cast on is a more advanced technique that creates a neat and elastic edge, making it perfect for projects that need a stretchy and professional finish. It mimics the appearance of a knitted rib, providing a seamless transition between the cast on edge and the rest of the knitting. This cast on requires some extra steps and practice to master.
Each cast on technique has its own advantages and is best suited for specific projects. Experiment with different techniques to find the one that works best for your project and knitting style. With practice and patience, you will become more comfortable with casting on and be able to tackle a wider range of knitting projects.
Long-Tail Cast On: Step-by-Step Instructions
The long-tail cast on is a versatile method of starting a knitting project that creates a neat and elastic edge. It’s a great technique to learn for beginners as well as experienced knitters. Here’s a step-by-step guide on how to do the long-tail cast on:
- Start by estimating how much yarn you’ll need for your cast on. As a general rule of thumb, you’ll need approximately one inch of yarn per stitch. Measure out a length of yarn that is about three times the width of your project, then add an extra tail length. This extra length will be used to create the stitches.
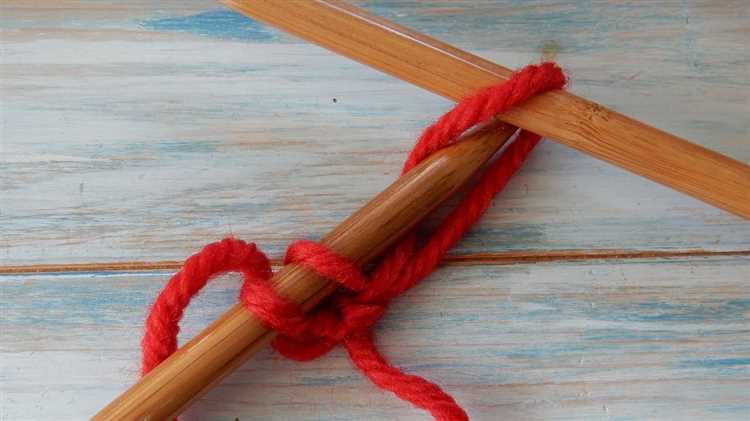
- Make a slip knot at the end of the yarn, leaving a tail of about six inches.
- Hold the slip knot on your needle with your right hand.
- With your left hand, hold the working yarn (the longer end) and the tail yarn (the shorter end).
- Using your thumb and index finger, create a V-shape with the tail yarn by lifting it up and over the working yarn.
- Insert the needle through the V-shape from left to right, going under the working yarn and over the tail yarn.
- Bring the needle back down, pulling the tail yarn through the V-shape, creating a loop on the needle. This loop will be your first cast on stitch.
- Tighten the loop slightly, but not too tight, as you want your cast on edge to be elastic.
- Repeat steps 5-8 until you have cast on the desired number of stitches.
- Once you have cast on all your stitches, you can start your knitting project as usual.
The long-tail cast on may seem a bit tricky at first, but with practice, it will become a smooth and efficient technique. It’s a versatile cast on that can be used for a wide range of knitting projects. Give it a try and see how it enhances the start of your knitting projects!
Knitting-on Cast On: Step-by-Step Instructions
The knitting-on cast on method is a versatile and easy way to start your knitting project. It creates a stretchy edge and is perfect for adding stitches to an existing piece of knitting. Follow these step-by-step instructions to learn how to cast on using the knitting-on method:
- Step 1: Hold the knitting needle with the stitches in your left hand. Insert the right needle tip into the first stitch on the left needle as if to knit.
- Step 2: Take the working yarn and wrap it around the right needle counterclockwise, just like in a normal knit stitch.
- Step 3: Use the right needle tip to draw the new loop through the old stitch, creating a new stitch on the right needle.
- Step 4: Slip the new stitch back onto the left needle, making sure the left needle is still holding all the original stitches.
- Step 5: Repeat steps 1-4 for the desired number of stitches. Each time you create a new stitch, slip it back onto the left needle.
- Step 6: Once you have cast on all the desired stitches, you can continue knitting with the newly created stitches.
It’s important to note that the knitting-on cast on method uses the knit stitch to create new stitches. If you want to add stitches using a different stitch pattern, you can use a different cast on method like the cable cast on or the long tail cast on.
By following these step-by-step instructions, you’ll be able to successfully cast on using the knitting-on method and start your knitting projects with ease. Happy knitting!
Tubular Cast On: Step-by-Step Instructions
The tubular cast on is a technique used in knitting to create a stretchy and professional-looking edge. It is often used for projects like hats, cuffs, and necklines. Here is a step-by-step guide on how to do a tubular cast on:
- Step 1: Start by casting on half the number of stitches you need using waste yarn. This will be the foundation for your tubular cast on. Use a contrasting color to make it easier to see.
- Step 2: Next, knit one row with your main color yarn.
- Step 3: Turn your work and knit across the row with your main color yarn, slipping the first stitch purlwise.
- Step 4: Repeat Step 3 for a total of four rows.
- Step 5: On the fifth row, knit the first stitch, then slip the next stitch purlwise with the yarn in front. Repeat this pattern across the row, ending with a knit stitch.
- Step 6: Continue working in this pattern, slipping the first stitch of each row and knitting the rest until you have the desired number of stitches.
- Step 7: Once you have the desired number of stitches, carefully unravel the waste yarn from the cast on edge.
- Step 8: Your tubular cast on is complete! You can now continue working on your project as usual.
With a tubular cast-on, you will have a professional-looking edge that is stretchy and adaptable to different projects. Practice this technique to improve your knitting skills and create beautiful, finished pieces.
Cable Cast On: Step-by-Step Instructions
The cable cast on is a popular method used to add stitches to your knitting project. It creates a neat and firm edge, making it a great choice for the beginning of a project or when you need to add stitches in the middle of your work. Here’s a step-by-step guide on how to do the cable cast on.
-
Start by making a slipknot and place it on the left-hand needle. This slipknot counts as the first stitch.
-
Insert the right-hand needle into the slipknot from the front to the back and hold it behind the left-hand needle.
-
Wrap the working yarn around the right-hand needle counterclockwise. This creates a loop around the right-hand needle.
-
Pull the loop through the slipknot, creating a new stitch on the right-hand needle. Keep the loop on the right-hand needle.
-
Repeat steps 2-4 for the desired number of stitches. Make sure to keep the tension even and not too tight or loose.
Once you’ve completed the cable cast on, you can continue with your knitting project using the newly added stitches. The cable cast on creates a firm and neat edge that works well for a variety of knitting projects.
Backward Loop Cast On: Step-by-Step Instructions
The backward loop cast on is one of the simplest methods to start a knitting project. It creates a row of loops that can easily be knit into stitches. Follow these step-by-step instructions to learn how to do a backward loop cast on.
- Begin with a slip knot. To make a slip knot, create a loop with your yarn, bringing the working end through the loop to secure it.
- Hold the slip knot on your right needle with your right hand, and hold the working end of the yarn in your left hand.
- With your left hand, use your thumb and middle finger to create a loop in the working end of the yarn.
- Insert your right needle through the loop on your left thumb from front to back.
- Bring the working end of the yarn over the top of the right needle, creating a new loop.
- Pull the new loop through the loop on your left thumb, creating a stitch on your right needle.
- Repeat steps 3 to 6 until you have cast on the desired number of stitches.
- Once you have cast on all the stitches, you can begin knitting the first row.
Remember to keep the tension of the cast on stitches even, neither too tight nor too loose. Practice this method to become comfortable with it, as it is a versatile cast on that can be used in various knitting projects.
Tips and Common Mistakes to Avoid
When learning how to cast on in knitting, it’s important to keep these tips in mind to ensure a successful and smooth start to your project:
- Choose the right cast-on method: There are several different cast-on methods to choose from, each with its own advantages and uses. Take the time to research and practice different methods to find the one that works best for your project.
- Practice tension: Maintaining consistent tension in your yarn is crucial for an even and professional-looking cast-on edge. Avoid pulling the yarn too tightly or leaving it too loose.
- Use the right needle size: The size of your knitting needles can greatly affect the outcome of your cast-on. Be sure to choose the appropriate size for your project to achieve the desired results.
- Count your stitches: It’s easy to lose track of the number of stitches you’ve cast on, especially when working with a large number. Use stitch markers or place a piece of scrap yarn every ten stitches to help keep count.
- Avoid twisting your stitches: Ensure that each stitch is properly oriented on your needle before proceeding to the next one. Twisted stitches can lead to a distorted and uneven edge.
- Practice and experiment: Casting on can be challenging at first, but practice makes perfect. Don’t be afraid to experiment with different techniques and find what works best for you.
While learning how to cast on, it’s common to make mistakes. Here are some common pitfalls to watch out for:
- Forgetting to leave an adequate tail: When casting on, it’s important to leave a long enough tail to weave in later. For most projects, a tail that is at least 6 inches (15 cm) long should suffice.
- Miscounting stitches: Accidentally adding or skipping stitches can lead to frustration and a wonky edge. Take your time to count your stitches after each row to ensure accuracy.
- Rushing the process: Casting on requires attention to detail and precision. Rushing through the process can result in sloppy edges and an uneven start to your knitting project.
- Not practicing enough: Like any skill, casting on takes practice. Don’t be discouraged if your first attempts don’t turn out perfectly. Keep practicing, and with time, your technique will improve.
Avoiding these common mistakes and following these tips will help you achieve neat and professional-looking cast-on edges in your knitting projects. Happy knitting!
FAQ:
What is casting on in knitting?
Casting on in knitting is the process of creating the first row of stitches on your knitting needle. It is the foundation of your knitting project and sets the stage for all subsequent knitting.
Why is it important to cast on correctly?
It is important to cast on correctly because the cast on edge determines the stretchiness and stability of your knitted fabric. If the cast on edge is too tight, it can make it difficult to work subsequent rows and can distort the shape of your project. If it is too loose, your project may end up looking messy and not hold its shape well.
What are some popular methods of casting on in knitting?
Some popular methods of casting on in knitting include the long tail cast on, the knit cast on, the cable cast on, and the provisional cast on. Each method has its own advantages and is suited for specific knitting projects.
Can you cast on using circular needles?
Yes, you can cast on using circular needles. The process is the same as casting on with straight needles. You can use circular needles for both flat knitting and knitting in the round.


