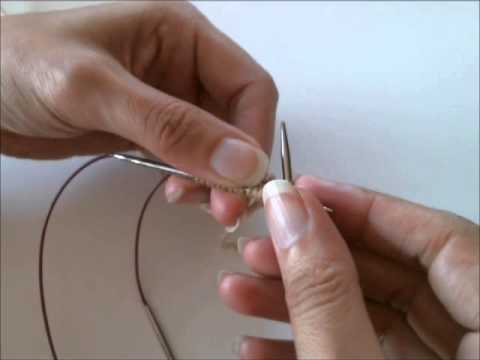
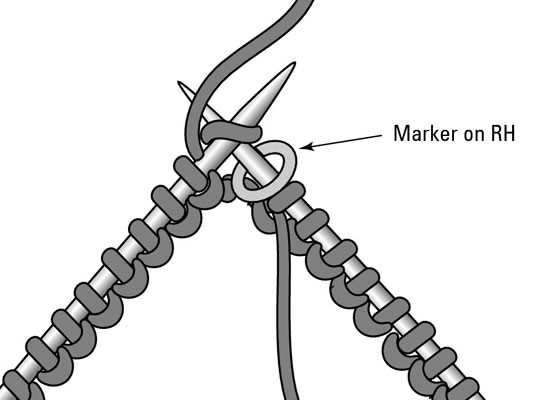
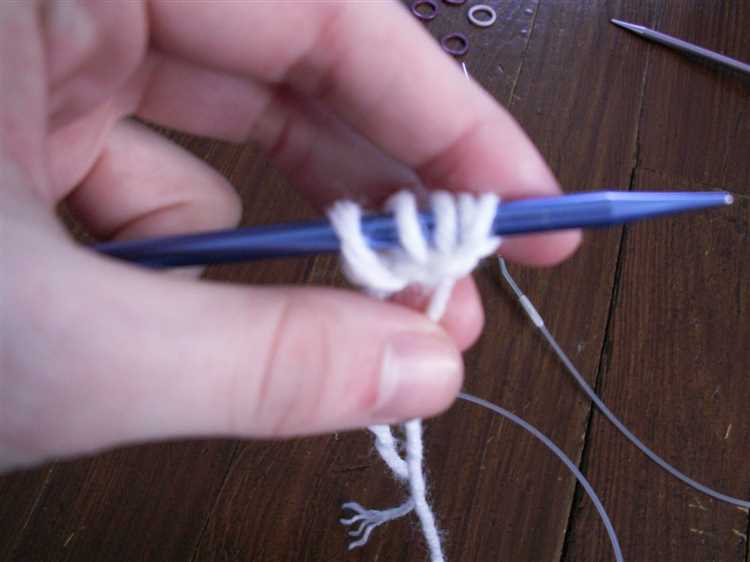
If you’re new to knitting or have only worked with straight needles, learning how to cast on with circular knitting needles can seem intimidating. However, once you master this technique, you’ll open up a whole new world of knitting possibilities. Whether you’re looking to knit hats, cowls, or even sweaters, circular knitting needles are a versatile tool that every knitter should know how to use.
In this step-by-step guide, we will walk you through the process of casting on with circular knitting needles. We’ll explain the differences between circular needles and straight needles, and why circular needles are preferred for certain projects. By the end of this guide, you’ll be ready to start your first circular knitting project and expand your knitting skills.
Before we dive into the casting on process, it’s important to understand the anatomy of a circular knitting needle. Unlike straight needles, circular needles have two needle tips connected by a flexible cord. The cord length can vary depending on the project, but for beginners, a shorter cord length may be easier to work with. The needle tips can be made of metal, wood, or plastic, and typically have a point at one end and a stopper at the other to prevent stitches from sliding off.
So, whether you’re a beginner knitter or just looking to expand your skills, stay tuned for our step-by-step guide on how to cast on with circular knitting needles. Soon enough, you’ll be ready to tackle all sorts of circular knitting projects and create beautiful garments and accessories.
Choosing the Right Circular Knitting Needles
When it comes to knitting in the round, choosing the right circular knitting needles is essential for a successful and enjoyable knitting experience. Here are some factors to consider when selecting your circular knitting needles:
- Needle Length: Circular knitting needles come in various lengths, typically ranging from 16 inches to 60 inches. The length you choose depends on the circumference of your project. For smaller projects like hats or sleeves, shorter circular needles are ideal, while longer needles are better suited for larger projects like blankets or shawls.
- Needle Material: Circular knitting needles can be made from a variety of materials, including metal, wood, and plastic. Each material has its advantages and disadvantages. Metal needles are durable and provide smooth stitches, but they can be slippery. Wood needles offer good grip, making them suitable for slippery yarns, but they may not be as durable. Plastic needles are lightweight and affordable, but they may not be as smooth as metal or wood.
- Needle Size: Circular knitting needles come in various sizes, which are measured in millimeters (mm). The size you choose depends on the weight of your yarn and the gauge you want to achieve. It’s important to match the needle size to the recommended gauge provided in your knitting pattern.
- Join: The join refers to the connection between the needle tips and the cable. Look for circular needles with a smooth and seamless join to ensure stitches glide easily across the needle.
- Cable Flexibility: The flexibility of the cable on circular knitting needles is important, especially when working with larger projects. Look for cables that are pliable and do not kink or twist easily, as this can affect your knitting experience.
- Interchangeable or Fixed: Circular knitting needles come in both interchangeable and fixed styles. Interchangeable needles allow you to change the needle tips and cable length, offering versatility for different projects. Fixed circular needles have the needle tips permanently attached to the cable, making them more suitable for projects with a specific needle length.
By considering these factors, you can choose the right circular knitting needles for your project and enjoy a comfortable and enjoyable knitting experience.
Gathering the Necessary Materials
Before you can start casting on circular knitting needles, you’ll need to gather a few materials. Here’s what you’ll need:
- Circular knitting needles: These are needles that are connected by a cable, creating a loop. Make sure to choose the appropriate size needles for your project.
- Yarn: Select a yarn that is suitable for your project. Consider the weight and fiber content of the yarn, as well as the color or pattern.
- Tapestry needle: This needle will be used for weaving in loose ends once your project is complete.
- Scissors: You’ll need a pair of scissors to cut the yarn at various points during your project.
- Stitch markers (optional): If your pattern calls for it, stitch markers can be helpful for marking specific points in your knitting.
Having these materials ready before you start will make the casting-on process go smoothly.
Preparing the Yarn
Before you start casting on your circular knitting needles, it’s important to prepare your yarn. Follow these steps to ensure you have the right amount and that it’s ready to use:
- Choose your yarn: Select a yarn that is suitable for your project. Consider the weight, fiber content, and color of the yarn.
- Check the yarn label: Look at the yarn label for information on the recommended needle size, gauge, and yardage. This will help you determine how much yarn you’ll need.
- Estimate the yardage: If the yarn label doesn’t specify the yardage, you can estimate it by weighing the yarn and using the average weight per yard of that particular type of yarn.
- Wind the yarn: If your yarn is in a skein or hank, you’ll need to wind it into a ball or cake. You can do this manually or by using a yarn swift and a ball winder.
- Find the yarn end: Once your yarn is wound, locate the end of the yarn. This will be the starting point for casting on your circular knitting needles.
By preparing your yarn before casting on, you’ll ensure that you have the right amount of yarn and that it’s ready to use. This will make the casting on process much smoother and more enjoyable.
Casting On with a Slip Knot
In circular knitting, casting on is the first step to create the foundation row of stitches on your circular knitting needles. One common method to cast on is using a slip knot. Here’s how to cast on with a slip knot:
- Start by making a slip knot. To do this, create a loop with the working yarn, leaving a tail of a few inches.
- Insert the knitting needle through the loop from front to back. Hold the tail end of the slip knot with your thumb and index finger.
- With your other hand, grab the working yarn and move it over the knitting needle, forming a loop.
- Insert the knitting needle into the loop, and gently pull the working yarn to tighten the loop around the knitting needle.
Repeat these steps until you have the desired number of stitches on your circular knitting needle.
Using a slip knot for casting on allows you to adjust the tension of each stitch easily. It also creates a secure starting point for your knitting project. Once you have casted on with a slip knot, you can start knitting in the round.
Starting the First Round
Once you have successfully cast on your circular knitting needles, you are ready to start the first round of your project.
1. Hold the needles: Hold the needles in your hands, making sure that the working yarn is attached to the needle in your right hand.
2. Position the needles: Position the needles so that the needle in your right hand is on top and the needle in your left hand is on the bottom.
3. Slide the stitches: With your right hand, slide the stitches from the right needle onto the cable of the circular needle. Make sure that the stitches are not twisted and that they are all facing the same direction.
4. Begin knitting: Using the needle in your right hand, insert it into the first stitch on the left needle, bringing the working yarn behind the needles. Wrap the working yarn around the needle in a counterclockwise motion.
5. Pull through: Pull the wrapped yarn through the stitch, creating a new stitch on the right needle. Slide the original stitch off the left needle.
6. Repeat: Continue knitting in this manner, working all the stitches from the left needle onto the right needle. As you knit, the stitches will move from the cable onto the needle in your right hand.
7. Join in the round: Once you have worked all the stitches onto the right needle, you have completed the first round. To join in the round, slide the stitches from the right needle back onto the left needle, making sure not to twist the stitches.
8. Slip the first stitch: To create a smooth edge, slip the first stitch from the left needle onto the right needle without working it. This stitch is then slipped at the beginning of each subsequent round.
9. Continue knitting in the round: With your stitches back on the left needle, you are now ready to start the second round. Repeat steps 4-8 to continue knitting in the round.
By following these steps, you can successfully start the first round of your knitting project on circular needles. Happy knitting!
Joining the Round
Once you have cast on the required number of stitches for your project, you are ready to join the round and begin knitting in the round. Here are the steps to join the round:
- Step 1: Hold your circular needles with the cast on stitches in your left hand and the working yarn in your right hand.
- Step 2: Insert your right needle into the first stitch on your left needle, from front to back.
- Step 3: Bring the working yarn over the right needle, from back to front, creating a loop.
- Step 4: Pull the loop through the stitch, bringing it onto the right needle.
- Step 5: Slip the first stitch from the right needle back onto the left needle. This will help to prevent any gaps when joining the round.
- Step 6: Pull the working yarn tight to close the gap between the first and last stitches.
Once you have completed these steps, you have successfully joined the round and can begin knitting in the round. It is important to note that when knitting in the round, you will be working on the right side of the fabric at all times.
Joining the round can be a tricky technique to master at first, but with practice, it will become easier. Remember to take your time and be patient with yourself as you learn.
Continuing the Knitting Process
After you have cast on your stitches onto the circular knitting needles, you are ready to continue with the knitting process. Here are the steps to follow:
- Hold the circular knitting needles with the cast on stitches in your right hand.
- Using your left hand, insert the tip of the left circular needle into the first stitch on the right circular needle, from left to right.
- Hold both circular needles together with your left hand.
- With your right hand, wrap the working yarn (the yarn attached to the ball or skein) around the tip of the right needle.
- Using the right needle, draw the wrapped yarn through the first stitch, creating a new loop on the right circular needle.
- Slip the new loop onto the left circular needle.
- Repeat steps 2-6 for each stitch until all the stitches have been transferred from the right circular needle to the left circular needle.
- Now, the right needle should be empty, and all the stitches should be on the left needle.
At this point, you can begin the knitting pattern or stitch of your choice, following the instructions specific to your project. You will continue working in the round, using the circular knitting needles to create a seamless knitting fabric.
Remember to always keep your tension even and avoid pulling too tightly on the yarn as you knit. This will help ensure that your stitches are consistent and that your knitting fabric has a nice drape.
With practice and patience, you will become comfortable with knitting on circular needles and be able to create a wide range of projects, from hats and socks to sweaters and blankets.
Happy knitting!
Finishing Off and Securing the Stitches
Once you have finished knitting your project on circular knitting needles, it’s important to properly finish off and secure the stitches to prevent them from unraveling. Here are some steps to follow:
- Bind off: To bind off, knit the first two stitches onto the right needle. Then, use the left needle to lift the first stitch you knitted over the second stitch and off the needle. Repeat this process until you have one stitch remaining on the right needle. Cut the yarn, leaving a long tail, and pull it through the final stitch to secure it.
- Weave in ends: Use a tapestry needle to weave in the loose ends of yarn from casting on and binding off. Thread the yarn through the needle and insert it into the knitted fabric near the edge. Weave the needle in and out of the stitches, going back and forth to secure the end.
- Block the project: Blocking is an important step in finishing your knitted project. It helps to even out the stitches and can make the final result look more professional. Follow the blocking instructions specific to your yarn and project.
- Secure any additional details: If your project has buttons, zippers, or other types of closures or embellishments, make sure they are properly sewn on or attached. This will ensure that your project is fully finished and ready to use or wear.
By following these steps and taking the time to properly finish off and secure your stitches, you can ensure that your knitted project will look great and last for years to come.
FAQ:
What are circular knitting needles used for?
Circular knitting needles are used for knitting projects that require a round or tubular shape, such as hats, socks, and seamless garments.
Why would I choose circular knitting needles over straight needles?
Circular knitting needles allow you to knit larger projects in a smaller space, as the project wraps around the cables. They also help distribute the weight of the project more evenly, making it more comfortable to knit. Additionally, circular needles eliminate the need for seaming in many projects, as they can be used to knit in the round.
What materials are circular knitting needles available in?
Circular knitting needles are available in a variety of materials, including metal, bamboo, wood, and plastic. Each material has its own advantages and disadvantages, such as durability, flexibility, and smoothness. It’s a personal preference as to which material you prefer to work with.
Can I use circular knitting needles for flat projects?
Yes, circular knitting needles can be used for both flat and round projects. For flat projects, such as scarves or blankets, you would simply knit back and forth on the circular needles as you would with straight needles. The circular needles help hold a large number of stitches and make it easier to manage the weight of the project.
Are there different sizes of circular knitting needles?
Yes, circular knitting needles come in a range of sizes, just like straight needles. The size of the needles determines the gauge or tension of the finished project. It’s important to choose the correct needle size to achieve the desired gauge and ensure that your project turns out the right size.


