Knitting is a popular hobby that allows you to create handmade garments and accessories. However, after completing a knitting project, the final step to achieving a professional finish is blocking. Blocking is the process of shaping and setting your knitted piece to ensure it reaches its full potential.
Blocking is especially important for projects made with natural fibers like wool or alpaca, as they have a tendency to stretch or shrink. By blocking your knitting, you can control the size and shape of your finished piece, resulting in a more polished and professional look.
In this step-by-step guide, we will walk you through the blocking process, from preparing your knitted piece to drying it to perfection. We will cover different blocking methods, including wet blocking and steam blocking, so you can choose the one that suits your needs and materials.
Whether you’re a beginner or an experienced knitter, mastering the art of blocking will elevate your knitting projects to a whole new level. So grab your knitting needles and get ready to learn how to block knitting like a pro!
Increase Durability with Proper Blocking
Blocking is an essential step in the knitting process that not only ensures your knitwear looks its best, but also increases its durability. By properly blocking your knitted items, you can prevent excessive stretching, minimize wear and tear, and prolong the lifespan of your knits. Here are some tips on how to block your knitting for maximum durability:
- Use the right materials: When blocking your knitting, it’s important to use the right materials to avoid damaging your knits. Opt for blocking mats or towels that won’t transfer color onto your items, rust-resistant pins, and a proper blocking board or surface that provides enough space for your knits to lay flat.
- Prep your knits: Before you start blocking, make sure your knitted items are clean and free from any stains or dirt. Hand wash or machine wash them according to the yarn and care instructions to remove any oils or residues that might impact the blocking process.
- Pin it correctly: Properly pinning your knits is crucial for achieving the desired shape and preventing unnecessary stretching. Use rust-resistant pins to secure your item to the blocking surface, making sure to distribute them evenly and follow the pattern’s measurements or your desired dimensions. Avoid pulling or tugging on your knits too tightly, as this can lead to distortion.
- Allow ample drying time: Once your knits are blocked, allow them to dry completely before removing the pins. Depending on the fiber and humidity level, this may take anywhere from a few hours to a couple of days. Avoid rushing the drying process, as removing the pins too soon can cause your knits to lose their shape.
- Store your blocked knits properly: After blocking, store your knits in a way that preserves their shape and prevents unnecessary stretching. Fold them neatly, avoiding any sharp creases, or hang them using proper hangers or clips to maintain their shape. Keep them away from direct sunlight and excessive humidity to prevent color fading and mildew.
By following these steps and properly blocking your knitting, you can increase the durability of your knitwear and enjoy your handmade creations for years to come.
Choose the Right Tools and Materials
When it comes to blocking your knitting, having the right tools and materials can make all the difference. Here are some essential items you’ll need:
- Pins: Choose rustproof pins with a smooth finish. T-pins are a popular choice as they provide a secure hold without damaging the fabric.
- Blocking mats: Invest in foam blocking mats that are moisture-resistant. These mats provide a sturdy surface for pinning your knitting.
- Spray bottle: Fill a spray bottle with water to dampen your knitting during blocking. A fine mist setting is ideal for evenly distributing moisture.
- Tape measure: Use a tape measure to ensure your knitting is blocked to the correct measurements. This will help you achieve the desired fit and shape.
- Towels: Have a few clean towels on hand to blot excess moisture from your knitting. This will help speed up the drying process.
- Blocking wires: Use blocking wires to create straight edges and smooth curves. They are particularly useful for lace knitting or garments with intricate stitch patterns.
- Pins and clips: In addition to T-pins, have some blocking clips or clothespins available. These can be used to secure smaller, delicate pieces or to hold seams in place.
In addition to these tools, it’s important to use the right materials for blocking:
- Wool wash/pH-neutral detergent: Choose a gentle wool wash or pH-neutral detergent to wash your knitting before blocking. Avoid using harsh soaps or fabric softeners that can damage the fibers.
- Clean water: Use clean, lukewarm water for blocking. Avoid hot water or water with additives, as they can affect the color and texture of your knitting.
By having the right tools and materials on hand, you’ll be well-equipped to block your knitting effectively and achieve beautifully shaped finished pieces.
Prepare Your Knitting for Blocking
Blocking is an essential step in knitting that helps to shape and finish your project. Before you start blocking, there are a few steps you should take to prepare your knitting:
- Weave in the ends: Before blocking your knitting, make sure to weave in all loose ends. This will give your finished project a neater appearance.
- Wash your knitting: Depending on the type of fiber you used, it may be necessary to wash your knitting before blocking. This will remove any dirt or oils and help the fibers relax and shape more easily.
- Test for color bleeding: If you are working with multiple colors or dyed yarn, it’s important to test for color bleeding. Wet a small section of your knitting and press it between two paper towels. If any color transfers to the paper towels, you will need to take extra precautions when blocking to prevent colors from bleeding or running together.
- Measure your gauge: It’s important to measure your gauge before blocking to ensure proper sizing of your project. If your gauge is off, you may need to adjust your blocking technique to achieve the desired measurements.
Once you have completed these preparatory steps, you are ready to move on to the blocking process. Taking the time to prepare your knitting will ensure that you achieve the best results and a beautifully finished knitwear piece.
Step 1: Wetting Your Knitting
Before you begin blocking your knitting, it’s important to wet the fabric to relax the fibers and allow them to reshape. Follow these steps to wet your knitting:
- Fill a basin or sink with lukewarm water. Avoid using hot water, as it can cause the colors to bleed or the yarn to felt.
- Add a gentle soap or a wool wash to the water. Be sure to use a soap that is suitable for delicate fabrics.
- Place your knitted item in the water and gently press it down to submerge it completely. Avoid agitating or rubbing the fabric, as this can cause it to stretch or become misshapen.
- Let the knitting soak in the water for about 10-15 minutes. This gives the fibers enough time to absorb the water and relax.
- After the soaking time, carefully lift the knitting out of the water and gently squeeze out the excess water. Avoid wringing or twisting the fabric, as this can damage the fibers.
Once your knitting is wet, you’re ready to move on to the next step of blocking, which is shaping the fabric to its desired dimensions.
Step 2: Shaping and Pinning Your Knitting
Once you have finished knitting your project, it is important to shape and block it to ensure a professional and polished finish. Shaping your knitting involves manipulating the fabric into the desired shape, while pinning ensures that your knitted item retains this shape throughout the blocking process.
1. Determine the desired measurements and shape for your knitwear:
- Measure the dimensions specified in your knitting pattern or decide on your own measurements.
- Consider any specific shaping techniques required for your project, such as increasing, decreasing, or adding darts.
2. Prepare your knitting for shaping:
- Gently remove any excess yarn or loose ends, ensuring that your knitting is clean and free from any obstructions.
3. Shaping your knitting:
- Using a tape measure or ruler, carefully shape your knitting by gently stretching or pulling it to the desired dimensions.
- Pay attention to any specific shaping instructions in your knitting pattern and ensure accuracy.
- You may need to use blocking wires or pins to help shape your knitting if it has complex or intricate details.
4. Pinning your knitting:
- Prepare a clean, flat surface for blocking, such as a blocking board or a towel.
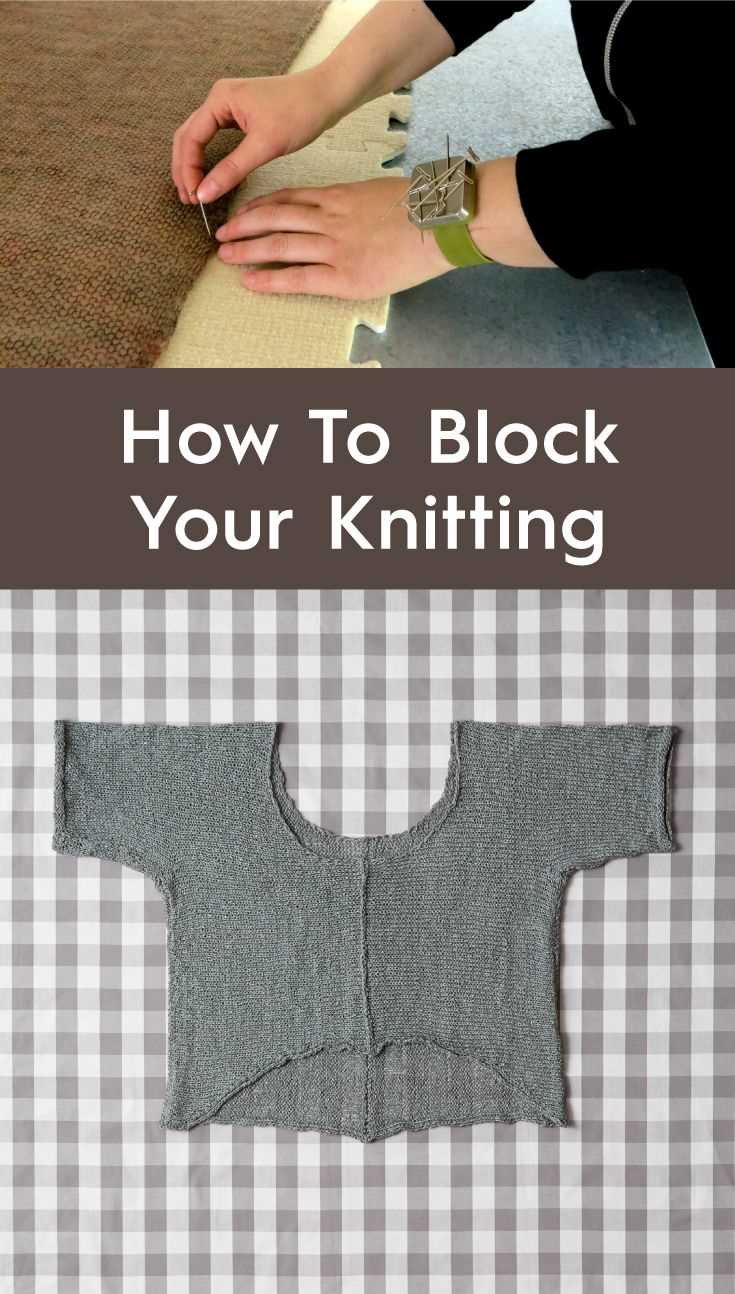
- Lay your knitting on the surface and use rust-proof pins to secure it in place.
- Start by pinning the edges, gradually working towards the center of your project.
- Ensure that the tension is even and the fabric is smooth by adjusting the pins as needed.
5. Allow your knitting to dry:
- Once your knitting is shaped and pinned, allow it to air dry completely.
- Do not rush the drying process by using a hairdryer or placing it near a direct heat source, as this may damage the fabric.
Following these steps will help ensure that your knitting takes on the perfect shape and size, resulting in a professional-looking finished product. Taking the time to properly shape and pin your knitting will make a significant difference in the overall appearance and fit of your knitwear.
Step 3: Drying Your Knitting
Once you have finished blocking your knitting, it is important to let it dry properly to ensure the desired shape and dimensions are maintained. Here is a step-by-step guide on how to dry your knitting:
- Gently remove your knitted item from the blocking mat or towel.
- Place a clean, dry towel on a flat surface, such as a table or a clean floor.
- Use another clean towel or a dry cloth to gently press and remove any excess water from your knitting. Be careful not to wring or twist it, as this can damage the fibers and affect the final result.
- Reshape your knitting if necessary. Check the original measurements or use a template to ensure the correct dimensions.
- Lay your knitting flat on the clean towel, making sure it is in the desired shape and dimensions. Smooth out any wrinkles or creases with your hands.
- Allow your knitting to air dry. Avoid direct sunlight or heat sources, as they can cause the fibers to become brittle or fade in color.
- Depending on the size and thickness of your knitting, it may take several hours or even overnight to fully dry. Patience is key!
- If necessary, flip your knitting over halfway through the drying process to ensure both sides dry evenly.
- Once your knitting is completely dry, remove it from the towel and admire your beautifully blocked and dried creation!
Remember, proper drying is essential to maintain the shape and dimensions of your knitted item. By following these steps, you can ensure that your knitwear will look its best and last for years to come.
Finishing Touches for Professional Results
In order to achieve a polished and professional look for your knitted garments, it’s important to pay attention to the finishing touches. These small details can make a big difference in the overall appearance of your knitwear. Here are some key steps to follow:
- Blocking: Before adding any embellishments or finishing touches, it’s essential to block your knitwear. This helps even out the stitches, relax the fibers, and shape the garment to its intended dimensions. Follow the blocking instructions provided in the pattern or use your preferred blocking method.
- Seaming: Proper seaming is crucial for achieving a professional finish. Use a tapestry needle and matching yarn to invisibly sew the seams together. Take your time and make sure the stitches are even and secure. This will give your garment a polished look and ensure durability.
- Edging: The edging of your knitwear can greatly impact the final result. Choose an edging that complements the design and enhances the overall appearance. Common edge stitches include garter stitch, ribbing, or a decorative lace pattern. Make sure to work the edging evenly and consistently.
- Weaving in ends: It’s important to securely weave in all loose ends to prevent unraveling and maintain a neat appearance. Use a tapestry needle to thread the yarn through the stitches on the wrong side of the fabric. Be sure to weave in the ends discreetly to avoid any bulkiness or visible knots.
- Blocking again: Once all the finishing touches are complete, it’s a good idea to block your knitwear one more time. This will help to set the stitches and ensure that all the elements of the garment are aligned correctly. Follow the blocking instructions as before, making any necessary adjustments.
- Final inspection: Before considering your knitwear project complete, take the time to inspect it thoroughly. Check for any loose stitches, uneven tension, or other imperfections. Make any necessary corrections and ensure that the garment meets your expectations.
By following these finishing touches, you can achieve professional results and create knitwear that looks and feels as if it were done by an expert. Remember that attention to detail is key in knitting, and taking the time to perfect these final steps will make a noticeable difference in the final outcome of your project.
Maintaining the Shape of Your Knitwear
After spending time and effort on creating beautiful knitwear, it is essential to take the necessary steps to maintain its shape. Proper care and blocking techniques will prolong the lifespan of your knitted garments and keep them looking their best. Here are some tips for maintaining the shape of your knitwear:
- Handwash with care: To avoid stretching or distorting the shape of your knitwear, it is best to handwash them rather than using a washing machine. Use gentle detergent and lukewarm water to gently clean your garments. Avoid wringing or twisting them as this can cause them to lose their shape.
- Dry flat: After washing, reshape your knitted items by laying them flat on a clean towel or blocking mat. Gently pat them into the desired shape, making sure to smooth out any wrinkles or folds. Allow them to air dry completely before wearing or storing.
- Use blocking techniques: Blocking is an essential step in maintaining the shape of your knitwear. To block your knitted items, you can use steam blocking or wet blocking methods. Steam blocking involves using steam from an iron or steamer to shape your garments. Wet blocking involves soaking your knitted items in water and then reshaping them. Follow the instructions for your specific fiber content and gauge when blocking.
- Store carefully: When storing your knitwear, it is important to fold them properly to avoid stretching or misshaping. Avoid hanging your knitted items as this can cause them to lose their shape. Use acid-free tissue paper or a fabric bag to protect them from dust and moths.
- Avoid excessive pulling or snagging: When wearing your knitted garments, be conscious of avoiding excessive pulling or snagging. This can distort their shape and cause damage to the fabric. Be careful when handling sharp objects or surfaces to prevent them from catching on your knitwear.
By following these tips, you can maintain the shape of your knitwear and enjoy wearing your beautifully crafted garments for years to come.
FAQ:
What is blocking in knitting?
Blocking in knitting is a process of finishing a knitted item by wetting it and then shaping it to the desired dimensions and allowing it to dry. It helps to even out the stitches, adjust the size, and enhance the drape and appearance of the finished garment.
Should I block my knitted item?
Yes, blocking is highly recommended for most knitted items. It can make a significant difference in the overall look and fit of your project. Blocking helps to smooth out uneven stitches, open up lace patterns, and provide a professional finish to your knitted garment.
What materials do I need to block knitting?
To block your knitting, you will need a few basic materials, including blocking mats or a clean towel, rust-proof pins or blocking wires, a spray bottle filled with water, and a measuring tape. You may also need a flat surface, like a table or the floor, to lay your knitted item on.
How do I block my knitted item?
Blocking your knitted item is a simple process. First, soak your knitted piece in lukewarm water for about 15 minutes. Gently squeeze out the excess water without wringing or twisting the fabric. Lay the item flat on a clean towel or blocking mats, shaping it to the desired dimensions and pinning it in place using rust-proof pins or blocking wires. Allow it to dry completely before removing the pins or wires.
Can I block acrylic yarn?
Yes, you can block acrylic yarn, but it requires a different method than blocking natural fibers. Instead of wet-blocking, you can use the steam-blocking method for acrylic yarn. Hover a steam iron over the fabric without touching it until it is moist and then gently shape it to the desired dimensions. Allow it to cool and dry completely before moving or wearing the item.


