Blocking a knitted blanket is an essential final step to give your project a professional and finished look. It involves reshaping and resizing the blanket to achieve the desired dimensions and even tension. Whether you’re a beginner knitter or an experienced one, blocking can greatly enhance the drape and appearance of your blanket.
What is blocking?
Blocking is the process of wetting your knitted piece and allowing it to dry in the desired shape. It helps to even out stitches, open lace patterns, and straighten edges. It can also be used to stretch or shape the fabric to achieve the correct size and proportions.
Why should you block a knitted blanket?
Blocking a knitted blanket is especially important when using natural fibers such as wool, alpaca, and cotton. These fibers have memory, meaning they can retain their shape even after being stretched or manipulated. By blocking, you can shape the fibers to lay flat, remove any unevenness, and create a more polished finish.
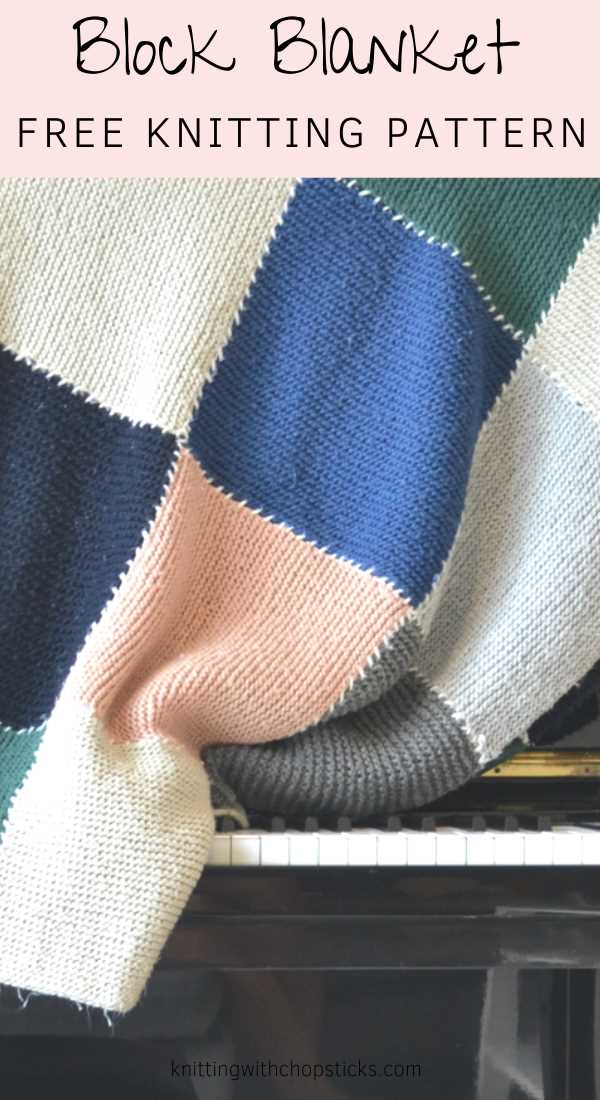
Blocking can also help to blend colors and stitches in intarsia or colorwork blankets, making the design appear more cohesive.
How to block a knitted blanket:
The first step in blocking a knitted blanket is to fill a basin or sink with lukewarm water and add a small amount of gentle detergent. Carefully place your knitted blanket in the water, gently submerge it, and let it soak for about 20-30 minutes to allow the fibers to fully absorb the water.
Once soaked, carefully remove the blanket from the water, gently squeeze out the excess water, and lay it flat on a clean towel. Roll up the towel to press out the remaining moisture. Do not wring or twist the blanket, as this can damage the fibers.
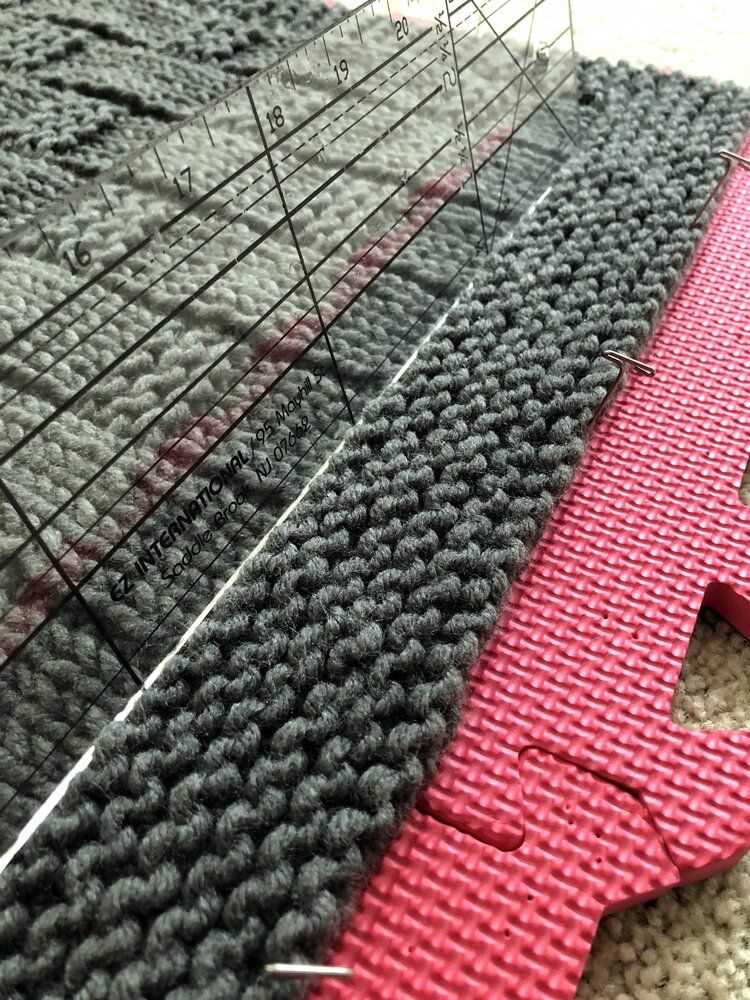
Unroll the towel and transfer the blanket to a flat surface where it can be pinned down. Start by shaping the edges and corners, making sure they are straight and even. Then, use rustproof T-pins or blocking wires to secure the edges and stretch the blanket to the desired size.
Once the blanket is pinned, let it air dry completely. This can take anywhere from 24 to 48 hours, depending on the thickness of the blanket and the humidity in the air. Once dry, carefully remove the pins or wires and admire your beautifully blocked knitted blanket!
Why Block a Knitted Blanket?
Blocking is an essential finishing technique for knitted blankets. It involves wetting the blanket and then stretching and shaping it to its desired dimensions. This process helps to even out the stitches, open up lace patterns, and create a more professional-looking finished product. Here are a few reasons why blocking a knitted blanket is important:
- Evenness: Blocking helps to even out the stitches and correct any irregularities or inconsistencies in the blanket. It smooths out the fabric and ensures that the blanket looks consistent throughout.
- Shape: By blocking, you can shape the blanket to the desired dimensions or pattern. This is especially important for projects that involve lace patterns or cables, where blocking can help accentuate and define the design elements.
- Size: Blocking can also help to resize a blanket if it has come out slightly smaller or larger than intended. By stretching or shrinking the fabric during blocking, you can achieve the desired size and proportions.
- Lace patterns: If your blanket includes lace patterns, blocking is crucial to open up the lace and showcase its intricate details. Blocking helps to stretch the stitches and create a more pronounced and aesthetically pleasing lace design.
- Professional finish: Blocking gives your knitted blanket a more polished and professional look. It smoothes out any wrinkles or bumps, making the fabric appear neat and uniform. It also helps the blanket to drape nicely, enhancing its overall appearance.
In conclusion, blocking a knitted blanket is an important step in the finishing process. It improves the overall appearance, evenness, and shape of the blanket. Whether you want to resize a blanket, showcase lace patterns, or simply achieve a more professional finish, blocking is a technique that can greatly enhance the final result.
Materials and Tools You’ll Need
Before you begin blocking your knitted blanket, make sure you have the following materials and tools:
- Knitted blanket: Make sure your blanket is clean and ready to be blocked.
- Pins: You will need a set of T-pins or blocking pins to secure your blanket in place.
- Blocking mats: Use foam or cork blocking mats to provide a stable and padded surface for your blanket.
- Measuring tape: A measuring tape will help you accurately measure the dimensions of your blanket as you block it.
- Spray bottle: Fill a spray bottle with water to dampen your blanket while blocking.
- Towels: Have some towels handy to absorb excess water during the blocking process.
- Space: Find a flat and spacious area where you can lay out your blocking mats and arrange your blanket.
- Patience: Blocking a knitted blanket can take time, so be prepared to dedicate a few hours to this process.
Once you have gathered all the necessary materials and tools, you will be ready to start blocking your knitted blanket and achieve the desired shape and size.
Preparing Your Blanket for Blocking
Before you start blocking your knitted blanket, it’s important to properly prepare it to ensure the best results. Follow these steps to prepare your blanket for blocking:
- Wash your blanket: Before blocking, it’s essential to wash your knitted blanket to remove any dirt, oils, or chemicals that may be on the yarn. Fill a basin or sink with lukewarm water and a gentle detergent suitable for hand-washing. Gently submerge the blanket in the water and soak it for a few minutes. Then, carefully squeeze out the excess water without wringing or twisting the fabric.
- Set the water temperature: Fill another basin or sink with lukewarm water for rinsing. Make sure the temperature is the same as the one used for washing. This helps to avoid any drastic temperature changes that might cause the fibers to shrink or felt together.
- Rinse the blanket: Submerge the blanket in the basin filled with clean water and let it soak for a few minutes. Gently squeeze out the excess water again, repeating the process if necessary, until the water runs clear and there are no soap residues left.
- Remove excess water: To remove excess water from the blanket, lay it flat on a clean towel and roll it up, gently pressing to absorb the water. Unroll the towel and repeat the process with another dry towel if needed. Avoid wringing or twisting the fabric, as it can stretch or distort the knitted stitches.
- Choose your blocking method: Depending on the desired outcome and fiber content, you can choose between wet blocking or steam blocking. Wet blocking involves shaping the blanket while it’s wet and letting it dry, while steam blocking requires using a steam iron or handheld steamer to smooth out the fabric and set its shape.
Following these steps will ensure that your knitted blanket is clean and ready to be blocked, allowing you to achieve the desired finished look for your project.
Wet Blocking vs. Steam Blocking
When it comes to blocking a knitted blanket, there are two main methods: wet blocking and steam blocking. Both techniques can help achieve the desired shape and size for your blanket, but they differ in the process and results.
Wet Blocking
Wet blocking involves immersing your knitted blanket in water and manipulating it into the desired shape. Here are the steps to follow for wet blocking:
- Fill a basin or sink with lukewarm water.
- Add a small amount of gentle wool wash or baby shampoo to the water and mix well.
- Submerge the knitted blanket in the water, ensuring it is fully saturated.
- Let the blanket soak for about 15-20 minutes.
- Gently squeeze out the excess water without wringing or twisting the fabric.
- Lay the blanket flat on a clean towel and roll it up to remove additional moisture.
- Unroll the towel and transfer the blanket to a blocking mat or any flat, clean surface.
- Shape the blanket to the desired measurements, stretching or patting it gently.
- Pin the edges of the blanket using rust-proof T-pins or blocking wires.
- Leave the blanket to dry completely, which can take several days depending on the thickness of the yarn.
- Once dry, unpin the blanket and enjoy your beautifully blocked knitted creation!
Steam Blocking
If you prefer a quicker blocking method or your yarn is not suitable for wet blocking, steam blocking is an alternative option. Here’s how to steam block a knitted blanket:
- Set up your ironing board and ensure it is covered with a clean cloth or towel.
- Fill a steam iron with water and set it to a low steam setting.
- Lay the knitted blanket flat on the ironing board.
- Hold the iron above the blanket, allowing the steam to penetrate the fabric.
- Gently press the iron on the sections of the blanket that need shaping, avoiding direct contact with the fabric.
- Move the iron slowly and repeat the process until the entire blanket has been steamed.
- Allow the blanket to cool and dry before removing it from the ironing board.
Remember, steam blocking may not be suitable for all types of yarn, so it’s essential to check the care instructions for your specific yarn.
Whichever method you choose, blocking your knitted blanket can help give it a professional finish and unlock its full potential. It’s worth the time and effort to ensure your hard work pays off!
Stretching and Pinning the Blanket
Once you have soaked your knitted blanket and gently squeezed out the excess water, it’s time to stretch and pin it. This step will help ensure that your blanket maintains its shape and size.
Here’s how you can stretch and pin your knitted blanket:
- Lay your damp blanket on a clean, flat surface, such as a blocking mat or a towel. Make sure the surface is large enough to accommodate the full size of your blanket.
- Smooth out any wrinkles or creases in the blanket with your hands.
- Starting in one corner of the blanket, gently pull on the edges to stretch it to the desired measurements. Use a measuring tape to ensure that you are stretching it evenly.
- Once you have achieved the desired measurements, secure the stretched edges of the blanket with rustproof T-pins or blocking wires. Place the pins or wires approximately every 2-3 inches along the edges.
- If your blanket has a lace or intricate pattern, use blocking wires to maintain the shape and definition of the stitches. Thread the wires through the edges of the pattern, and secure them with pins.
- Continue stretching and pinning the remaining edges of the blanket, ensuring that it maintains its shape and measurements throughout the process.
- Leave the blanket to dry completely in a well-ventilated area, away from direct sunlight. This may take several hours or even overnight.
- Once the blanket is fully dry, carefully remove the pins or blocking wires. Your knitted blanket is now blocked and ready to be used!
Remember, blocking is an important step in the knitting process, as it helps to even out stitches, relax the fabric, and give your blanket a professional finish. Take your time and be gentle when stretching and pinning your blanket to avoid damaging the fibers or altering the shape.
Drying and Finishing
After blocking your knitted blanket, it’s important to properly dry and finish it to ensure the best results. Here’s a step-by-step guide on how to dry and finish your blocked knitted blanket:
- Gently remove the blocking pins or wires from your knitted blanket. Take your time to avoid any damage to the fabric.
- Prepare a clean and dry surface for drying your knitted blanket. A blocking board or a towel on a flat surface works well.
- Place your knitted blanket on the drying surface, making sure it is spread out evenly and any edges or corners are adjusted properly.
- Avoid exposing your knitted blanket to direct sunlight, as it can cause fading or discoloration. Find a cool and well-ventilated area for drying.
- Allow your knitted blanket to air dry naturally. Avoid using heat sources such as heaters or hair dryers, as they can damage the fibers of the fabric.
- While drying, periodically check the blanket to ensure it is maintaining its shape and adjusting any uneven areas if necessary.
- Once your knitted blanket is completely dry, it’s time to finish it. This includes trimming any loose threads, tucking in any stray ends, and double-checking for any imperfections in the fabric.
- Give your knitted blanket a final inspection and make any necessary touch-ups.
Congratulations! Your knitted blanket is now properly dried and finished. It’s ready to be used or gifted to someone special. Enjoy the warmth and coziness it brings!
Removing the Pins and Final Touches
Once your knitted blanket has dried completely, it’s time to remove the pins and add final touches to give it a polished look.
Step 1: Remove the pins
Begin by carefully removing the pins that were securing your blanket in place. Take your time to avoid snagging or damaging the knitted fabric.
Step 2: Smooth out any wrinkles
After removing the pins, gently smooth out any wrinkles or creases that may have formed during the blocking process. Use your hands to gently pull and shape the blanket until it is flat and even.
Step 3: Check for any loose or uneven stitches
Inspect your knitted blanket for any loose or uneven stitches that need to be fixed. Use a needle and coordinating yarn to carefully tighten any loose stitches or mend any imperfections.
Step 4: Add any final embellishments
If desired, now is the time to add any final embellishments to your knitted blanket. This could include decorative borders, tassels, or pom-poms. Follow the pattern or design instructions for attaching these embellishments securely.
Step 5: Reblock if necessary
If you notice any significant changes or issues with your blanket after removing the pins, you may need to reblock it. In this case, repeat the blocking process from the beginning, ensuring you pin it into the desired shape and size.
Step 6: Enjoy your beautifully blocked knitted blanket
Once you are satisfied with the appearance of your blanket and all final touches have been added, it is ready for use or display. Now you can cozy up with your finished project or proudly showcase it to others.
Enjoying Your Blocked Knitted Blanket
Once you have blocked your knitted blanket and it has dried, it’s time to enjoy the fruits of your labor. Here are some tips for making the most of your blocked knitted blanket:
- Find the Perfect Spot: Choose a cozy corner of your home where you can cuddle up with your blocked knitted blanket. Whether it’s your favorite armchair or a spot on the couch, make sure it’s a place where you can truly relax.
- Celebrate Your Achievement: Take a moment to appreciate the hard work and dedication that went into creating your blocked knitted blanket. Admire the beautiful stitch patterns and colors, and feel a sense of pride in your handiwork.
- Enjoy the Softness: One of the benefits of blocking is that it can help to soften the yarn and make it more comfortable against your skin. Wrap yourself in the luxuriousness of your blocked knitted blanket and revel in its softness.
- Share the Warmth: If you have family or friends who also appreciate the joy of a cozy blanket, consider sharing your blocked knitted blanket with them. It can be a special gift for a loved one or a comforting presence for guests.
- Embrace Versatility: Your blocked knitted blanket can be used in a variety of ways. Use it as a throw over a chair or sofa, drape it over your legs while reading or watching TV, or even use it as a picnic blanket on a warm day.
- Take Care of Your Blanket: To keep your blocked knitted blanket in its best condition, follow the care instructions for the yarn you used. This may include gentle hand washing or machine washing on a delicate cycle. Be sure to dry it properly to maintain its shape and softness.
With these tips in mind, you can fully enjoy the comfort and beauty of your blocked knitted blanket for years to come. Happy knitting!
FAQ:
How long does it take to block a knitted blanket?
The time it takes to block a knitted blanket can vary depending on the size and thickness of the blanket, as well as the humidity in the air. On average, it can take anywhere from a few hours to a day or two for a knitted blanket to fully dry and set after blocking.
Can I block a knitted blanket without using T-pins or blocking wires?
While it is possible to block a knitted blanket without using T-pins or blocking wires, these tools are highly recommended for achieving the best results. T-pins and blocking wires help to hold the blanket in place as it dries, ensuring that it maintains its shape and size.
Can I wash a knitted blanket after blocking?
Yes, you can wash a knitted blanket after blocking. In fact, blocking is often done after washing the blanket to help reshape it and fix any uneven stitches. When washing a blocked knitted blanket, it is important to follow the care instructions for the yarn used to ensure that it does not shrink or lose its shape.


