Whether you’re knitting a hat, a pair of socks, or any other project in the round, knowing how to bind off is an essential skill that every knitter should have in their repertoire. Binding off is the final step in completing your project, and it creates a finished edge that keeps your stitches from unraveling.
But what if you’re knitting in the round? Binding off can be a bit trickier when you’re working in a continuous circle, but with these easy steps, you’ll be able to confidently finish off your project and achieve a professional-looking result.
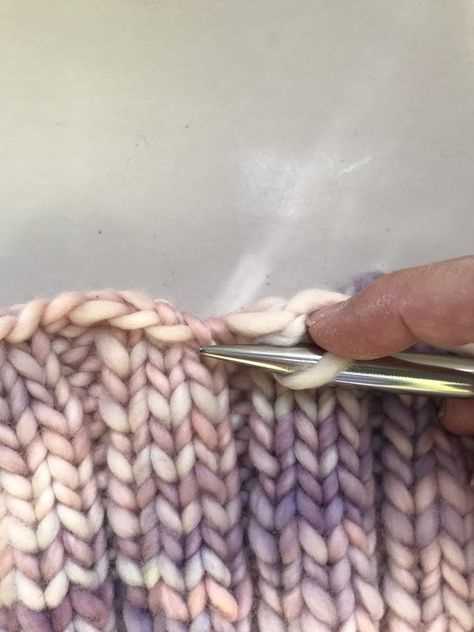
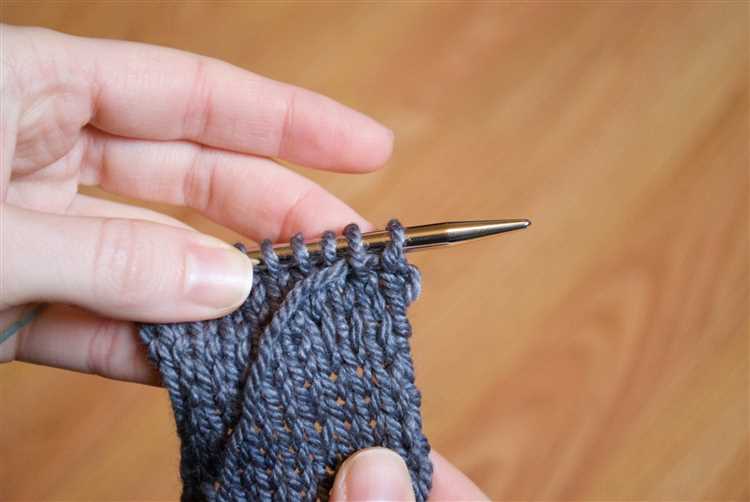
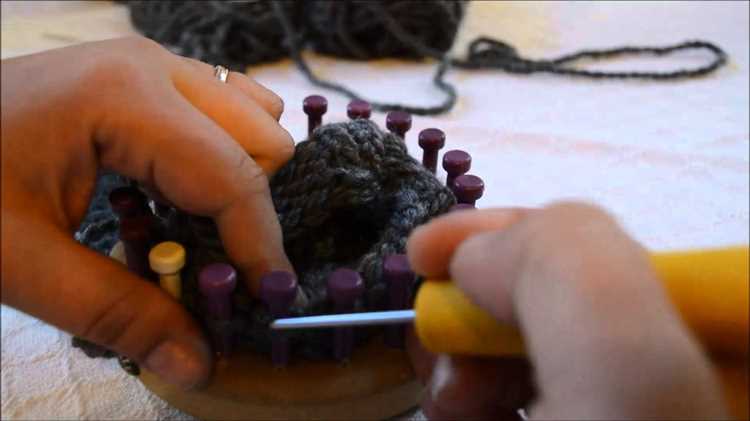
The first step to binding off in the round is to knit two stitches as normal. Then, use the left needle to lift the first stitch over the second stitch and drop it off the needle. This binds off one stitch.
Repeat this process, knitting one stitch and binding off the previous stitch, until you have bound off all stitches except for one. At this point, cut your yarn, leaving a tail that is several inches long. Then, thread the tail through the remaining stitch, pull it tight, and weave in any loose ends to secure.
Steps to Bind Off Knitting in the Round
Binding off knitting in the round is the final step in completing your project. It creates a finished edge that will keep your stitches from unraveling. Follow these easy steps to bind off your knitting in the round:
- Start by knitting two stitches in pattern.
- Insert the left needle into the first stitch you knitted.
- Lift this stitch over the second stitch and off the needle, just like a regular bind off.
- Knit the next stitch.
- Repeat steps 2-4 until you have bound off all the stitches.
Here are a few tips to keep in mind while binding off knitting in the round:
- Make sure to keep your tension consistent so that the bind off edge is not too tight or too loose.
- Use the same size needle for binding off as you did for knitting the project to ensure an even tension.
- If you are binding off ribbing, you can maintain the ribbing pattern by knitting or purling the stitches as they appear.
Once you have completed the bind off, you can cut the yarn, leaving a tail for weaving in later. Weave in the ends using a darning needle to secure them and ensure a neat finish.
Gather Your Materials
Before you start binding off your knitting project in the round, make sure you have the following materials on hand:
- A pair of knitting needles or a circular knitting needle in the size recommended for your yarn
- Yarn in the color and weight of your choice
- A tapestry needle for weaving in the loose ends
- Scissors to cut the yarn
Having all of these materials ready will ensure that you can complete the binding off process smoothly and without any interruptions.
Prepare your work
Before you begin binding off your knitting in the round, there are a few things you need to do to prepare your work.
- Make sure you have completed all of your desired stitch patterns: Before you start binding off, make sure you have finished any stitch patterns or design elements you want to include in your project.
- Arrange your stitches: If you are working with multiple needles or a circular needle, make sure your stitches are evenly distributed. This will make the binding off process easier and ensure a consistent tension.
- Have a tapestry needle handy: You will need a tapestry needle to perform the bind off. Make sure you have one with a large enough eye to accommodate your yarn.
- Consider using a stitch marker: If you find it helpful, you can place a stitch marker at the beginning of your round. This can be especially useful if you are working with a large number of stitches.
By taking these steps to prepare your work, you will set yourself up for success as you bind off your knitting in the round.
Knit Two Stitches Together
Knitting two stitches together is a common technique used in knitting to decrease the number of stitches in a row. It is often used in shaping projects or creating decorative patterns.
To knit two stitches together, follow these simple steps:
- Insert your right-hand needle into the next two stitches on your left-hand needle as if to knit.
- Wrap the yarn around your right-hand needle and pull it through both stitches at the same time.
- Slide the two stitches off your left-hand needle.
When you knit two stitches together, you are essentially treating them as one stitch and creating a decrease. This can help shape your knitting and create a neater, more polished finish.
Here are a few things to keep in mind when knitting two stitches together:
- Make sure to knit the two stitches tightly together to avoid any loose or sloppy stitches.
- Pay attention to the pattern instructions and follow the specific type of decrease indicated (such as knit two stitches together through the back loop).
- Practice knitting two stitches together on scrap yarn before attempting it in your actual project to familiarize yourself with the technique.
Knitting two stitches together is a versatile and useful skill in knitting. It can be used to create shaping, decrease stitch counts, or add interesting texture to your projects. With a bit of practice, you’ll master this technique in no time!
Pass the first stitch over the second stitch
Once you have completed your knitting project in the round and are ready to bind off, you will need to pass the first stitch over the second stitch. This step is crucial for securing your stitches and creating a neat edge.
To pass the first stitch over the second stitch, follow these steps:
- Insert the right needle into the first stitch
- Use the right needle to lift the first stitch up and over the second stitch, moving it to the right needle
- Drop the first stitch off the left needle
Make sure to pull the yarn tight after each stitch to ensure a neat and secure bind off. Repeat these steps until all stitches have been bound off and there is only one stitch remaining on the right needle.
If you have any stitches remaining after binding off, you will need to cut the yarn, leaving a tail long enough to thread through the remaining stitch and secure it. This will prevent your work from unraveling.
Passing the first stitch over the second stitch is a key step in binding off your knitting in the round. It creates a clean finished edge and secures your stitches. Practice this technique and you’ll be able to confidently finish your knitted projects.
Knit One Stitch
Once you have completed all the rounds of knitting in the round and are ready to bind off, you will need to knit one stitch before starting the bind off process. Knitting one stitch at the beginning of the bind off row helps create a neater edge and ensures that the bind off stitches are secure.
To knit one stitch, follow these steps:
- Hold the working yarn in your right hand and the needle with the stitches in your left hand.
- Insert the right needle from left to right through the first stitch on the left needle.
- Wrap the working yarn over the right needle in a counter-clockwise direction.
- Use the right needle to pull the working yarn through the stitch on the left needle, creating a new stitch on the right needle.
- Slide the original stitch off the left needle, leaving the new stitch on the right needle.
- Repeat these steps for each stitch that you need to knit.
By knitting one stitch before binding off, you can ensure that the edge of your knitting project is clean and well-finished. This is especially important if you plan on seaming or joining the edges of your project, as it will create a neater and more professional appearance.
Pass the previous stitch over the newly knitted stitch
After knitting the new stitch, you will need to pass the previous stitch over the newly knitted stitch.
To do this, follow these steps:
- Use your left-hand needle to lift the first stitch over the second stitch and off the right-hand needle.
- Continue in this manner, passing each previous stitch over the newly knitted stitch until you have only one stitch left on the right-hand needle.
- Once you have passed the last stitch over, take the scissors and cut the yarn, leaving a tail that is several inches long.
By passing the previous stitch over the newly knitted stitch, you are binding off the stitches and securing the final edge of your knitting project.
It’s important to note that when binding off in the round, you may need to adjust the stitches on your needles to ensure that you have an even number of stitches before beginning the bind off process. This will make it easier to pass the previous stitch over the newly knitted stitch.
| In Summary: |
|---|
| 1. Lift the first stitch over the second stitch and off the right-hand needle. |
| 2. Continue passing each previous stitch over the newly knitted stitch until one stitch remains. |
| 3. Cut the yarn, leaving a tail. |
Repeat steps 5 and 6
Once you have completed step 5 and bound off the required number of stitches, you will need to repeat steps 5 and 6 to continue binding off until all stitches have been worked. This process is the same as before, but you will be starting with the next stitch in the round.
Step 5: Knit the first two stitches on the left needle together. To do this, insert the right needle into the first stitch on the left needle as if to knit. Then, insert the right needle into the second stitch on the left needle as if to knit. Wrap the yarn around the right needle and pull it through both stitches, dropping them off the left needle.
Step 6: Repeat step 5 until you have bound off the required number of stitches. To do this, continue knitting two stitches together and dropping them off the left needle until you have reached the end of the round or have bound off all the stitches.
By repeating steps 5 and 6, you will be able to bind off all the stitches in the round. Remember to count your stitches as you go to ensure you don’t miss any or bind off too many. Once you have finished binding off, you can cut your yarn, leaving a tail for weaving in later.
Secure the final stitch
Once you have finished binding off all of your stitches, you will be left with one stitch remaining. To secure this final stitch, you will need to cut the yarn, leaving a long tail. This tail will be used to secure the stitch and prevent it from unraveling.
To secure the final stitch, thread the tail of the yarn through a large-eyed tapestry needle. Insert the needle through the final stitch from front to back, and gently pull the yarn through.
Next, insert the needle through the stitch again, this time from back to front. Pull the yarn through, creating a loop.
Finally, pass the needle through the loop, creating a knot. Pull the yarn tight to secure the stitch.
Trim any excess yarn, leaving a small tail. Your final stitch is now secure, and your knitting is complete!
FAQ:
What is the purpose of binding off in knitting?
The purpose of binding off in knitting is to secure the stitches and create a finished edge. It prevents the knitting from unraveling and gives a clean and neat appearance to the project.
Can you bind off knitting in the round?
Yes, you can bind off knitting in the round. The process is slightly different from binding off in flat knitting, but it is still possible to achieve a neat and secure edge.


