Seaming is an essential skill for any knitter. Whether you’re finishing a sweater, joining two pieces for a garment, or simply fixing a small hole, knowing how to seam two knitted pieces together is a valuable technique. In this step-by-step guide, we’ll walk you through the process of seaming, providing tips and tricks along the way.
Step 1: Prepare the pieces
Before you begin seaming, make sure that both knitted pieces are properly blocked and the edges are even. This will ensure that the finished seam looks tidy and professional. Block the pieces according to the instructions for your specific yarn and pattern.
Step 2: Choose the seaming method
There are several different methods for seaming knitted pieces together, depending on the desired outcome and the type of stitch pattern used. The most common methods include mattress stitch, whip stitch, and backstitch. Research and decide which method will work best for your project.
Step 3: Prepare your yarn
Before you begin seaming, cut a long tail of yarn and thread it onto a tapestry needle. Make sure to choose a yarn that matches the color and thickness of your knitted pieces. Having a long tail ensures that you won’t run out of yarn before you finish seaming.
Step 4: Start seaming
Begin seaming by aligning the edges of the knitted pieces and securing them with pins or stitch markers. This will help keep the edges in place as you seam. Start by seaming a few stitches at a time, working from one side to the other. Use the chosen seaming method and follow the instructions carefully.
Step 5: Finish the seam
Once you’ve reached the end of the seam, secure the yarn and weave in any loose ends. Gently block the finished seam to make it lie flat and blend in with the rest of the knitting. Take the time to check your work and make any necessary adjustments.
Note: Practice makes perfect when it comes to seaming. Don’t get discouraged if your first few seams don’t turn out as expected. With time and experience, you’ll become more confident and proficient in this essential skill.
By following these step-by-step instructions and practicing your seaming technique, you’ll be able to seamlessly join two knitted pieces together and create beautiful, professional-looking projects.
Gather the Materials
Before you begin seaming your knitted pieces together, it’s important to gather all the necessary materials. Having everything ready beforehand will make the process go smoothly and efficiently. Here are the materials you’ll need:
- Knitting needles: You’ll need a pair of knitting needles or a circular needle, depending on the project.
- Yarn: Use the same yarn that you used to knit the pieces you’re seaming. Make sure to have enough yarn to complete the seam.
- Tapestry needle: A tapestry needle, also known as a yarn needle or darning needle, is essential for seaming. Choose one with a large eye that can accommodate the yarn.
- Scissors: Keep a pair of scissors nearby for cutting the yarn.
- Pins: You may want to use straight pins to hold the pieces in place while seaming. This can help ensure that the seam is straight and even.
- Blocking mat and pins (optional): If your knitted pieces need to be blocked, have a blocking mat and pins on hand.
Having all these materials prepared and within reach will save you time and prevent interruptions during the seaming process. Once you have everything, you’ll be ready to start seaming your knitted pieces together!
Prepare the Knitted Pieces
Before you can begin seaming your knitted pieces together, it’s important to make sure they are prepared correctly. Follow these steps to ensure your pieces are ready for seaming:
- Block your knitted pieces: Blocking your knitted pieces helps to shape them and make them easier to work with. Use pins and a blocking board or surface to lay out your pieces and gently stretch and shape them to the correct dimensions. Leave them to dry completely before proceeding.
- Weave in any loose ends: Before seaming, make sure to weave in any loose ends of yarn from your knitting. Use a blunt tapestry needle to weave the ends into the fabric, following the direction of the stitches to ensure they are secure and invisible. Trim any excess yarn if necessary.
- Mark the seam lines: To help with aligning your pieces for seaming, it can be helpful to mark the seam lines on both pieces. Use a contrasting color of yarn or thread and a tapestry needle to make small running stitches along the edges of each piece where the seam will be.
- Consider the stitch pattern: Depending on the stitch pattern you used for your knitted pieces, you may need to take additional steps to ensure the seam is hidden or matches the rest of the fabric. For example, if you used a rib stitch, you may want to seam the pieces using a Kitchener stitch or a grafting technique to create an invisible seam.
By taking the time to properly prepare your knitted pieces, you’ll ensure that your finished seam looks neat and professional. Always double-check your measurements and alignment before moving on to the seaming process.
Select a Suitable Seaming Method
When it comes to joining two knitted pieces together, there are several seaming methods to choose from. The method you select will depend on the type of project you are working on, the stitch pattern you used, and the desired finish of your seam. Here are a few commonly used seaming methods:
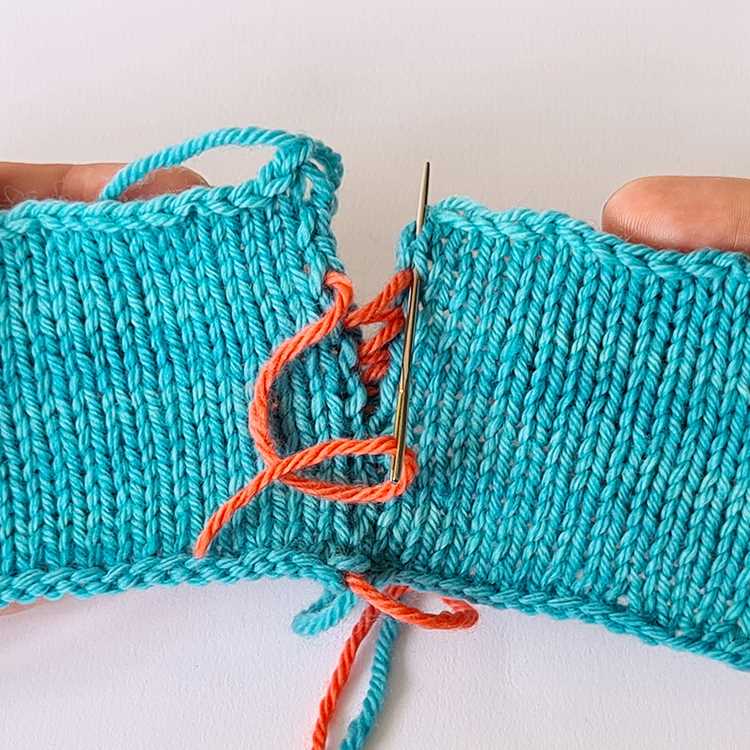
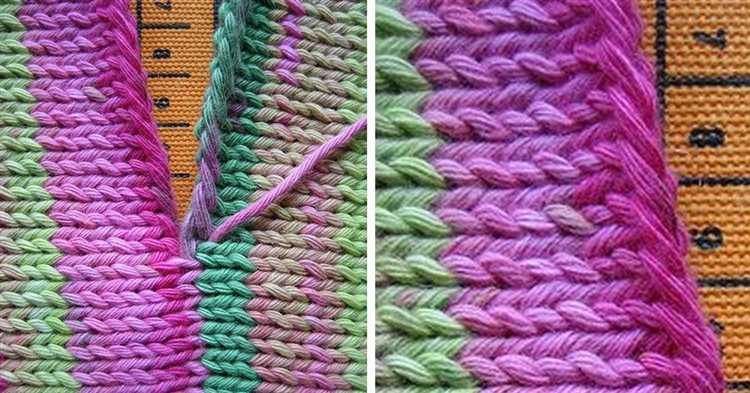
- Mattress Stitch: This method is great for joining pieces with a neat, invisible seam. It works best on stocking stitch or garter stitch fabric. The mattress stitch involves sewing through the horizontal bars between the stitches to create an invisible seam.
- Whip Stitch: The whip stitch is a simple and quick method for joining pieces. It involves sewing through the edges of the fabric in an over-and-under motion, creating a visible seam. This method is suitable for projects where you don’t mind the seam being visible.
- Backstitch: The backstitch creates a strong, secure seam and is often used for joining pieces that need extra stability. It involves sewing through the fabric in a straight line, creating a visible, but sturdy seam. This method is commonly used for sewing up shoulder seams or attaching sleeves.
- Kitchener Stitch: The Kitchener stitch, also known as grafting, is typically used for joining live stitches together, such as when closing the toes of a sock or creating a seamless shoulder. It creates an invisible, seamless join by duplicating the appearance of the knit stitches.
It’s important to consider the type of fabric you have and the desired outcome when selecting a seaming method. Take the time to practice each method on swatches or scrap pieces to determine which one achieves the best result for your project.
Thread the Needle
Once you have gathered all your materials and prepared your pieces, it’s time to thread the needle. Here are the steps to follow:
- Choose a yarn that matches the color and weight of your knitted pieces.
- Cut a piece of yarn that is about three times the length of the seam you need to sew.
- Thread one end of the yarn through the eye of the needle, leaving a tail that is about 4-6 inches long.
- Tie a knot at the end of the yarn to secure it to the needle.
- If your knitted pieces have a cast-off edge, start threading the needle through the loops along that edge.
- If your knitted pieces have a cast-on edge, start threading the needle through the loops along that edge instead.
- Gently pull the yarn through the loops, being careful not to pull it too tight.
- Continue threading the needle through the loops, alternating between the front and back pieces, until you reach the end of the seam.
- Once you have sewn the entire seam, make a small knot at the end of the yarn to secure it.
- Trim any excess yarn, leaving a tail of about 4-6 inches.
Threading the needle is an important step in seaming two knitted pieces together. Make sure to choose the right yarn and take your time to sew the seam neatly and securely.
Start Seam from the Bottom
When seaming two knitted pieces together, it is often recommended to start the seam from the bottom. This means that you will begin sewing the pieces together at the very edge of the fabric, closest to the hem or cast-on edge.
Starting from the bottom ensures that the seam will be neat and secure, as the tension will be evenly distributed along the seam. It also allows you to easily align the stitches of each piece, creating a seamless and professional finish.
Here are the steps to start the seam from the bottom:
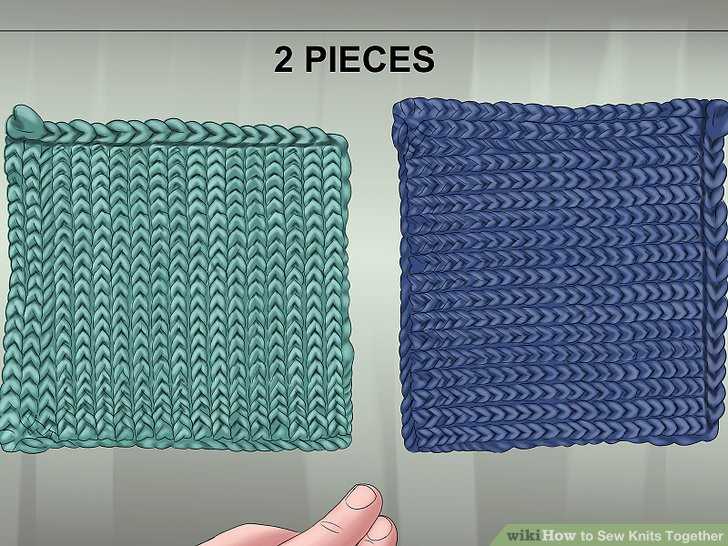
- Lay the two knitted pieces flat on a surface, with the right sides facing up.
- Align the edges of the pieces so that they match up evenly.
- Thread a tapestry needle with the same yarn that you used to knit the pieces.
- Starting at the very edge of the fabric, insert the needle from back to front through both layers of fabric.
- Pull the yarn through, leaving a small tail hanging at the back.
With the seam started, you can continue sewing the pieces together using your preferred seaming method, such as mattress stitch or backstitch. Remember to maintain even tension and to sew through both layers of fabric to create a neat and secure seam.
Starting the seam from the bottom is a useful technique to ensure a professional-looking finish when joining knitted pieces together. By following these steps, you will be able to seam your knitted pieces together seamlessly and with confidence.
Work Seam Along the Edge
Once you have prepared your knitted pieces by blocking and arranging them as desired, it’s time to start seaming along the edges. This is typically done with a tapestry needle and a length of yarn in a matching color to the knitting.
Follow these steps to work the seam along the edge:
- Thread the yarn: Start by threading a tapestry needle with a length of yarn. The yarn should be about three times the length of the seam you need to sew.
- Secure the yarn: Insert the needle through the back side of the knitting, near the edge. Leave a small tail of yarn at the back to secure it later.
- Move to the other piece: Bring the needle through the corresponding point on the other piece, ensuring that both edges align.
- Begin seaming: Insert the needle through the adjacent stitches on both sides, ensuring that the seam stays even and flat.
- Continue seaming: Repeat the previous step, working your way along the entire edge. Be careful not to pull the yarn too tightly, as it may cause the seam to pucker.
- Secure the seam: Once you reach the end of the edge, secure the yarn by weaving it back into the knitting. Trim any excess yarn.
In some cases, you may need to work a specific type of seam, such as a mattress stitch for joining stockinette stitch pieces or a backstitch for joining garter stitch pieces. Refer to the instructions for your pattern or project to determine the appropriate type of seam to use.
Working a seam along the edge is an essential skill for any knitter, as it allows you to join pieces together seamlessly and create a polished finished product. With practice and attention to detail, you can achieve a professional-looking seam that enhances the overall appearance of your knitted project.
Finish Seam at the Top
When you have finished seaming the sides of your knitted pieces together, it’s time to finish the seam at the top. This step will help give your finished project a clean and professional look.
To finish the seam at the top, you will need to:
- Thread the tail: Thread the yarn tail onto a tapestry needle.
- Align the edges: Align the edges of the knitted pieces at the top.
- Start at the back: Start at the back of the seam and insert the needle into the first stitch on one side.
- Weave through the stitches: Weave the needle in and out of the stitches, matching the stitch pattern as closely as possible.
- Secure the seam: When you reach the end of the seam, secure the yarn by passing the needle through the last stitch several times.
- Weave in the ends: Weave in any remaining yarn ends to hide them and ensure a neat finish.
Once you have finished seaming the top of your knitted pieces, you can try on your project to ensure a proper fit. If there are any adjustments that need to be made, you can easily undo the seam and make the necessary changes.
Seaming can be a time-consuming process, but taking the time to do it properly will greatly improve the overall look and durability of your knitted project. With practice, you will become more skilled at achieving seamless and virtually invisible seams.
Now that you know how to seam two knitted pieces together, you can confidently tackle any project that requires seaming. Happy knitting!
Secure and Hide Loose Ends
When you finish knitting two pieces that you want to seam together, you may find yourself with loose ends of yarn hanging from the edges. These loose ends need to be secured and hidden in order to create a seamless seam.
Here are the steps to secure and hide loose ends:
- Thread the loose end onto a tapestry needle. Take the loose end of yarn and thread it onto a tapestry needle that has a large enough eye to accommodate the yarn.
- Weave the loose end through the knitted fabric. Carefully weave the tapestry needle and yarn under and over the stitches along the edge of the knitted piece. This will secure the loose end and prevent it from unraveling.
- Trim the excess yarn. Once you have woven the loose end through the fabric, trim any excess yarn so that it is flush with the edge of the fabric. Be careful not to cut the working yarn or any stitches in the process.
- Repeat on the other side. If you have another loose end on the other piece that needs to be secured, repeat the process described above. Make sure to match the method used on the first piece to ensure consistency.
By securing and hiding the loose ends, you ensure that your knitted pieces are securely joined together and that the seam appears seamless. This is an important step in finishing your knitted project and creating a professional-looking result.
FAQ:
What is the best way to seam two knitted pieces together?
The best way to seam two knitted pieces together is by using the mattress stitch. This stitch creates an invisible seam that blends in seamlessly with the rest of the knitting. It requires aligning the edges of the two pieces and sewing through the loops in a specific manner.
Can I use a different stitch to seam two knitted pieces?
Yes, you can use other stitches to seam two knitted pieces together, such as the backstitch, whipstitch, or slip stitch. However, the mattress stitch is considered the best option as it creates a seamless and invisible seam.
Is it necessary to block the knitted pieces before seaming?
It is highly recommended to block the knitted pieces before seaming. Blocking helps to even out the stitches, relax the fabric, and make it easier to align the edges for seaming. It also ensures that the finished project will have a professional and polished look.
What should I do if the pieces I need to seam together have different stitch patterns?
If the pieces have different stitch patterns, it can be challenging to seam them together seamlessly. In this case, you can try to match the stitch patterns as closely as possible by adjusting the tension while seaming. You may also consider adding a border or edging to the pieces to help camouflage any differences.
Can I use a sewing machine to seam knitted pieces together?
While it is possible to use a sewing machine to seam knitted pieces together, it is not recommended. Sewing machines can stretch and distort the fabric, and the seams may not be as flexible or durable as hand-sewn seams. It is best to use a hand-sewing technique, like the mattress stitch, to achieve the best results.
What is the best way to secure the end of the yarn after seaming?
The best way to secure the end of the yarn after seaming is to weave it back into the knitted fabric. To do this, thread the yarn through a tapestry needle, insert the needle under a few stitches on the wrong side of the fabric, and then trim the excess yarn. This will ensure that the end is secure and hidden.


