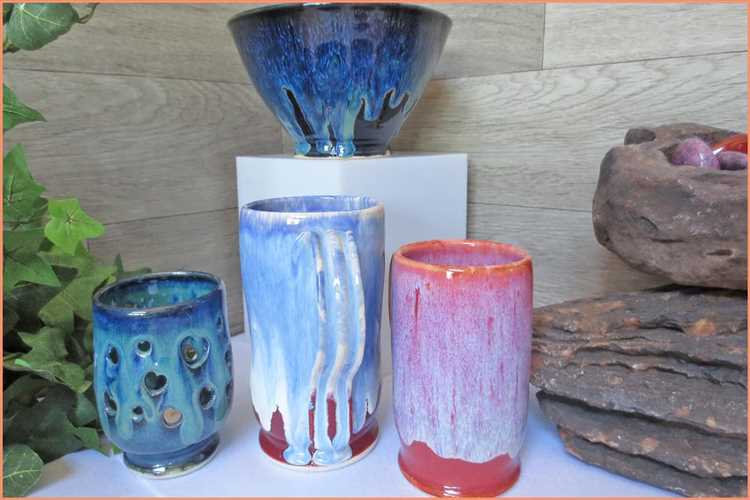
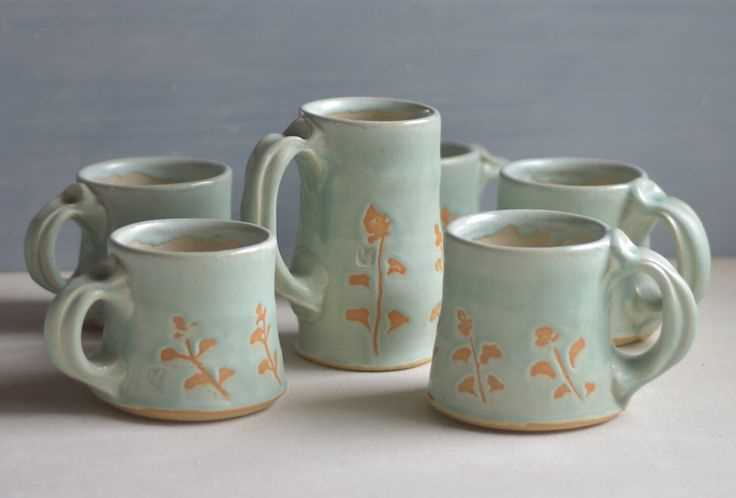
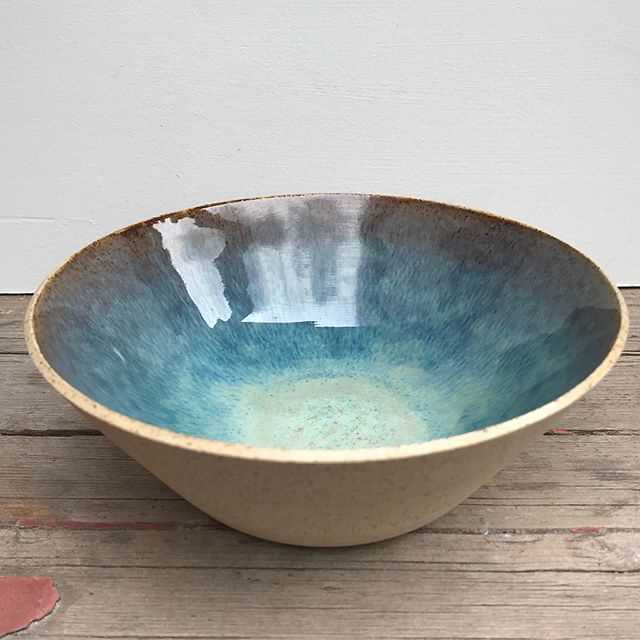
If you have ever admired the smooth, colorful finish of a beautifully glazed pottery piece, you may be curious about how this art form is achieved. Glazing involves applying a liquid mixture of minerals and pigments to a piece of pottery before it is fired in a kiln. This process not only adds color to the ceramic surface but also creates a protective coating that enhances the durability of the finished piece.
In this comprehensive guide, we will explore the different techniques and styles of glazing pottery. We will delve into the various types of glazes, such as opaque, transparent, and majolica, and discuss the materials and tools needed for successful glazing. You will learn about the firing process and how different firing temperatures can affect the final result.
Additionally, we will cover some advanced techniques, including layering glazes, creating texture with glazes, and using resist methods to achieve unique patterns and designs. We will also discuss important considerations, such as safety precautions and proper ventilation when working with glazes.
Whether you are a beginner looking to dip your toes into the world of glazing or an experienced potter wanting to expand your repertoire, this comprehensive guide will provide you with the knowledge and inspiration to explore the art of glazing pottery.
The History and Origins
Glazing pottery is an art form that dates back thousands of years. The practice of glazing pottery began in ancient civilizations such as Egypt, Mesopotamia, and China. It has since spread across the globe and evolved into various techniques and styles.
The ancient Egyptians were among the first to discover the transformative effects of glazing pottery. Their beautiful and intricate pottery designs were achieved by applying a mixture of minerals and oxides, such as silica, feldspar, and metal oxides, onto the surface of the clay. The pottery was then fired in kilns, which caused the glaze to melt and bond with the clay, resulting in a smooth, glossy finish.
In Mesopotamia, glazing pottery became popular during the ancient Sumerian civilization around 3000 BCE. The Sumerians developed techniques using a lead glaze, which created a vibrant, shiny appearance on their pottery. This lead-based glaze was known for its ability to produce a brilliant blue color, which was highly sought after.
The art of glazing pottery also flourished in ancient China. The Chinese mastered the art of celadon glazes, which are known for their pale green color. The Song Dynasty (960-1279 CE) is particularly renowned for its celadon pottery, which showcased intricate carvings and a delicate translucent glaze.
Glazing pottery continued to evolve throughout history. In Europe, during the Renaissance period, potters began experimenting with new techniques and materials. The Italians developed the maiolica technique, which involved applying tin-based glazes onto earthenware pottery. This technique allowed for vibrant, multicolored designs and became popular throughout Europe.
Today, glazing pottery is practiced by artists all over the world. The techniques and materials used vary greatly, ranging from traditional methods to contemporary innovations. From ancient civilizations to modern times, glazing pottery has been a beloved art form that continues to captivate and inspire with its endless possibilities.
Types of Glazes
When it comes to glazing pottery, there are various types of glazes that you can choose from. Each type offers different characteristics and effects, allowing you to customize and enhance your pottery pieces.
- Transparent Glazes: These glazes are clear and allow the natural color and texture of the clay to show through. They are commonly used when you want a glossy or shiny finish on your pottery.
- Opaque Glazes: Opaque glazes cover the surface of the pottery completely, creating a solid, non-translucent color. These glazes are often used when you want to achieve a solid and vibrant color on your pottery.
- Matt Glazes: Matt glazes have a non-reflective and smooth surface. They create a soft and subtle appearance, making them suitable for pottery with intricate details or a rustic look.
- Glossy Glazes: Glossy glazes have a shiny and reflective surface. They are used when you want to achieve a lustrous and polished finish on your pottery.
- Crawling Glazes: Crawling glazes create a textured effect on the surface of the pottery, resembling cracked or peeled paint. They are often used to add visual interest and a touch of uniqueness to pottery pieces.
It’s important to note that glazes can be further customized by adding different colors, textures, and effects. By experimenting with different types of glazes, you can create a wide range of unique and visually appealing pottery pieces.
Basic Techniques for Glazing
Glazing pottery is an essential part of the ceramics process. It not only adds a decorative finish to the piece but also plays a crucial role in making it functional and durable. Here are some basic techniques for glazing pottery:
- Dipping: Dipping is one of the simplest and most common glazing techniques. It involves immersing the pottery piece into a glaze, allowing it to absorb the glaze evenly. This technique is effective for basic glazing and achieving smooth and even coverage.
- Brushing: Brushing allows for more control and precision when applying glazes. Using a soft brush, glaze is brushed onto the surface of the pottery piece in even strokes. This technique is ideal for detailing and creating intricate designs.
- Spraying: Spraying is often used for larger pottery pieces or for achieving a more textured or layered effect. The glaze is thinned out and sprayed onto the pottery piece using an airbrush or spray gun. This technique requires practice to achieve consistent and even coverage.
- Sponging: Sponging is a glazing technique that creates a mottled or textured effect. A damp sponge is dipped in glaze and gently pressed onto the pottery surface. The glaze is absorbed unevenly, resulting in a unique and organic appearance.
Regardless of the glazing technique used, it is important to follow these general guidelines:
- Prepare the surface: Before glazing, ensure that the pottery piece is clean and free from any dust or debris. Remove any rough spots or blemishes that could affect the glaze application.
- Apply multiple coats: To achieve a rich and vibrant glaze, apply multiple coats of glaze, allowing each coat to dry before applying the next. This will ensure a more even and consistent finish.
- Consider layering glazes: Experiment with layering different glazes to create unique color combinations and effects. Start with lighter glazes as a base and build up layers with darker or contrasting glazes to achieve depth and complexity in the final result.
- Take care of the kiln firing: Proper firing of glazed pottery is crucial for achieving the desired results. Follow the recommended firing temperature and duration specified by the glaze manufacturer. Improper firing can lead to glaze defects or a matte instead of glossy finish.
Mastering the basic glazing techniques and understanding the properties of different glazes will provide a solid foundation for exploring more advanced glazing techniques and creating unique and distinctive pottery pieces.
Choosing the Right Glaze
When it comes to glazing pottery, choosing the right glaze is crucial to achieving the desired artistic effect. There are several factors to consider when selecting a glaze, including color, texture, and firing temperature.
Color: Glazes come in a wide range of colors, from earthy neutrals to vibrant blues and greens. Consider the overall aesthetic of your piece and the intended impact on the viewer. Some glazes, like celadon, create a translucent effect, while others, like raku, produce a crackled appearance.
Texture: The texture of the glaze can greatly impact the look and feel of your pottery. Some glazes create a smooth and glossy surface, while others create a rough and matte finish. Choose a glaze that complements the form and function of your piece.
Firing Temperature: Different glazes require different firing temperatures to achieve their desired effect. Some glazes are low-fire and can be fired at temperatures around 1000°C, while others are high-fire and require temperatures above 1200°C. Be sure to check the recommended firing temperature for each glaze before applying it to your pottery.
Safety: It’s important to consider the safety aspects of the glaze you choose. Some glazes may contain toxic materials, such as lead or cadmium, which can be harmful if ingested. Always read the labels and follow safety guidelines when working with glazes.
Testing: Before applying a glaze to your entire piece, it’s a good idea to do some test firings on small tiles or shards of clay. This allows you to see how the glaze will react in the firing process and gives you the opportunity to make any adjustments before applying it to your finished piece.
Experimentation: Don’t be afraid to experiment with different glazes and combinations. Mixing glazes or layering them can create unique effects and textures. Keep detailed records of your experiments, so you can reproduce any successful results in the future.
In conclusion, choosing the right glaze is a crucial step in the pottery glazing process. Consider factors such as color, texture, firing temperature, safety, and experimentation to find the perfect glaze for your artistic vision.
Common Glazing Mistakes to Avoid
Glazing pottery is an art that requires practice and attention to detail. However, even experienced potters can make mistakes in the glazing process. Here are some common glazing mistakes to avoid:
- Inadequate surface preparation: Before applying glaze, it’s important to ensure that the pottery surface is clean and free from dust, oils, and other contaminants. Failing to prepare the surface properly can result in uneven glaze application or adhesion issues.
- Insufficient glaze thickness: Applying glaze too thinly can result in a patchy or uneven surface. It’s important to apply an adequate amount of glaze to achieve a smooth and consistent finish. Multiple layers may be necessary for some glazes.
- Overloading glaze: Applying too much glaze can lead to drips, pooling, and glaze running onto the kiln shelf. It’s important to apply glaze evenly and avoid excessive buildup, especially on the bottom of the pottery.
- Using incompatible glazes: Mixing incompatible glazes or applying them in layers can result in undesirable chemical reactions during firing. Always test glazes before using them on valuable pottery to ensure compatibility.
- Ignoring firing temperature: Different glazes have specific firing temperatures that need to be followed for optimum results. Failing to fire the pottery at the correct temperature can lead to glaze defects, such as bubbling, crawling, or improper color development.
- Not using a glaze sieve: Glazes can contain lumps or impurities, which can result in rough surfaces or inconsistent application. It’s important to pass the glaze through a fine-mesh glaze sieve before application to ensure a smooth and even consistency.
- Inadequate ventilation: Glazing pottery releases fumes that can be harmful if inhaled. It’s important to work in a well-ventilated area or use a fume hood to minimize exposure to toxic fumes. Always follow safety guidelines and use protective equipment when necessary.
Avoiding these common glazing mistakes can help improve the overall quality of your glazed pottery. Remember to practice, experiment, and learn from your mistakes to enhance your skills as a potter.
Advanced Glazing Techniques
Once you have mastered the basics of glazing pottery, you may want to explore more advanced techniques to create unique and intricate designs on your pottery pieces. These techniques require more skill and experience, but they can result in stunning and visually appealing finished pieces.
- Layering: Layering glazes involves applying multiple layers of different glazes to create depth and dimension. You can experiment with different combinations of glazes to achieve interesting effects, such as a speckled or marbled appearance.
- Masking: Masking involves applying a resist material, such as wax or tape, to certain areas of the pottery piece before glazing. This creates a barrier, preventing the glaze from adhering to those areas. After firing, the resist material is removed, revealing the unglazed areas underneath.
- Mishima: Mishima is a technique that involves incising or carving designs into the pottery surface and then filling the carved lines with contrasting glaze. This creates a beautiful inlaid effect. The excess glaze is wiped away from the surface, leaving only the glaze in the carved lines.
- Dipping and Pouring: Instead of brushing glaze onto the pottery surface, you can achieve different effects by dipping or pouring the pottery piece into a bucket of glaze. This can create a more even and uniform glaze application, as well as allow for unique blending and layering of colors.
- Crawling: Crawling is a glazing effect that occurs when the glaze pulls away from the pottery surface during firing, leaving behind cracked or textured areas. This effect can be intentionally created by applying a thick layer of glaze or by adding ingredients that promote crawling, such as sand or alumina hydrate.
- Bubble Glazing: Bubble glazing involves introducing air bubbles into the glaze before applying it to the pottery surface. This creates a textured and bubbly effect when the glaze is fired. You can achieve this effect by stirring the glaze vigorously or by using a frothing agent.
These advanced glazing techniques require patience, practice, and a willingness to experiment. Don’t be afraid to try new combinations and techniques to create your own unique glazing styles and effects. With time and experience, you can develop your own signature glazing techniques that will make your pottery pieces truly stand out.
Exploring Glaze Effects
When it comes to pottery glazing, the possibilities for creating interesting and unique effects are virtually endless. By experimenting with different techniques, materials, and firing temperatures, you can achieve a wide range of captivating glaze effects. Here are some popular and widely-used techniques to get you started:
1. Crackle Glaze
Crackle glaze is characterized by a network of fine, intricate cracks that appear on the surface of the pottery. This effect is achieved by using a glaze with a higher coefficient of thermal expansion than the clay body. As the pottery cools after firing, the glaze shrinks more than the clay, resulting in the crackle pattern. To enhance the crackle effect, contrasting colors can be applied and wiped off the surface before firing.
2. Mottled Glaze
Mottled glaze creates a visually pleasing speckled or blotchy appearance on the pottery. This effect is typically achieved by mixing various glaze colors or materials together in a controlled manner. Using a sponge, brush, or spray bottle can help create the desired mottled effect. Firing the pottery at specific temperatures can also influence the intensity and depth of the mottled effect.
3. Reduction Firing
Reduction firing is a technique that involves creating a reduction atmosphere in the kiln during firing. This atmosphere lacks oxygen, which can have a transformative effect on certain glazes. Reduction firing can result in a range of effects, including metallic lusters, iridescent surfaces, and unique color variations. Copper reds, carbon trapping, and celadons are some popular glazes that are often achieved through reduction firing.
4. Layering and Overlapping
Layering and overlapping glazes can produce stunning and complex effects on pottery. By applying multiple layers of glaze and allowing them to interact with each other during firing, you can create depth, texture, and subtle variations in color. To achieve the best results, it’s important to consider the compatibility of the glazes and their firing temperatures.
5. Wax Resist
Wax resist is a technique where liquid wax is applied to certain areas of the pottery before glazing. The wax acts as a barrier, preventing the glaze from adhering to those areas. This technique can be used to create precise patterns, lines, or designs on the pottery. After the glaze has been applied and fired, the wax can be removed, revealing the unglazed areas.
6. Textured Glazes
Textured glazes add a tactile element to pottery by creating raised or rough surfaces. This effect can be achieved by incorporating various materials, such as sand, crushed glass, or silica, into the glaze. The texture can be further enhanced by applying the glaze unevenly or using different application tools, such as brushes, sponges, or even your fingers.
These are just a few of the many glaze effects that you can explore in pottery. The key to discovering your own unique glaze effects is to experiment, take risks, and learn from your results. With practice and a spirit of creativity, you can create pottery pieces with stunning and captivating glaze effects that truly showcase your artistic vision.
FAQ:
What is glazing pottery?
Glazing pottery is a technique used to decorate and seal ceramic pieces. It involves applying a glass-like coating, commonly known as glaze, to the surface of the pottery. The glaze is applied before firing the pottery in the kiln, and it transforms into a smooth, glossy finish after the firing process. The glaze not only adds aesthetic appeal to the pottery but also acts as a protective layer, making the ceramic piece water-resistant.
Can you glaze pottery without a kiln?
Glazing pottery typically requires a kiln to achieve the desired results. The glaze needs to be fired at high temperatures to melt and form a durable, glass-like finish. However, there are alternative glazing methods for those without access to a kiln. One option is raku firing, which involves removing the glazed pottery from the kiln while still hot and placing it in a container with combustible materials. This creates unique, unpredictable glaze effects. Another option is using low-fire glazes, which can be fired in a kiln that reaches lower temperatures. These low-fire glazes may not have the same durability and finish as high-fire glazes but can still be used for decorative purposes.


