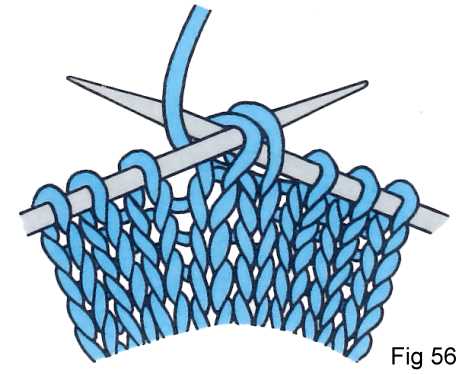
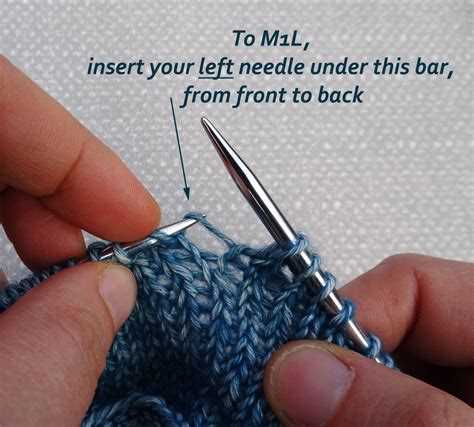
Knitting is a beautiful and versatile craft that allows you to create all sorts of wonderful handmade items. One of the essential techniques every knitter should learn is how to decrease stitches. Decreasing stitches is a crucial skill that allows you to shape your knitting projects, such as creating curves, shaping garments, or adding intricate details. In this step-by-step guide, we will walk you through the process of decreasing stitches in knitting, so you can confidently tackle any pattern or project.
There are several methods for decreasing stitches in knitting, and the technique you choose will depend on the pattern and the effect you want to achieve. One of the most common methods is the knit two stitches together (k2tog) decrease. This decrease creates a single stitch out of two, reducing the total number of stitches on your needle. It is often used to shape necklines, sleeves, or to create decorative patterns.
Another commonly used decrease method is the slip, slip, knit (ssk) decrease. This decrease also creates a single stitch out of two but creates a left-leaning decrease. It is often used in knitting projects with a more decorative or textured appearance, such as lace or cables. The slip, slip, knit decrease adds a touch of elegance to your knitting and is an essential skill to have in your repertoire.
Understanding how to decrease stitches in knitting will open up a whole new world of possibilities for your projects. Whether you’re a beginner knitter or an experienced one, mastering this skill will give you the ability to create beautifully shaped garments and intricate designs. With our step-by-step guide, you’ll be decreasing stitches like a pro in no time!
Understanding the importance of decreasing stitches
Decreasing stitches is an essential technique in knitting that allows you to shape your project and create various patterns and designs. By reducing the number of stitches, you can create curves, angles, and other shapes that add interest and dimension to your knitted piece.
1. Shaping garments: Decreasing stitches is crucial when knitting garments to ensure a proper fit. By decreasing at the sides, waist, or armholes, you can create a more flattering shape that contours to the body. This technique is especially important when knitting fitted sweaters, cardigans, and dresses.
2. Creating texture: Decreasing stitches can also be used to create textured patterns, such as ribbing, cables, and lace. By strategically decreasing stitches within a pattern, you can add depth and visual interest to your knitting.
3. Correcting mistakes: Decreasing stitches is a valuable skill when it comes to fixing mistakes in your knitting. If you accidentally increase stitches or need to adjust the size of a section, you can use decreases to correct the problem and maintain the overall integrity of your project.
4. Transitioning between sections: When knitting garments or accessories with different stitch patterns or sections, decreasing stitches can help create smooth transitions. By gradually decreasing the number of stitches, you can seamlessly transition from one stitch pattern to another, ensuring a polished and professional-looking finished product.
5. Controlling tension: Decreasing stitches can also help you control the tension of your knitting. By adjusting the number of stitches, you can create a looser or tighter fabric, depending on your desired outcome.
In conclusion, understanding how to decrease stitches in knitting is essential for achieving the desired shape, texture, and fit in your projects. Whether you’re shaping garments, creating patterns, fixing mistakes, transitioning between sections, or controlling tension, mastering the art of decreases will take your knitting skills to the next level.
Tools and materials needed for decreasing stitches in knitting
Decreasing stitches in knitting requires a few essential tools and materials to ensure the process goes smoothly. These items will help you achieve clean and accurate decreases in your knitting projects:
- Knitting needles: Choose a pair of knitting needles suitable for your project, preferably in the same size as the rest of your work.
- Yarn: Use the same type and weight of yarn that you have been using for your knitting project. This ensures consistency in the appearance and texture of your finished piece.
- Tapestry needle: A tapestry needle is used to weave in loose ends and tidy up your work. You may need it to secure any loose stitches after decreasing.
- Stitch markers: Stitch markers can be beneficial when counting stitches and keeping track of your decreases, especially in more complex knitting patterns.
- Scissors: It’s always handy to have a pair of scissors nearby for cutting yarn and trimming any loose ends in your knitting.
- Row counter: A row counter can help you keep track of the number of rows or repeats completed in your knitting pattern, which is particularly useful for complex stitch patterns.
Having these tools and materials on hand will ensure that you are well-prepared for decreasing stitches in your knitting projects. It’s always a good idea to gather everything you need before starting a new project to avoid any interruptions or delays.
Step 1: Identifying the stitches to be decreased
Before you can start decreasing stitches in your knitting project, it’s important to identify which stitches need to be decreased. This will depend on the pattern you’re following or the design you’re creating. Decreasing stitches helps shape your knitting and can be used to create various effects.
Here are a few common stitch decreases:
- K2tog (Knit Two Together): This is a right-leaning decrease where you knit two stitches together as if they were one.
- SSK (Slip, Slip, Knit): This is a left-leaning decrease where you slip two stitches individually knitwise, then insert the left needle into the front loops of the slipped stitches and knit them together.
- P2tog (Purl Two Together): This is a right-leaning decrease similar to K2tog, but it’s done with purl stitches.
- SKP (Slip, Knit, Pass Slipped Stitch Over): This is a left-leaning decrease where you slip one stitch knitwise, knit the next stitch, then pass the slipped stitch over the knit stitch.
These are just a few examples, and there are many more stitch decreases you can learn depending on your project. You’ll need to refer to your pattern or design to determine which stitches should be decreased and at what intervals.
Once you’ve identified the stitches to be decreased, you’re ready to move on to the next step.
Step 2: Choosing the right decrease technique
Once you have determined that you need to decrease stitches in your knitting, the next step is to choose the right decrease technique. There are several different methods you can use, each with its own effect on the appearance and structure of your knitting.
1. Knit Two Together (K2tog): This is the most common and basic decrease technique. To do a K2tog, simply insert your right needle through the next two stitches on the left needle as if to knit, and then knit them together as one stitch. This decrease slants to the right.
2. Slip, Slip, Knit (SSK): The SSK decrease is similar to K2tog, but it slants to the left. To do an SSK, slip the next two stitches one by one from the left needle to the right needle as if to knit, insert the left needle into the front of both stitches, and knit them together through the back loop.
3. Slip, Slip, Slip, Knit (SSSK): The SSSK decrease is a variation of the SSK decrease, and it creates a more pronounced left-leaning decrease. To do an SSSK, slip the next three stitches one by one from the left needle to the right needle as if to knit, insert the left needle into the front of all three stitches, and knit them together through the back loop.
4. Slip 1, Knit 1, Pass Slipped Stitch Over (SKP): The SKP decrease is also known as the left-sloping decrease. To do an SKP, slip the next stitch from the left needle to the right needle as if to knit, knit the next stitch, and then pass the slipped stitch over the knit stitch and off the right needle.
5. Central Double Decrease: This decrease is used when you want to decrease two stitches in the middle of your knitting, while maintaining a symmetrical appearance. To do a central double decrease, slip the next stitch from the left needle to the right needle as if to knit, knit the next two stitches together as one stitch (K2tog), and then pass the slipped stitch over the Knit 2 together stitch.
There are many more decrease techniques available, but these are some of the most commonly used methods. Depending on your knitting pattern and desired outcome, you may choose to use different decrease techniques throughout your project. It’s always helpful to practice these techniques on a swatch before applying them to your actual knitting.
Step 3: Executing the chosen decrease technique
Once you have chosen the decrease technique you would like to use, it’s time to execute it.
Follow these steps to execute the chosen decrease technique:
- Identify the stitches you want to decrease. This will depend on the specific technique you chose.
- If you are doing a knit-wise decrease, insert the right needle into the next stitch on the left needle as if to knit.
- If you are doing a purl-wise decrease, insert the right needle into the next stitch on the left needle as if to purl.
- Slide the right needle through both stitches on the left needle.
- Wrap the working yarn around the right needle and pull it through the stitches, creating a new stitch on the right needle while dropping the original stitches from the left needle.
- Complete the row or round as instructed in the pattern.
- Repeat the decrease process as necessary for the pattern, following the specific decrease technique you chose.
Remember to always check your pattern for any specific instructions on the decrease technique and where to place the decreases within the pattern.
Congratulations! You have successfully executed the chosen decrease technique. Continue knitting your project with confidence!
Step 4: Checking and adjusting the decreased stitches
After you have completed the decrease rows, it is important to check your work and make any necessary adjustments. This step will ensure that your knitting looks neat and even.
- First, carefully examine your work to check for any mistakes or inconsistencies in the decreased stitches. Look for any dropped stitches or accidental increases.
- If you spot any errors, use a crochet hook or knitting needle to fix them. Gently unravel the stitches back to the mistake and rework the decrease correctly.
- Once you have fixed any mistakes, lay your knitting flat on a table or surface. Check that the rows of decreased stitches are in alignment and evenly spaced. This will ensure that your finished piece has a professional look.
- If you notice that the decreased stitches are too tight or too loose, you can adjust the tension by carefully manipulating the stitches with your fingers. Gently pull on the stitches to loosen them or tighten them as needed. Be careful not to pull too hard and distort the overall shape of your knitting.
By taking the time to check and adjust your decreased stitches, you will be able to achieve a uniform and professional finish for your knitting project.
FAQ:
What does it mean to decrease stitches in knitting?
Decreasing stitches in knitting means to decrease the number of stitches on your needles. It is a technique used to shape the fabric and create various design elements in your knitting project.
Why would I want to decrease stitches in my knitting?
There are several reasons why you might want to decrease stitches in your knitting. You may want to shape the fabric, create a tapered edge, or make specific design elements such as a decrease stitch pattern or a lace pattern.
What are some common methods for decreasing stitches in knitting?
There are several commonly used methods for decreasing stitches in knitting. These include knit two stitches together (k2tog), slip, slip, knit (ssk), and slip, slip, slip, knit (sssk), among others. Each method creates a different effect, so it’s important to choose the method that best suits your project.
Can decreasing stitches in knitting be reversed?
No, once you have decreased stitches in knitting, you cannot reverse the process. However, you can always undo or “frog” your knitting to the point before the decreases and start again if needed.


