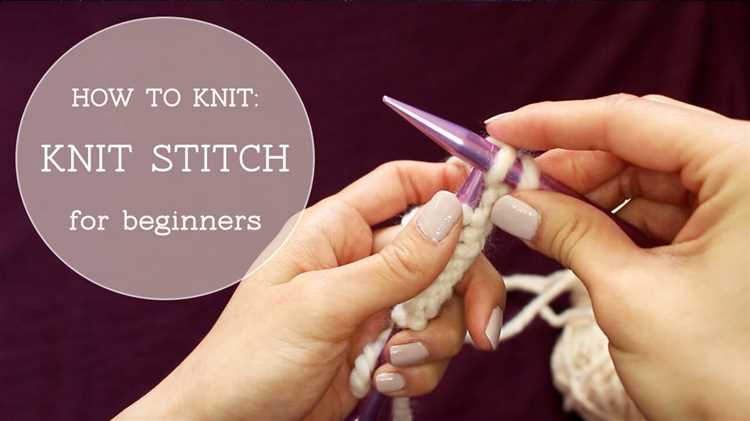
Knitting is a wonderful craft that allows you to create beautiful and functional items. If you’re new to knitting, one of the first things you’ll need to learn is how to start a knit stitch. This essential skill forms the foundation for all your knitting projects, so it’s important to get it right from the beginning.
Starting a knit stitch may seem intimidating at first, but with a step-by-step guide, you’ll be able to master this technique in no time. In this article, we’ll walk you through each stage of starting a knit stitch, from casting on to completing your first stitch. Whether you’re a complete beginner or have some knitting experience, this guide will give you the confidence to start your knitting journey.
Before we dive into the steps, let’s talk about the tools you’ll need. To start a knit stitch, you’ll need knitting needles and yarn. It’s important to choose the right size needles for your yarn to ensure your stitches are neither too tight nor too loose. Consult the yarn label for recommended needle sizes. As for yarn, opt for a smooth, medium-weight yarn to begin with, as it’s easier to work with.
Understanding the Knit Stitch
The knit stitch is one of the basic stitches in knitting. It is commonly used in a wide range of knitting projects and forms the foundation for many knitting patterns. Understanding how the knit stitch works is essential for beginners who are just starting to learn how to knit.
Here are some key points to help you understand the knit stitch:
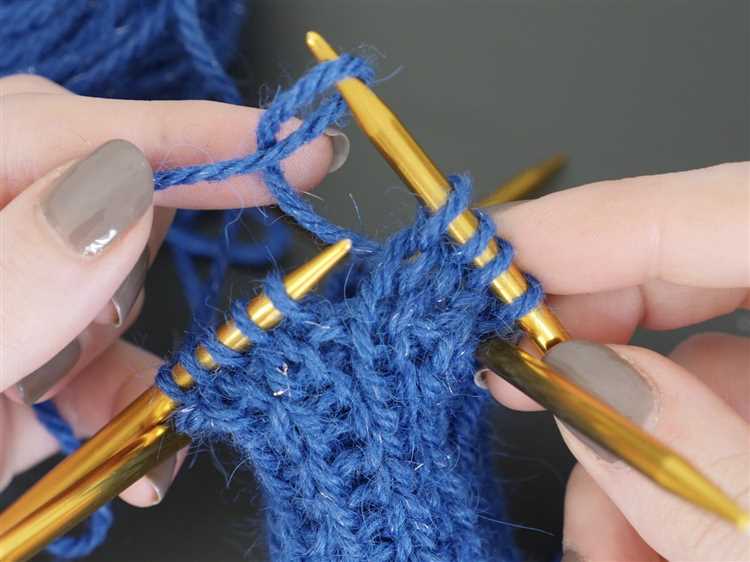
- 1. Knit stitches create a smooth V-shaped pattern. When you knit a stitch, it creates a smooth texture with a distinctive V-shaped pattern on the right side of the fabric.
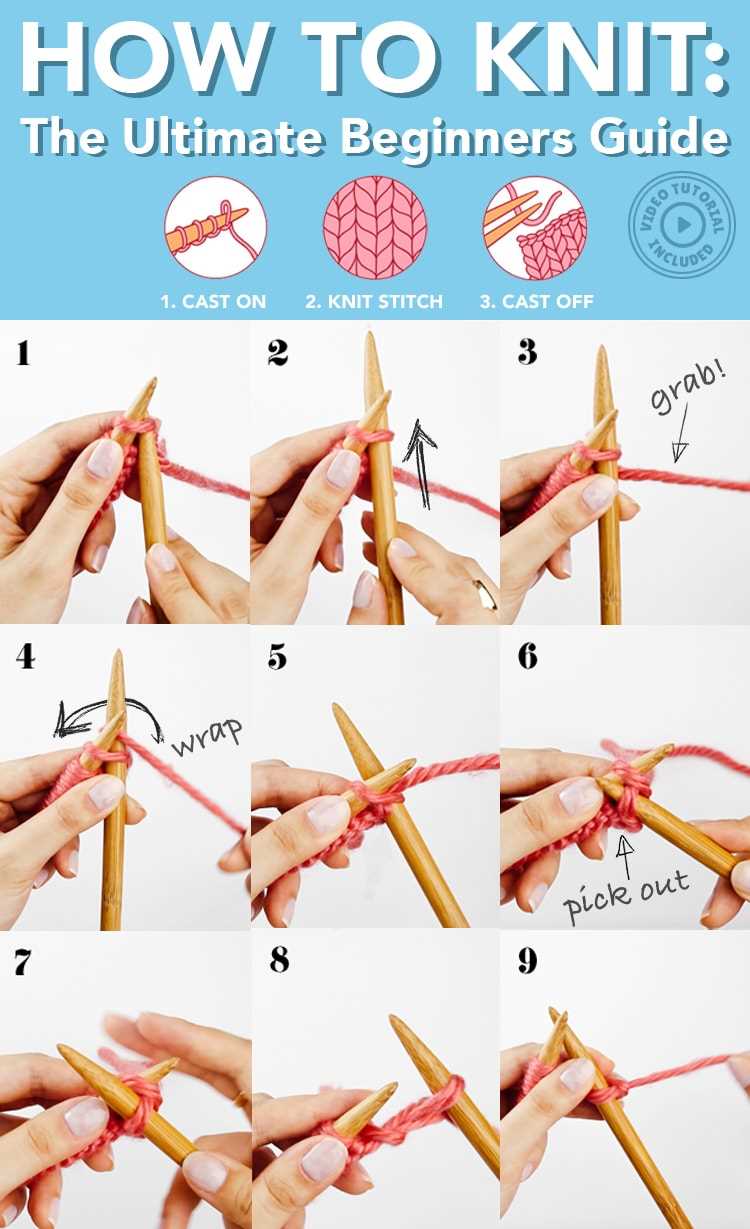
- 2. Knit stitches are created by inserting the needle into the stitch. To knit a stitch, you need to insert the right-hand needle into the next stitch on the left-hand needle from left to right.
- 3. Yarn is wrapped around the needle to create the stitch. Once the needle is inserted into the stitch, you need to bring the yarn over and around the right-hand needle.
- 4. The new stitch is pulled through the old stitch. After wrapping the yarn around the needle, you can pull the right-hand needle through the old stitch, creating a new stitch on the right-hand needle.
- 5. The old stitch is then slipped off the left-hand needle. Once the new stitch is created, you can slide the old stitch off the left-hand needle, completing the knit stitch.
By understanding these key points, you will be able to start knitting and create your first knit stitches. Practice and repetition will help you improve your knitting skills and create various beautiful projects.
Gather the Necessary Materials
Before you can start knitting, you’ll need to gather a few essential materials. While there are many different types and sizes of knitting needles and yarn available, it’s best to start with the basics as a beginner. Here’s what you’ll need:
- Knitting Needles: Choose a pair of knitting needles that are comfortable for you to hold. They come in different materials, such as metal, wood, and plastic. Size 8 or 9 (5mm or 5.5mm) needles are a good place to start.
- Yarn: Look for a medium-weight yarn that is easy to work with, like worsted or aran weight. Choose a color or texture that you love!
- Scissors: You’ll need a pair of scissors to cut the yarn when needed.
- Tapestry Needle: This needle has a large eye and a blunt tip. It’s used for sewing in loose yarn ends or joining knitted pieces together.
Aside from these basic supplies, you may also want to consider getting a knitting gauge, stitch markers, and a row counter for more precise knitting. These additional tools can help you measure your gauge, keep track of your stitches, and make your knitting process more efficient.
Choose the Right Yarn
When it comes to knitting, choosing the right yarn is essential for your project’s success. The type of yarn you select will determine the look, feel, and durability of your finished piece. Here are some factors to consider when choosing yarn:
- Fiber: Yarn can be made from various fibers, including wool, cotton, acrylic, and blends. Each fiber has its own unique properties, so consider the project’s needs when selecting a fiber. For example, wool is warm and elastic, while cotton is breathable and absorbs dye well.
- Weight: Yarn comes in different weights, which determine its thickness and the gauge required for the pattern. The most common weights are fingering, sport, worsted, and bulky. Make sure to choose a yarn weight that matches your pattern’s recommendations.
- Texture: Yarn can have different textures, such as smooth, fuzzy, or textured. Consider the desired look and feel of your project when selecting the yarn’s texture. For example, a smooth yarn is ideal for stitch definition, while a fuzzy yarn can create a soft and fluffy texture.
- Color: Yarn is available in a wide array of colors, so choose a color that complements your project. Consider the recipient’s preferences, the project’s purpose, and any color patterns or motifs the pattern may require.
- Price: Yarn prices can vary greatly, so consider your budget when selecting yarn. Keep in mind that higher-quality yarns may be more expensive but can result in a higher-quality finished project.
It’s also helpful to visit your local yarn store or browse online to explore the different yarn options available. Reading reviews or asking fellow knitters for recommendations can also help you make an informed decision. Remember, choosing the right yarn is an important step towards creating a beautiful and successful knitting project.
Select the Appropriate Knitting Needles
Before you start knitting, it’s important to choose the right knitting needles for your project. Knitting needles come in various sizes, materials, and types, and selecting the appropriate ones can make a big difference in your knitting experience.
Size:
One of the most important factors to consider when choosing knitting needles is their size. The size of the needles determines the size of your stitches and ultimately the size of your finished project. The size of the needles is usually indicated by a number or a letter. The larger the number, the larger the needles. Be sure to check your knitting pattern or gauge swatch for the recommended needle size to ensure that your stitches will come out at the correct size.
Material:
Knitting needles come in a variety of materials, including metal, wood, bamboo, and plastic. Each material has its own characteristics and can affect how your stitches slide on the needles. Metal needles are smooth and slippery, making them great for fast knitting. Wood and bamboo needles have a natural feel and create a warm and steady grip. Plastic needles are lightweight and flexible, making them ideal for beginners or for knitting large projects.
Type:
There are different types of knitting needles, including straight needles, circular needles, and double-pointed needles. Straight needles are the most common and consist of two separate straight sticks with a point at one end and a stopper at the other. Circular needles have two needle tips connected by a flexible cable, and they are used for knitting in the round or for larger projects. Double-pointed needles have points on both ends and are used for knitting small items in the round, such as socks or hats.
Once you have considered the size, material, and type of knitting needles you need, you can begin your knitting project with confidence. Remember to always choose needles that feel comfortable in your hands and suit your knitting style, and don’t be afraid to experiment with different sizes and materials to find your perfect fit.
Cast On the Stitches
Before you can start knitting, you need to cast on the stitches onto your knitting needle. This will create the foundation row from which you will work your knitting project.
There are several methods for casting on stitches, but we will discuss the two most common ones: the long-tail cast on and the knitted cast on.
- Long-Tail Cast On:
- Make a slipknot with the yarn, leaving a long tail.
- Hold the slipknot in one hand and the needle in the other hand.
- Place the slipknot on the needle and tighten it.
- Keep the tail of the yarn to the left and the working yarn to the right.
- Insert the needle between the two strands of yarn on your thumb and bring it under the strand on your index finger.
- Move the needle towards you and slip it off your thumb.
- Repeat steps 5 and 6 until you have the desired number of stitches.
- Knitted Cast On:
- Make a slipknot with the yarn and place it on the needle.
- Hold the needle with the slipknot in your right hand.
- Insert the needle into the slipknot, from front to back.
- Wrap the yarn around the needle counterclockwise.
- Draw the loop through the slipknot, forming a new stitch.
- Place the new stitch on the left needle.
- Repeat steps 3-6 until you have the desired number of stitches.
This method creates a neat and elastic edge. Here’s how to do it:
This method is simple and versatile. Here’s how to do it:
Once you have cast on the stitches, you are ready to start knitting your first row!
Hold the Knitting Needles
Before you can start knitting, you need to know how to hold the knitting needles properly. Here are the basic steps:
- Choose the right size of knitting needles: Knitting needles come in different sizes, so choose the size that is appropriate for the type of yarn you will be using. The size of the needles should be indicated on the yarn label.
- Hold one knitting needle in your dominant hand: If you are right-handed, hold the knitting needle in your right hand, and if you are left-handed, hold it in your left hand.
- Hold the other knitting needle in your non-dominant hand: This needle will be used to manipulate the yarn as you work the knit stitch. Hold it in a comfortable position that allows you to easily maneuver the yarn.
- Position your hands: Hold the knitting needles in a way that feels comfortable to you. The tips of the needles should point away from your body, and there should be enough space between your hands for the yarn to pass through.
By holding the knitting needles correctly, you will have better control over your knitting and be able to create more even stitches. Practice holding the needles until you find a grip that feels natural and comfortable for you.
Insert the Right Needle into the First Stitch
Once you have cast on your stitches and have the yarn in your right hand, it’s time to start knitting. The first step is to insert the right needle into the first stitch on your left needle.
Here’s how to do it:
- Hold the knitting needles in your hands, with the stitches on the left needle and the empty right needle in your right hand.
- With your right hand, insert the point of the right needle into the front of the first stitch on the left needle.
- Slide the right needle through the stitch, going from left to right.
Make sure that the right needle is going under the left needle as you insert it into the stitch. This will help you maintain the correct direction of your knitting.
Here are some tips to keep in mind:
- Try to keep a relaxed grip on the needles. Tension in your hands can make it more difficult to insert the needle into the stitch.
- Make sure to insert the needle into the stitch, not between the stitches. You want to go through the actual loop of the stitch.
- Don’t worry if it feels a little awkward at first. Knitting takes practice and it will become more natural with time.
Once you have inserted the right needle into the first stitch, you are ready to move on to the next step in knitting your first stitch.
Complete the Knit Stitch
Now that you have learned how to start a knit stitch, it’s time to complete the stitch. Follow these steps to finish your knit stitch:
- Hold the knitting needle with the cast-on stitches in your left hand and the empty needle in your right hand.
- Insert the right needle into the first stitch on the left needle from left to right, going under the left needle.
- Wrap the yarn around the right needle.
- Using the right needle, pull the wrapped yarn through the loop of the first stitch, bringing it through to the right side.
- Slide the stitch off the left needle and onto the right needle. You have completed one knit stitch!
Continue these steps for each stitch until you have completed the row or pattern as desired.
If you encounter any difficulties or need further clarification, consult knitting resources or seek guidance from experienced knitters. Practice and patience will help you improve your knitting skills. Happy knitting!
FAQ:
What materials do I need to start knitting?
To start knitting, you will need a pair of knitting needles and yarn. You can choose needles of different sizes depending on the thickness of the yarn you are using.
How do I hold the knitting needles?
There are different ways to hold the knitting needles, but the most common method is to hold one needle in your right hand and the other needle in your left hand. The exact grip will depend on your preference and comfort.
What is the first step of knitting a stitch?
The first step of knitting a stitch is called casting on. This is when you create a foundation row of loops on your knitting needle. There are different methods of casting on, such as the long tail cast on or the knitted cast on.
How do I make a knit stitch?
To make a knit stitch, insert the right-hand needle through the first loop on the left-hand needle from front to back. Then, wrap the yarn around the right-hand needle in a clockwise direction and pull it through the loop. Slide the loop onto the right-hand needle, and you have completed a knit stitch.
Can I practice knitting without using yarn?
Yes, you can practice knitting without using yarn. You can use a practice piece of yarn or even just your fingers to simulate the knitting motion. This can help you get familiar with the movements and build muscle memory before you start using yarn.


